By Judith on April 1, 2021 0 Comments (Leave comment)
At the end of this month I will be teaching my Triaxial Weaving workshop for Crafty Monkies.
I first taught weaving as part of my Studio ‘in-person’ classes 2 years ago.
We looked at the simple basket weave …
Houndstooth weave (intermediate) …..
and the more advanced Triaxial weaving …
(you can see the amazing results of our classes here.)
‘Triaxial’ means 3 axis - unlike the other 2 styles where fabric strips are woven vertically and horizontally, the 3 layers of fabric strips in the triaxial weave are woven at 30 degrees to each other. By varying the order of ‘overs and unders’ different patterns can be achieved, like the Tumbling Blocks design shown here in my basket.
In my Crafty Monkies workshop I will be demonstrating simple 2 axis weaving before taking the class through
how to mark and prepare a foam foundation for weaving on
learn how to make a triaxial woven panel
learn how to ready your woven panel for use in another project (my new Woven Basket pattern will be available free, exclusively for workshop attendees)
The Trixial weave can be a little fiddly, but a genius invention called the Wefty Needle makes this technique a lot more manageable!!
Wefty Needles can be purchased in our store here, as well as other supplies you will need. The full list of workshop requirements (as well as a video on how to prep your fabric strips) and booking info is available here.
So if you would like to spend 3 fun hours on a Friday night learning a cool new technique with me and lots of other like-minded creatives, then book in now!
By Judith on January 4, 2021 2 Comments (Leave comment)
To enter my 10 year blogiversary giveaway click here.
At the end of this month (30th January, 4pm - 7pm) I will be teaching another live zoom workshop for Crafty Monkies.
Their theme for January is all about using what you have available (following the post Christmas slump!) and so repurposing some old jeans into practical zippy pouches fits right in!
During this workshop you will learn:
How to prep and repurpose denim
Best interfacings to use
How to set up your sewing machine (needles & thread) for sewing denim
The ‘Quilt As You Go’ quilting technique
Zippy pouch construction, including covered zipper tabs, inserting a metal zipper and pouch lining
If you have never sewn with denim before, or if you have some experience and want to get a little more creative, then this workshop is for you!
There are 2 pouches to choose from. Pouch A is simpler in style and uses thinner interfacing, making it easier to construct and beginner friendly.
Pouch A Front
Pouch A Back
Pouch B is a little more involved, incorporating more denim features and characteristics and is quilted onto thicker interfacing to give a much more textured look.
Pouch B Front
Pouch B Back
Whichever pouch you choose to make, you need to have confident use of your sewing-machine (including attaching walking foot) and how to measure and cut fabric using a rotary cutter & ruler.
Material/Fabric requirements for this Online Interactive Workshop:-
Several pairs of non-stretch denim items e.g. jeans, skirts, shirts (a variety of colours is best). Pay particular attention to interesting sections of the jeans e.g. seams, pockets, worn sections, feature stitching, labels, tabs & loops etc., especially if making Pouch B
Fat quarter* of cotton lining fabric or cotton shirt (not denim weight)
8” metal (or nylon) closed ended zipper*
Co-ordinating Polyester thread (standard weight)
Button to decorate (optional)
Ribbon or fine leather cord – Zipper pull (optional)
Embroidery Thread for Boro Stitching (I used Aurifil Wool 12wt) Optional
Pouch A – ¼ metre Heavy Sew-in Interfacing (Vlieseline S13)* & 1/4 metre Light Woven Fusible Interfacing (Vlieseline G710)*
Pouch B – ¼ metre Legacy Flex Foam*
Equipment requirements for this Online Interactive Workshop:-
Rotary Cutter, ruler and mat
Iron & ironing board
Sewing machine
Walking Foot
Zipper Foot
Hand sewing needle (for Boro stitching)
Needles*: 90/14 Jeans Needle, 100/16 Jeans Needle, 80/12 Standard Needle
505 Basting Spray*
If you would like more information about this workshop or to book, click here to access the Crafty Monkies website (scroll down and click on my workshop listing to access more info).
You can also access a printable List of Materials & Workshop Prep here.
I hope you will join me for 3 hours of denim ripping fun!!
By Judith on January 12, 2020 0 Comments (Leave comment)
It’s only 6 weeks until our next Quilting Retreat at the tranquil Murlough House, Co. Down.
It will be another fun filled weekend, chilling out, sewing, eating, games and lots more!
There will also be 2 workshops to choose from:
Foundation Pieced Spools:
On Saturday afternoon we will be trying our hand at foundation paper piecing, making these cute spool blocks, which can be turned into a sweet wallhanging.
Foundation paper piecing is a lovely technique for achieving accuracy and clean, crisp lines and points!
I used cork fabric for my spool ends, which I think adds a lovely bit of texture. And the fun doesn’t stop there - you get to decorate your spools with ribbons, lace, trim or even selvedges!
This is a great workshop for using up those favourite ‘wee’ bits!
Brooches:
On Sunday morning we will be using a weaving method to create ‘rosette’ brooches.
I experimented with different textiles here, tweed, quilting cotton, Liberty Lawn, satin ribbon, hessian, crocheted and antique lace.
I even used a fluffy Essex Linen selvedge for one of the centres!
I love how diverse and vintagey they look, and again, you don’t need big pieces of fabric for this project. I also love an excuse to use vintage buttons, but equally you could use beads to decorate.
The brooches are completely hand sewn, a lovely relaxing way to spend a Sunday morning!
So if you want to learn a new technique or present idea, or get using up some of your scraps, one of our retreat workshops might just hit the spot!
There are still a few places available on the retreat. Just drop us an email at justjudedesigns@hotmail.co.uk to get more info and a booking form.
By Judith on December 1, 2019 2 Comments (Leave comment)
Yesterday was our Robin Hoop Art Workshop, and what ‘sketchy’ fun we all had!!
Nine ladies spent a glorious Saturday getting in touch with their artistic side.
They built up their low volume backgrounds, a little matchstick quilting and lacey additions before bondawebbing their scrappy robins and starting the sketching fun!
And just look at their awesome results ….
Aren’t they so cute!!
Well done ladies on your festive works of hoop art!
So that’s the last of our Saturday workshops for 2019! We will soon be releasing new classes and workshops for 2020 so stay tuned!
By Judith on November 3, 2019 6 Comments (Leave comment)
Sorry it has taken me so long to post about our first Quilting Retreat (last weekend). I’ve had some very special visitors this week (which I’ll tell you all about soon).
It’s hard to believe that a week ago today we were heading home after a wonderful weekend of sewing, eating, fun and games!
Murlough house is a 150 year old stately house situated only 5 minutes walk from the beach and surrounded by beautiful and calming gardens. The staff that run the house were so accommodating and friendly and the meals ……. oh my! We were spoiled! Their generous and servant heartedness combined with this beautiful setting established our retreat vibe from the first day.
There was of course lots of independent sewing time in the big hall. I have lots of photos of fabulous finished projects, but here are just a few!
After dinner in the evenings, we had a few fun games like a our pincushion swap, sewing bingo and the postage stamp charity block race, before getting down to more serious sewing time. (The hard core stitchers were still in the Hall to the wee hours of the morning!!)
Postage Stamp Blocks for Siblings Together
In addition to all of this I ran 2 workshops:
Sashiko cushion (Saturday afternoon) ……
….and selvedge projects (Sunday morning).
A few folks also managed to fit in some walks (& runs) around the bay!
Phew! What a lot we managed to pack in!
From the feedback forms I can safely say that everyone had a fabulously relaxing and productive weekend.
A huge thank you to everyone who came and participated in all the activities so eagerly and to all the staff at Murlough House for spoiling us.
Thank you too to my 2 lovely friends, Ruth and Barbara, who valiantly helped and supported me from conception to conclusion (they are 2nd and 3rd from the right in the photo above). I couldn’t have done this without you!
I already have Murlough House booked for 2 more retreats in 2020! So watch this space!
By Judith on September 8, 2019 1 Comment (Leave comment)
Yesterday was the 2nd of my charity sewing days.
Once again the studio was filled with generous ladies donating their time, talent and fabric to make syringe driver bags for Macmillan Cancer Care and N.I. Children’s Hospice.
It was lovely meeting old friends and new, and at least one bag was completed by all!
I’d like to thank everyone who has beavered away making bags for our 2nd appeal, the total of which is now over 350 (and they’re still coming!).
For many of the contributors to our Syringe Driver Bags appeal, it is a very personal and heartfelt gesture of giving back. These bags will be winging their way to palliative care units and hopefully bringing a little cheer to an otherwise dark corner.
By Judith on September 7, 2019 0 Comments (Leave comment)
I’m delighted to announce a new initiative I’m piloting in my studio this term.
There is a wealth of creative talent here in Northern Ireland, and I want my studio to be used a lot more in facilitating this creativity and supporting local artists and crafters.
So I am hosting a range of workshops taught by talented and experienced tutors and artists!
At the time of writing we have scheduled the following workshops:
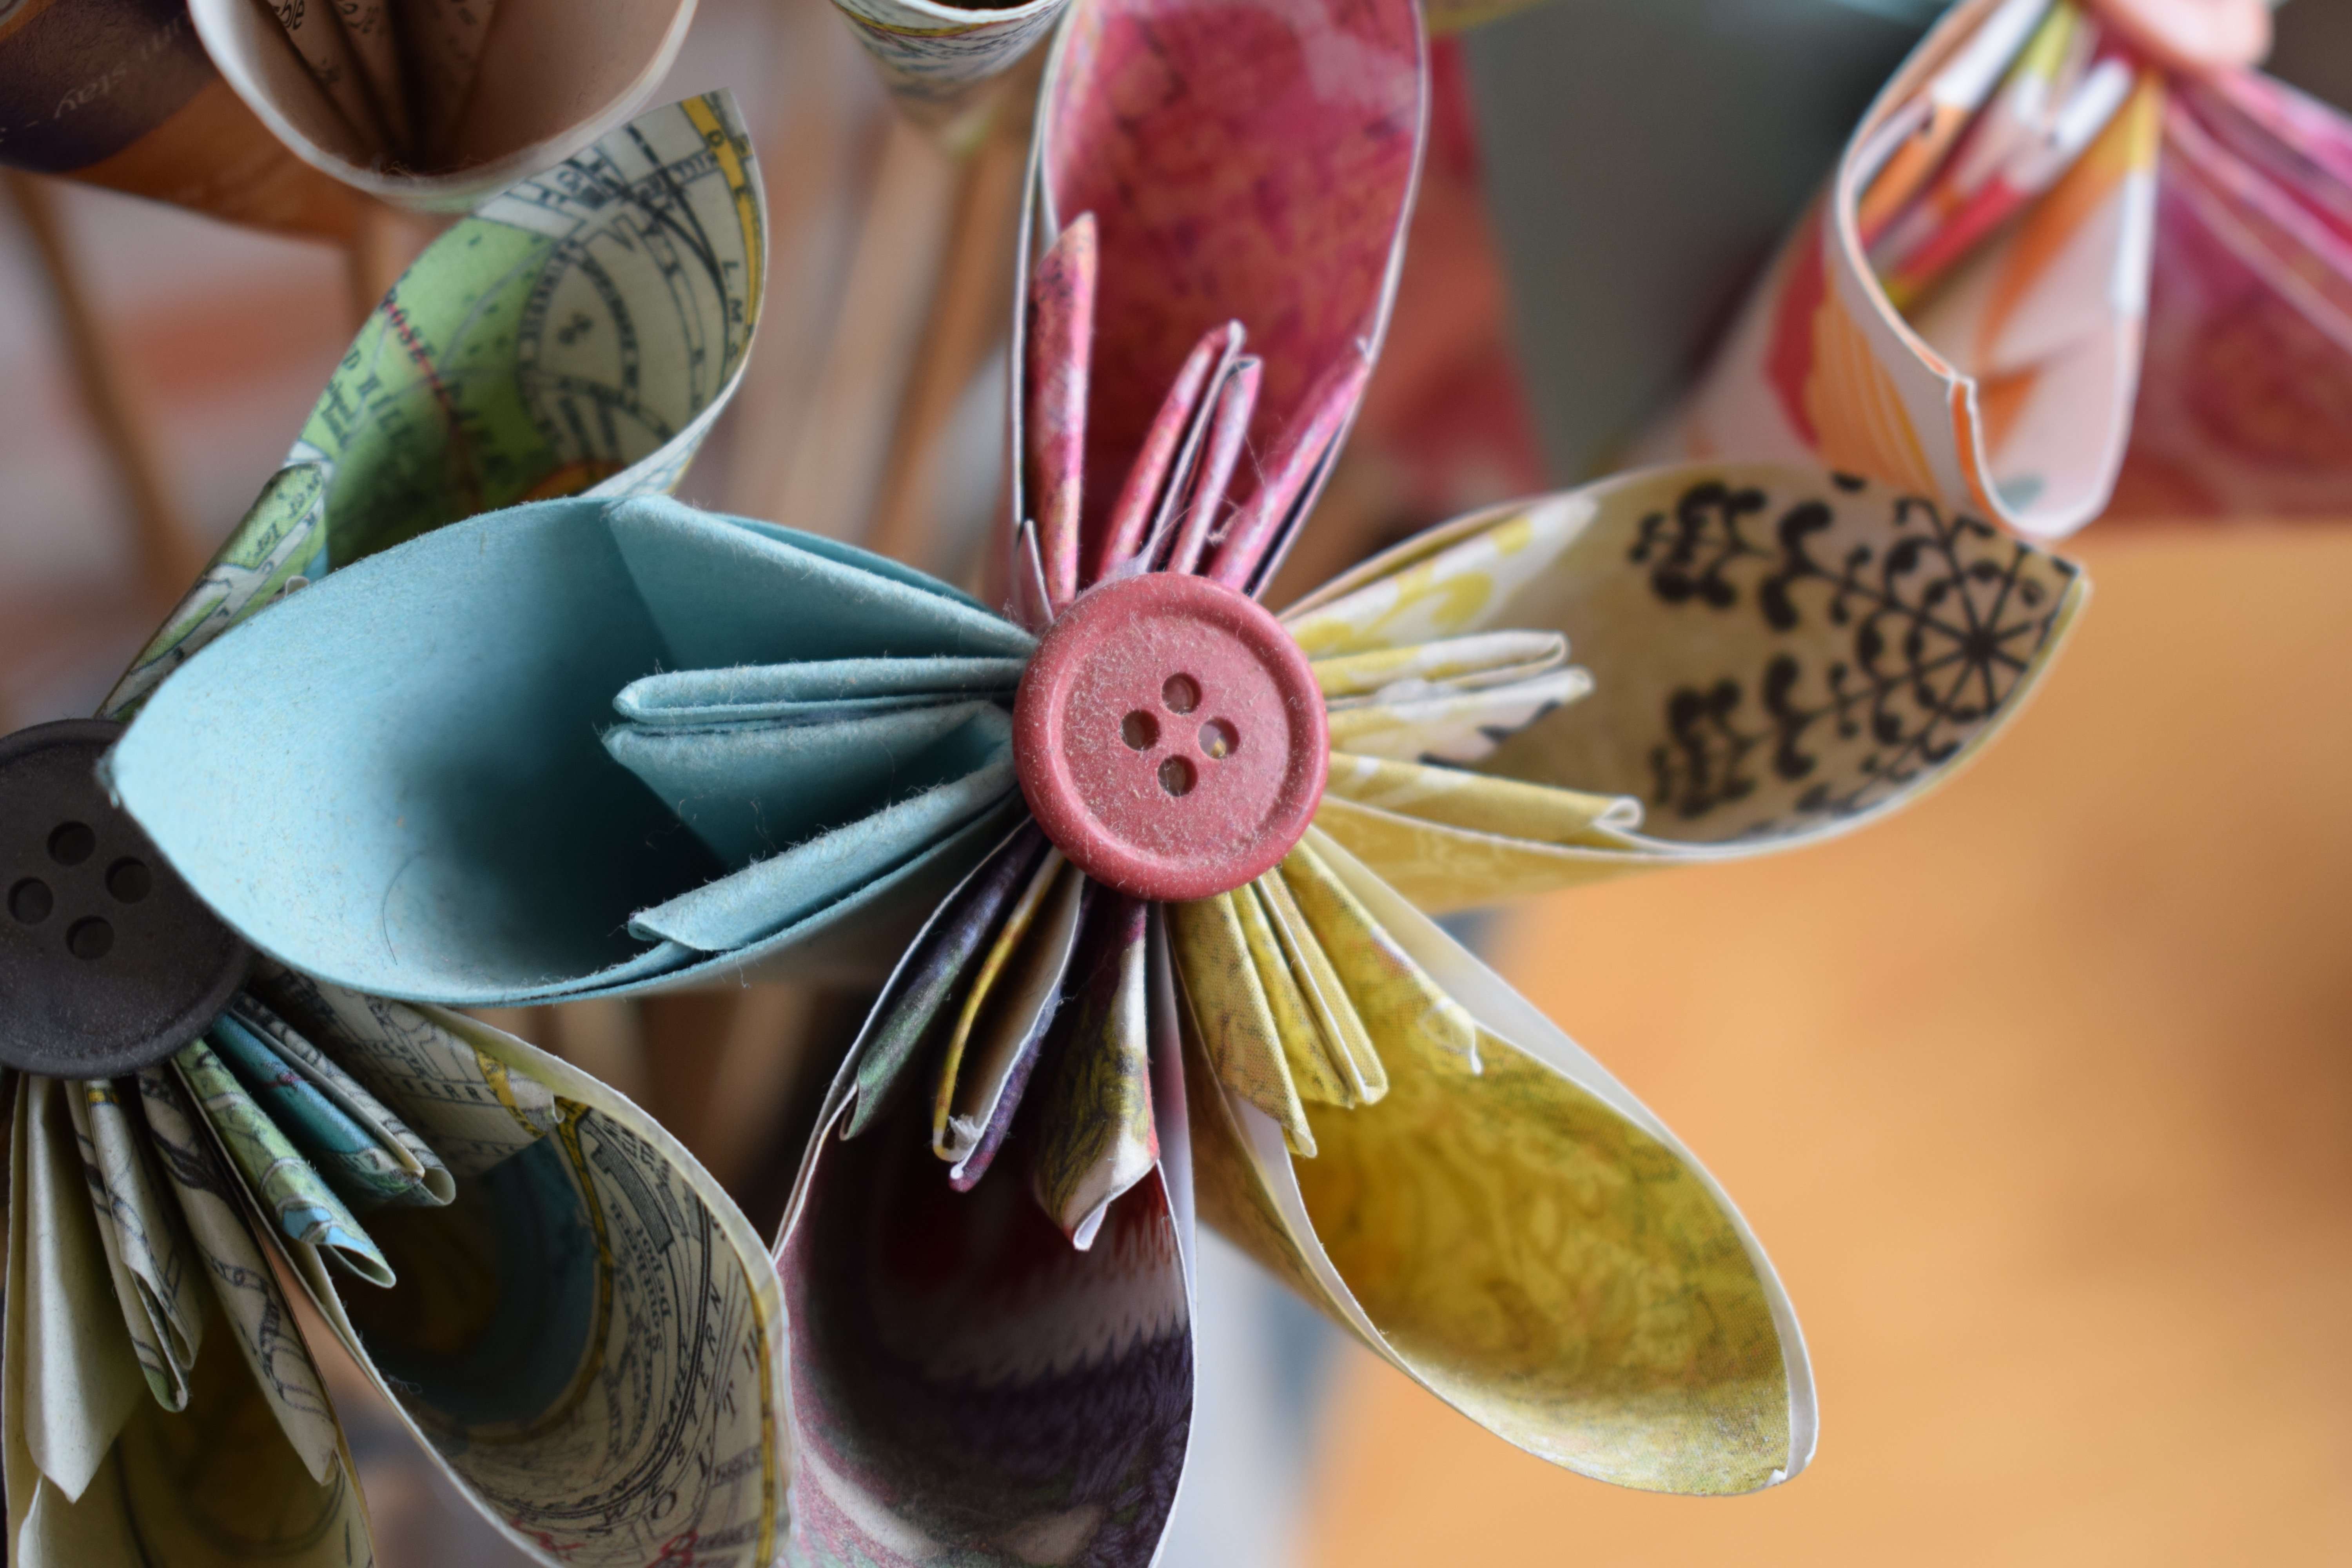
Paper Flower Craft
by Debbie Thompson
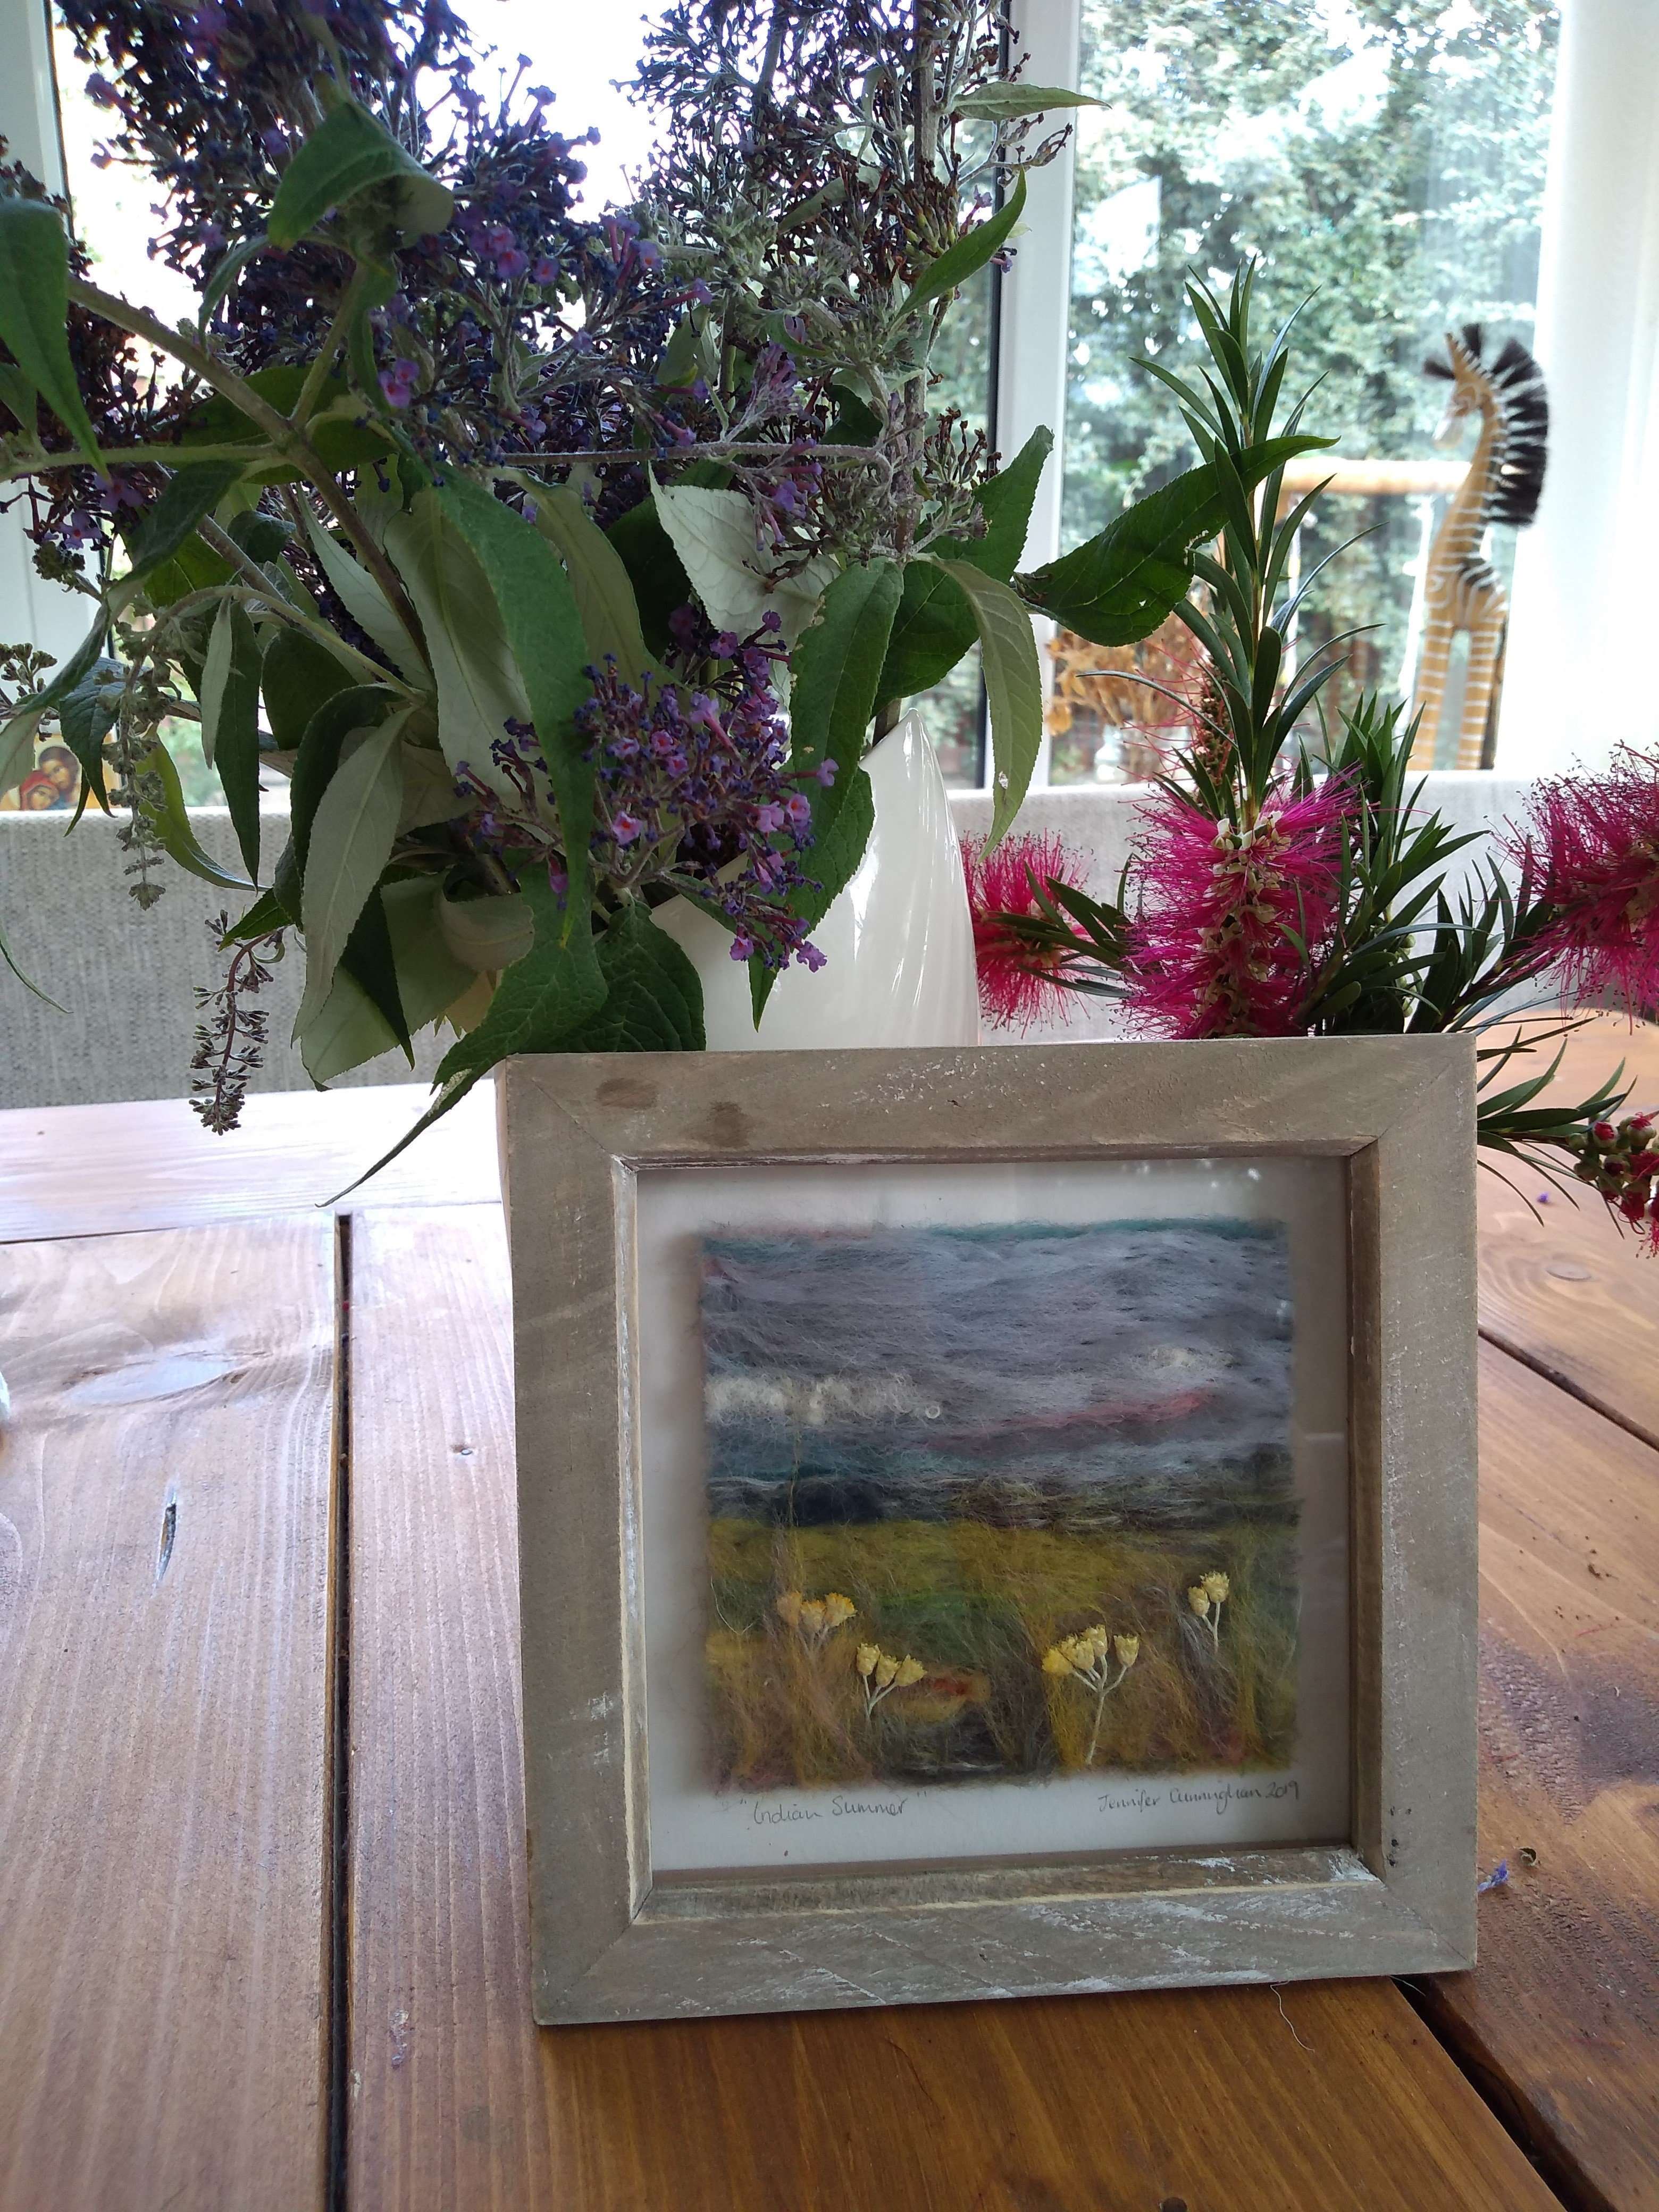
Needle Felted Landscapes
by Jennifer Cunningham
Linocut Printmaking
by Jenni Robinson
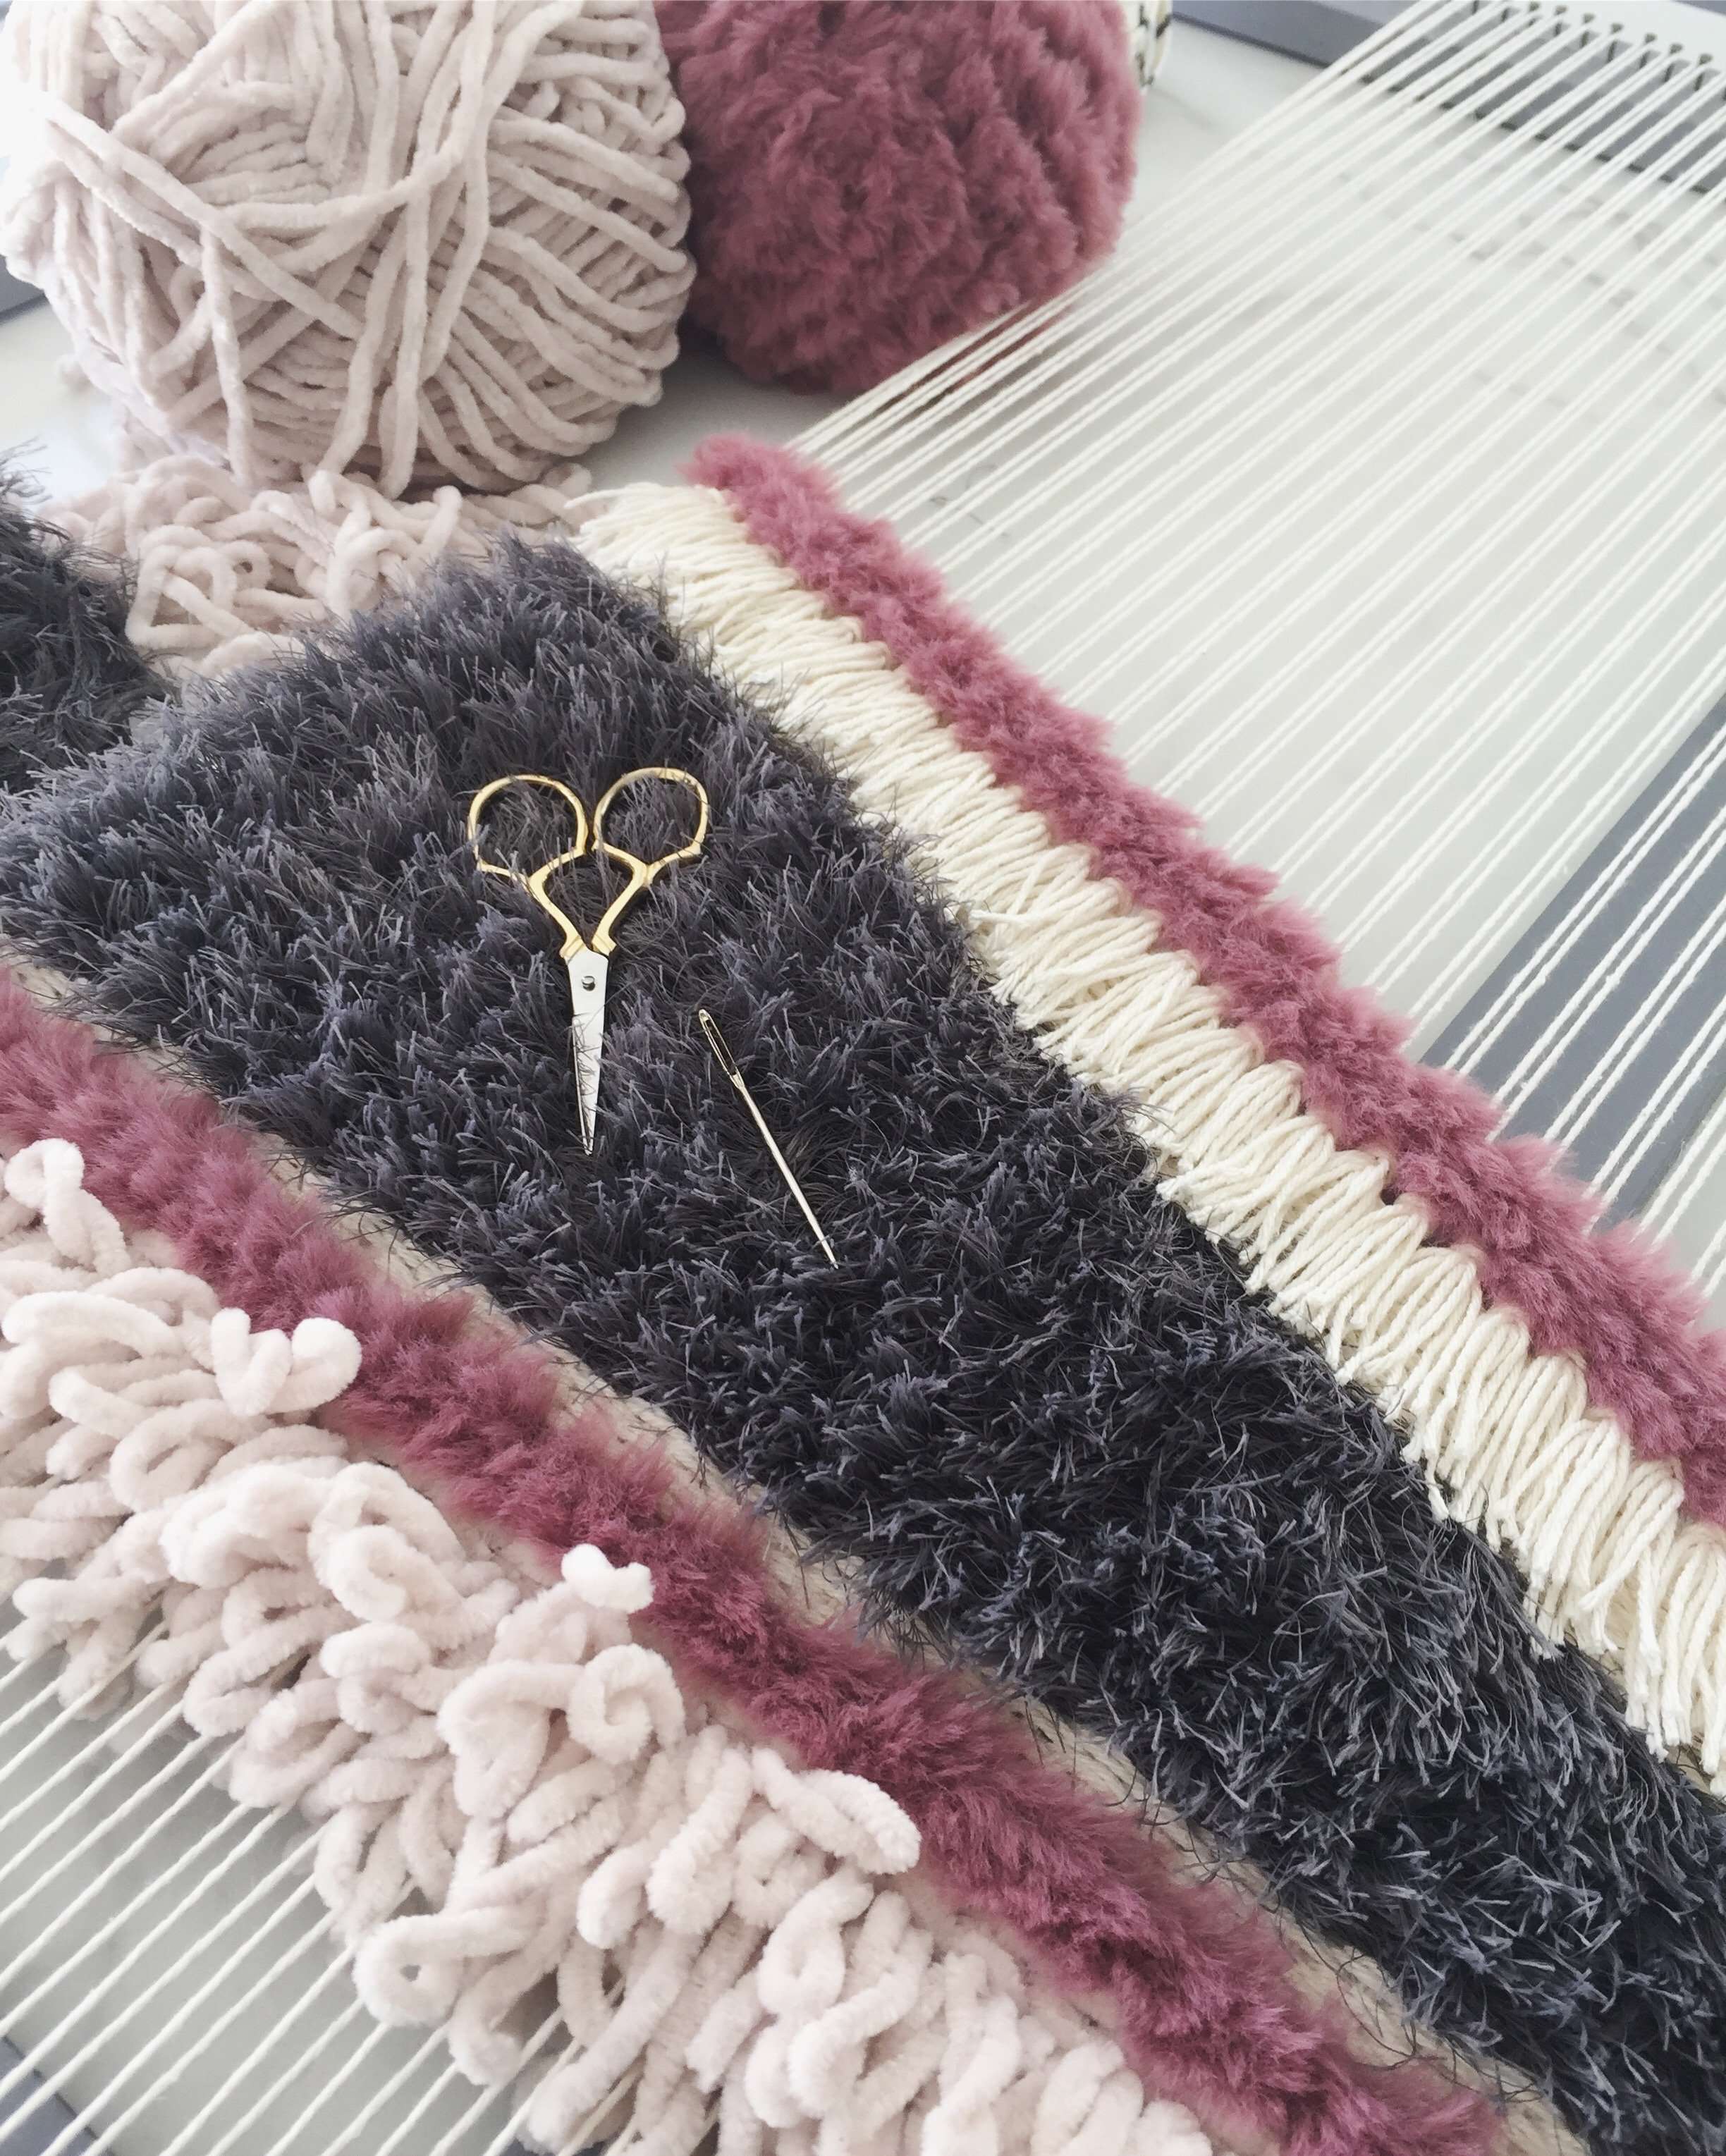
Weaving Wallhanging
by Little Tangle
Botanical Printing on Irish Linen
by Ruth Osborne
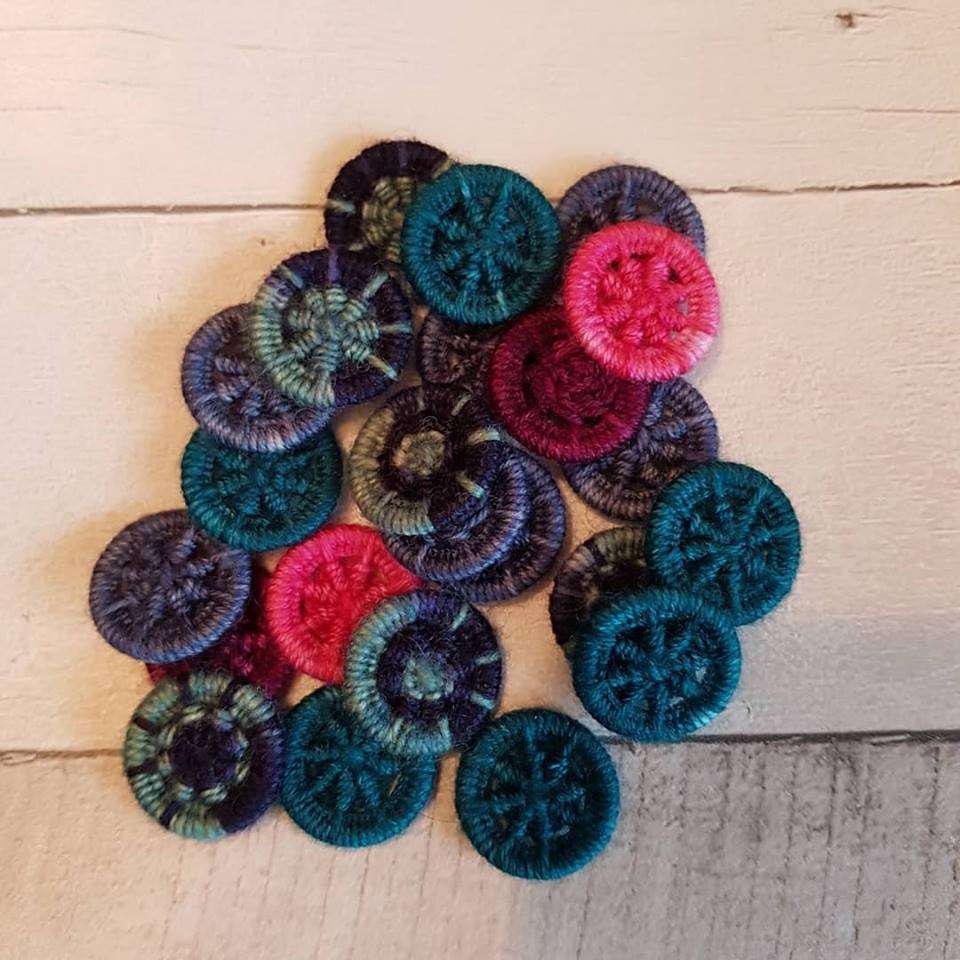
Dorset Button Jewellery
by Debbie McCann (Wee Yarn Designs)
Booking for all of these workshops is available here.
These workshops will be a mixture of Saturdays, weekdays and evenings and you are guaranteed expert and professional tution (places are limited).
I will keep you up to date with additions to the crafting programme as we go along. But I hope you are excited as I am about celebrating our homegrown talent and supporting our local artists.
If you have a fear of zips then this is the workshop for you!! At this workshop you will learn how to make a sizeable pouch and neatly insert a finished zipper.
You can upcycle denim for your pouch, or try out some durable cork fabric (available to purchase in class) or perhaps use up some pretty scraps!
Hoop Art is a popular and satisfying way of creating textile art.
At this workshop you will learn how to layer a background, matchstick quilting, raw edge applique/free motion sketching and how to finish and mount your hoop.
A great little project for using up scraps of cotton, lace, ribbon and tweed.
8″ wooden hoops available to purchase in class.
So that’s the roundup of our Patchwork & Quilting Saturday workshops. I hope you see something you like!
And come back soon for some exciting news on our new Autumn craft workshops!
By Judith on August 24, 2019 2 Comments (Leave comment)
Today was the first of 2 Syringe Driver Bag Workshops at our studio in Conway Mill.
These amazing ladies donated their fabric, time and talent to learn how to make Syringe Driver Bags for Macmillan Cancer Care and N.I. Childrens Hospice.
It was a lovely day of sewing, chatting (and eating …. mostly chocolate!).
And half way through the day, the lovely Eleanor dropped in 21 donated bags!!!!!
So including all the bags made and donated today, our total number of bags stands at 294!
A huge thank you to everyone who has been beavering away making bags for these 2 amazing charities.
And if you would like to make some bags for your local palliative care unit, you can follow the free tutorial here.
By Judith on August 14, 2019 1 Comment (Leave comment)
Last Saturday was sultry and wet, the perfect day for sewing!
We had our ‘Quilt Top In A Day’ Workshop at the studio, with 7 ladies making either my Mama Boho or Baby Boho Quilt pattern (see if you can spot my Mama Boho Quilt in the picture below!).
Mama Boho is a great quilt design for using large and bold prints, and the simple half square triangle construction means blocks are made in double quick time!
Look at these dramatic Mama Boho Quilts …..
70″ x 88″ finished
And while there is a little waste generated from the triangle corners that are cut away, even these can be repurposed into a co-ordinating cushion cover!
The Baby Boho quilt is ‘layer cake friendly’ - just look at these cuties!!!
38″ x 48″ finished
Aren’t they adorable!
Well done ladies on a productive day sewing your flimsies!
So if you need a quilt made up quickly why not try Mama or Baby Boho Quilt pattern, available here.
By Judith on June 26, 2019 0 Comments (Leave comment)
Hello everyone!
This is my last week of classes before the summer break. The sun is finally shining and I will have a few more photos to show you from this term’s project focus.
In the meantime, I can show you some stunning bags from our Beach Bag Workshop last Saturday.
It was a warm and clammy day in the studio, perfect weather for thinking about holidays by the beach!
All the ladies beavered away on their bags, and just look at their results!
Such classy and colourful bags! The webbing handles are sewn onto the exterior and base of the bag, making them nice and strong for all your beach or picnic gear.
The bags are lined with Rip Stop Nylon, a water resistant and washable fabric, which is really easy to sew with too!
And you can see a few examples of the additional ‘wet bag’ above, which is included in the pattern. This is also lined with Rip Stop Nyon, the perfect place for wet swimwear or drippy sun lotion bottles!
Well done ladies on your hard work. I hope you get many opportunities to use your bag this summer!
And if you would like to make your own roomy beach bag, you can get the pattern here.
By Judith on June 14, 2019 4 Comments (Leave comment)
(Edit: retreat is now fully booked)
I’m ridiculously excited to tell you all about a new Just Jude Designs venture!
Retreat from the stresses of life for a weekend of relaxation, creativity and great food in the spacious and comfortable Murlough House, surrounded by the beautiful Murlough Bay Nature Reserve!
Let me tell you all about it!
Your weekend retreat experience will include:
Time away to indulge your stitching passion, progress your projects or start something new
Fun meeting and connecting with other like-minded quilting enthusiasts
Support from your friendly, experienced tutor
Two optional project workshops (Sashiko Cushion / Selvedge Projects)
Light-hearted sewing games
Pop-up shop for fabric and haberdashery supplies
Comfortable accommodation in single, twin, shared and en-suite rooms
Ground floor ‘Less Abled’ accommodation available
All meals provided - no cooking means more time to sew! Special dietary requirements catered for.
Beautiful, extensive gardens and grounds within walking distance of stunning golden beach to enjoy some fresh air and stretch your legs
Retreat Itinerary:
5 large cutting mats, rotary cutters, irons/boards & rulers will be available
Free Tea & Coffee available throughout the day
Friday
5pm: Arrive, settle in
6pm: Dinner
7pm – bedtime: Free sewing time / Sewing Games
Saturday
9am: Breakfast
10am- 1pm: Free Sewing time
1pm – 2pm: Lunch
2pm – 5pm: Free sewing time or Sashiko Cushion Workshop
6pm: Dinner
7pm – bedtime: Free sewing time / Sewing Games
Sunday
9am: Breakfast
10am – 1pm: Free sewing time or Selvedge Pouch Workshop
1pm – 2pm: Lunch
2pm – 4pm: Free sewing time & pack up
The prices for full board accommodation at our Retreat range from Single En Suite (£160) through to a Shared Room for 5 (£120 pp). (A full list of rooms and prices available on request to justjudedesigns@hotmail.co.uk.)
(only shared rooms remaining at time of writing)
I’ve attended several retreats in the past, and know first hand how relaxing and fun they are! It’s so wonderful getting alongside other sewists, chatting, sharing and getting inspired by the plethora of creative projects being worked on. Not to mention getting away from cooking and other family responsibilities for a few days!
So if you would like to join us for some serious sewing time and lots of craic, or to enquire more about room availability, drop us a line to justjudedesigns@hotmail.co.uk.
By Judith on June 4, 2019 2 Comments (Leave comment)
Last Saturday we had a wonderfully productive day in the studio making Vinyl Pouches.
For most of the ladies it was their first time negotiating the petulant vinyl through their machines (after taming it on the cutting mat!).
Tissue paper was our secret weapon, placed under the vinyl when sewing. This helps it to glide easily over the needleplate (a Teflon foot on your machine will also work well).
Just look at those happy faces and lots of beautifully made pouches!
Well done ladies on conquering the plastic fantastic!
By Judith on May 13, 2019 0 Comments (Leave comment)
Happy Monday to you all!
Welcome to the final part in our Spring into Summer ’19 series, looking at the items on display in our classroom (part 1 available here; part 2 available here; part 3 available here).
This is the final item on my table to tell you about and will be a Saturday workshop in June.
These cute and practical zippy pouches are great for summer holidays, or just keeping your bits and bobs organised. The handy see-through vinyl means you know exactly which pouch to reach for, and sewing with vinyl isn’t as tricky as you might think.
At the workshop I will be showing some clever ways to sew with vinyl (vinyl available to purchase in class).
There are a few places still available so why not join us for some vinyl fun!
This quilt originally featured in Quilt Now magazine. The repeating blocks allow you to mix up the colours and fabrics without losing the overall design.
I worked from my aqua blue and teal green scraps for this quilt, representing the sea and sky. The little hits of yellow complete the summer feel of this quilt.
The final quilt on display is our current class project.
Welcome to my Spring into Summer ’19 series, looking at the items on display in our studio for this new term.
First up is our display table (I’ll be mixing up the order as shown but stay with me!).
I try to theme (or semi-theme) the table each term. Apart from an obvious summery feel, I think you’ll see another theme emerging as we look at the items.
You may remember seeing my aprons on display last term. I decided to leave my dressed mannequin again this term because we are running our 3rd Apron workshop in August (booking available here). In this workshop you can choose from either a tie back apron (pictured) or the Japanese style cross back apron (see here).
2 Kids Tote Bags:
These simple and fun makes are samples for my upcoming children’s workshop.
I have 4 girls and 2 boys registered to learn how to use a sewing machine and let their textile creativity loose!
Children are a joy to teach because they don’t overthink it and are so creatively uninhibited! We adults could learn alot from them!
This is my big and roomy beach bag (first featured in Pretty Patches magazine). It features water resistant Rip-Stop Nylon lining, mesh or cotton exterior pockets and a detachable ‘wet bag’ for your soggy bikini, or drippy sun lotion bottles!
I’ve made a few of these practical bags over the years, and they’ve even been road tested by my girls on their holiday!
If you’d like to join us at our Beach Bag workshop, you can book in here.
If you need a secure glasses or sunglasses case, how about my flex frame glasses case.
The tutorial covers 2 sizes (the bigger size is for wrap around sunglasses which don’t fold flat) and the applique glasses template is also available. You can purchase flex frames from here.
So that wraps up part 1 of Spring into Summer ’19.
Tune in again when we look at the inspiring creativity of one of my favourite quilt designers!
By Judith on April 14, 2019 2 Comments (Leave comment)
Yesterday we got all folksy at our Tea Cosy Workshop!
We were few in number, but the chatter and vibe was as warm and inviting as the cosies!
The raw edge applique was new to some, but with the easier option of top stitching also available, nothing held back these creative endeavours.
Aren’t they adorable!
Well done ladies on your cute cosies (I just know your tea will taste even better now!).
My Folksy Tea Cosy Pattern is available here, and includes a 2nd applique design and instructions on how to measure your teapot for a perfectly fitting cosy.
By Judith on January 14, 2019 3 Comments (Leave comment)
We are well into our stride again with the new term of classes.
So it’s time to show you my New Year Display Table!
I’ve gone for a ‘kitchen’ theme this term, getting you inspired to pretty up your table and domestic space, as well as lots of gift ideas for those friends who love being in their kitchen!
So let’s get started!
1 Trivet Mats
Over the years I have gathered up lots of free EPP (English Paper Piecing) packs and templates, most of which came free with quilting magazines.
Often there is a useful little book or pattern ideas that come with them, and I spent my free time over Christmas doing some relaxing hand sewing, and having fun with my Tilda scraps.
I used some Essex Yarn Dyed linen (Flax and Denim) for the backgrounds, appliqued and quilted them onto Polyester Insulating Wadding (available here) and made my own bias binding to finish.
I purposely used the thicker poly wadding (also used in oven gloves) to give my mats some durability when being used as trivets. I also love the lush texture you get from the denser batting.
You could easily replace this wadding with Insul Bright heat resistant wadding and turn them into placemats (all materials mentioned are machine washable).
2 Aprons
I have 2 types of Aprons on display, and I will be teaching them both as a Saturday workshop on 9th March.
The pattern for my Tie Back apron will be coming soon (adult and child sizes will be available).
This apron is designed to fit into a decorative mason jar so it can be gifted!
Cute or what!
3 Lunchbags (2 styles)
(Pattern coming soon)
I had a lot of fun designing these lunchbags several years ago for Popular Patchwork magazine.
The raw edge applique designs can be child or adult friendly (or you could even made a patchwork version - that’s next on my list!).
Both bags are insulated with Insul Bright heat resistant wadding, and the linings are made from wipeable Rip-stop nylon (or you could re-purpose a machine washable shower curtain!).
The pattern (includes both styles) is currently being tested and will be available soon.
I’ll be running my Folksy Tea cosy pattern as a Saturday workshop in April.
I originally designed this for Sewing World magazine, and it combines insulating wadding and fun felt applique.
The pattern takes you through how to measure your teapot and calculate your bespoke teacosy measurements. It also includes the additional applique design ‘Sit Long Talk Much’.
If you like to take a bottle of wine round to a friend’s house, or to your favourite ‘BYO’ restaurant, then you might find this reusable bottle carrier a handy addition to your kitchen cupboard.
One fat quarter will make the whole carrier, but why not jazz it up with a contrast fabric!
What an amazing year it has been, both inside the classroom and outside it!
One of my professional highlights in 2018 was attending Patchwork in the Peaks Quilters Retreat, Morzine, France, as guest tutor.
And on a personal level, hosting a memory quilt party for my special friend’s 50th birthday in February was a wonderful day!
Helping 2 charities, Shared Threads and Flourish, launch their new sewing initiatives, both aimed at improving the lives of women, locally and internationally was (and continues to be) a pleasure and a privilege.
Among the many highs and lows that come in a year, I’m reminded of my ‘word for the year’ back in January ’18 - RHYTHM.
I set a word at the start of each year to give me a focus to my professional and life goals.
After a massive year of change in 2017, I feel I definitely achieved some rhythm, allowing life to settle some, and to get into my stride with the new classroom and home.
Of course there were still changes in 2018, some happy, some sad, some expected, some unexecpted; the normalcy of life demands it.
But amidst it all, I have much to be thankful for and am content to leave 2018 with a smile, and embrace the exciting new chapter that is 2019.
Come back soon to find out all about my word for 2019!
By Judith on December 7, 2018 0 Comments (Leave comment)
In classes this week I presented my 2019 (January-April) Saturday workshops.
They got a wonderful response, and I’m happy to share them with you here.
So let me tell you a little more about what you can expect in each workshop:
I’ve scheduled again my most popular workshop - Free Motion Quilting and Sketching.
In this workshop you get lots of practice time to learn at least 6 ‘beginner friendly’ free motion designs, fillers and how to quilt a cot size quilt.
The 2nd half of the day is all about Free Motion Sketching, where you can relax a little and have fun with this raw edge applique and writing technique.
My cute friend ‘Harriet Hare’ (from my Woodland Friends quilt) makes her appearance in tweed!
Tweed is a favourite textile among many sewers, and mixed with pretty cottons and satin stitch applique, you have one gorgeous cushion!
(The pattern for Harriet Hare Cushion will be released after the workshop.)
At our Apron workshop in March there will be 2 styles to choose from - the Japanese style ‘Cross-over’ apron and my ‘Apron in Jar’, a practical and stylish apron which folds into a decorated mason jar for gifting.
The pattern for the Apron in a Jar includes a child’s size template and will be released after the workshop.
We wrap up our first term of ‘Sewing Saturdays’ with some folksy tea cosies.
Bring your teapot along to this workshop, and we will have fun appliqueing a ‘made to measure’ cosy for your pot.
I will be posting more information about each workshop nearer the time.
Places are limited, so book early (waiting lists available if fully booked). Just drop me an email at justjudedesigns@hotmail.co.uk
By Judith on November 1, 2018 0 Comments (Leave comment)
(Subscriber newsletters dispatched today - please check your inbox and junk folders!)
Exactly 1 year ago today I signed the contract and got the keys to my classroom in this stunning converted Victorian Linen Mill in Belfast!
After teaching in various places for more than 10 years, it was lovely to step into a bright a spacious room, which I knew would meet all our classroom needs.
The room takes 12 students per class, and we also have 5 separate cutting tables and 4 ironing stations.
The ‘Basting Bay’ gives the ladies room to spray baste their quilts, and the design wall facilitates the laying out of blocks and quilt design.
The ‘Tea/coffee’ making station is an essential feature (no mini-bar yet!) and I even have room for a themed display table and a small haberdashery and pattern shop.
I teach 6 weekly classes and monthly Saturday workshops from September to June, with a slightly different programme over the summer months.
Since I started the classes in January ’18, we have had a total of 203 weekly classes, 11 Saturday workshops, 1 50th birthday party and several charity sewing days!
Phew! What a brilliant year!
And to celebrate my first birthday in Conway Mill, we not only have chocolates in class, I’m also discounting all my online patterns by 50%. Just use the coupon code BIRTHDAY1 at the checkout (one use only).
Thank you to everyone for making this new venture an exciting and fulfilling one! I can’t wait to see what 2019 brings!
By Judith on October 14, 2018 0 Comments (Leave comment)
Yesterday was my Chenille Workshop, and I’ve been beavering away this past week getting samples ready.
My ladies learned how to make a fluffy, tactile texture in their fabrics, and turn it into a snuggly cushion or a soft and useful bathmat.
We learned about how cutting across the bias can create a very different effect from cutting in line with the warp and weft (straight grain).
And how some fabrics will fray better than others, and where some will reveal little surprises after washing and drying (a frayed selvage will give a clue to secondary coloured threads).
The best way to chenille fabric is to cut across the bias, but that in no way limits the different effects you can achieve.
Check out some of these examples:
Grids:
Curves:
Pintucks:
Layered Shapes:
Applique Bias Strips:
You don’t need any special equipment for this technique. The clever peeps at Olfa have made the Chenille cutter, but you can get the same results from sharp scissors (recommended for smaller projects).
And if you don’t have a Chenille brush to help with the fluffing-up, just use a regular hairbrush (the washing and tumble drying are usually sufficient, but brushing the chenille can help with those fabrics that are a little more fray resistant!).
So huge well done to my ladies for a great day’s work sewing and chenilling (& chatting too!).
And if you haven’t tried chenilling yet, why not give it a whirl! You’ll be pleasantly surprised!
By Judith on September 24, 2018 0 Comments (Leave comment)
So I’m back from my adventures abroad (eventually!), and what a fabulous few days it was!
Of course the surroundings were completely spectacular, and my photos simply don’t do justice to the beautiful part of the world that is Morzine, France.
But despite gloriously warm temperatures and the clear blue Alpine air, nothing would tempt 8 serious sewers from their missional weekend.
As a guest tutor I was teaching my Denim Applique Bag, and you can see their fabulous results here (don’t get distracted by the awesome backdrop!).
For most of the ladies, this was their first time using a twin needle and fusible bias as a decorative quilting technique.
The re-purposing fervour continued throughout the weekend, with more bags, baskets, pouches and cushions being produced.
Of course there were many other projects being worked on too (yes we did sleep and eat during the retreat!). Each finish was collectively celebrated with the special ‘gong’ of a bell!
Elita and Gina work hard at making this bi-annual retreat a fun, productive and inspiring experience for all who attend.
L-R: Elita, me, Gina
Everyone was so warm, welcoming and sociable (not to mention hilariously funny!).
I would highly recommend Patchwork in the Peaks for anyone who enjoys getting away from it all for some dedicated time to quilt, sew, chat, laugh and relax (there’s even a hot tub!).
You can read more about Elita’s Alpine Retreats and the other services she provides here.
I did manage a few little makes myself - tune in again for a round-up on my Alpine finishes!
By Judith on September 10, 2018 0 Comments (Leave comment)
Last Saturday was my 2nd Rope Bowl Workshop.
And I’m pleased to say this lot were just as productive as my first group of ladies!!
Once again the feedback from this workshop was a resounding success!
It gives me so much pleasure seeing proudly smiling faces going home with beautiful creations tucked under arms and invigorated inspiration for many future gifts!
Well done ladies!
Interest and enquiries for this workshop continue to grow, so I will be sure to schedule more in next year!
By Judith on September 6, 2018 0 Comments (Leave comment)
Hello there!
And hello September!
September sees the start of my Autumn term of classes, and an introduction to twin needling with fusible bias tape.
And in celebration of the start of meteorological Autumn, let me show you my new table display, full of ideas, patterns and tutorials to inspire you to get creative this season!
I designed this bag for my Scrap Buster Saturday, back in early August.
I organised my scraps into 3 colourways - lots of strips of varying widths, and at least 7″ long.
The French Braid technique is so easy and in no time at all you have the panels made. Quilting them onto Bosal Flex Foam gives the bag lovely structure.
2: Denim Messenger Bag
(pattern coming soon)
Messenger bags are great for all ages! Kids at school, professionals needing a laptop bag, or how about a ‘man bag’.
The pattern for this bag was originally published in Pretty Patches magazine a few years ago. I’m hoping to get the pattern reformatted for general sale soon.
You can see I’ve had a little fun with the flap section of the bag in other versions of this pattern!
This is a roomy bag which will put a dent in some of your scraps!
The ‘quilt as you go’ technique is great fun, and the condense quilting adds strength and structure too.
4: Rope Bowls
I’m teaching how to make these stylish and versatile bowls at my Saturday workshops.
The first workshop was a hit, and a very productive day!
The next Rope Bowls workshop is this Saturday. Again it is fully booked, but I will be running this one again in the new year (keep your eyes and ears open!).
On the table you can see a Chenille mat, and the Chenille Heart Cushion in the background.
Chenilling is such a fun quilting technique, and totally beginner friendly.
I’m hosting a Chenille workshop on Saturday 13th October, where you can make either a bath mat or my heart cushion (places still available at time of writing).
So that’s part 1 of my Autumn Table roundup.
Tune in later this week for more project inspiration!
By Judith on August 26, 2018 0 Comments (Leave comment)
Hello everyone!
Just checking in to tell you about some exciting new workshops coming up this term.
Saturday 8th September: Rope Bowls II
(fully booked - waiting list available)
My first Rope Bowls workshop booked up in double quick time, so I set a 2nd date! (you can read all about the first workshop here.)
15th September: Free Motion Quilting/Sketching
(fully booked - waiting list available)
Yesterday was the first of 2 FMQ workshops.
My ladies worked hard at 6 different FMQ designs, fillers, small and large samples, and tried their hand at a little sketching too! (I bet they all slept well last night!).
This is my most requested workshop, and as it booked up in 2 days(!!) it was only fair I put on a 2nd date!
Don’t worry if you haven’t managed to get onto one of these workshops. I’ll be running this one again next year.
13th October: Chenille (Bath Mat or Cushion)
(places available)
In quilting, the term ‘Chenille’ refers to a texture achieved through sewing and cutting through several layers of fabric. When washed and dried, the raw edges of the cuts ‘fluff up’ creating a wonderfully tactile texture. This new ‘fabric’ can then be turned into a wide range of items.
In this workshop you can choose to make a fluffy bath mat, or a snuggly cushion.
17th November: Scandi Christmas Stocking
(places available)
Getting ready for Christmas and Christmas gift-making is always popular among quilters.
My Scandi Christmas Stocking incorporates a little fun applique and it is fully lined, so it will stand the test of time year after year!
I’m now stocking the latest collection of Makower Red Scandi Christmas prints in my classroom, as well as my usual stocks of Essex Yarn Dyed Linen, and I’m hoping to have kits available for the workshop.
8th December: Gingerbread Men Garland
(places available)
How cute would these decorated felt Gingerbread Men look adorning your Christmas themed fireplace!
This workshop will combined some relaxing hand sewing and embellishing with a little machine work.
A great gift for gingerbread men lovers everywhere!
So there you have it! A round-up of fun ways to spend a Saturday!
If you see anything here you fancy, just drop me an email at justjudedesigns@hotmail.co.uk