By Judith on December 12, 2025 0 Comments (Leave comment)
I’m often donated fabric bags and offcuts from friends or their creative relatives when they’re having a ‘clear out’, to use or pass on! Most of what I’m given is donated on to sewing charities or Primary Schools for their after schools clubs.
But I can’t resist scavenging for particular vintage prints, and squirrelling them away!
I’ve made many projects from my vintage sheets collection, but I also have some older prints with a more retro vibe!
During our first lockdown I had a little playtime with a selection of these fabrics, keeping with a pink and green theme, to replace an existing cushion cover which has become ‘tired’!
Front
Back
I made the flimsy and then parked it! Until this week when I was motivated to get it finished!
I love the contradiction of bold chintz linens and graphic floral cottons. My starting point was this cute fella, building up around him the clashing contrasts of ditsy prints and 70s pattern.
My favourite print in the whole cushion is this vintage chintz linen.
I’ve used it in several projects before …..
‘Harriet’ Hare Cushion
Maker’s Tote
…but I’ve only a few tiny scraps left now. I’m so glad I could use up the last of the larger pieces in this cushion.
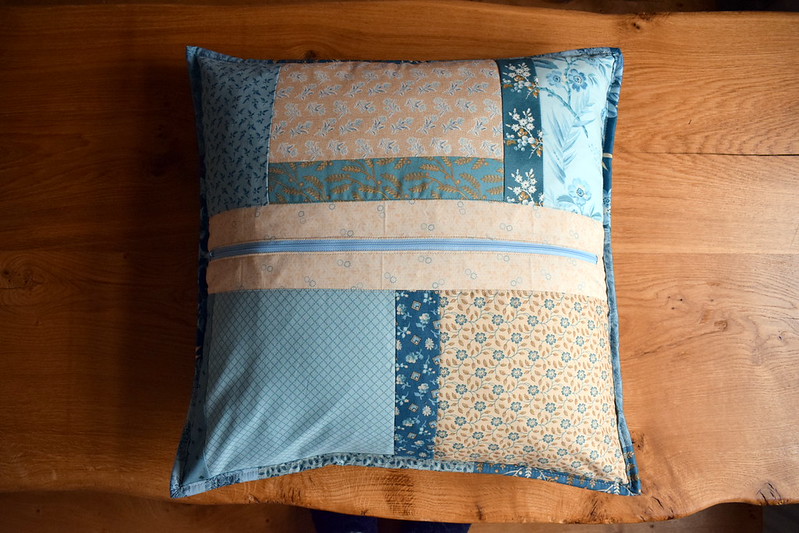
I kept my zipper as a feature in the back, rather than hiding it under a flap. And I quilted the front with a 2″ cross hatch grid, using my beloved quilting bar!
The cushion is now nestled happily on my sofa between 2 other handmade cushions!
It feels good to move this lockdown project from UFO to FO!
By Judith on July 10, 2026 3 Comments (Leave comment)
We are now in week 2 of our Instagram Designers Collaboration with Sotak Handmade, Charm About You, Stuart Hillard Sews, Penny Dog & myself.
Last week we made Svetlana’s Lola Pouches (you can see mine here).
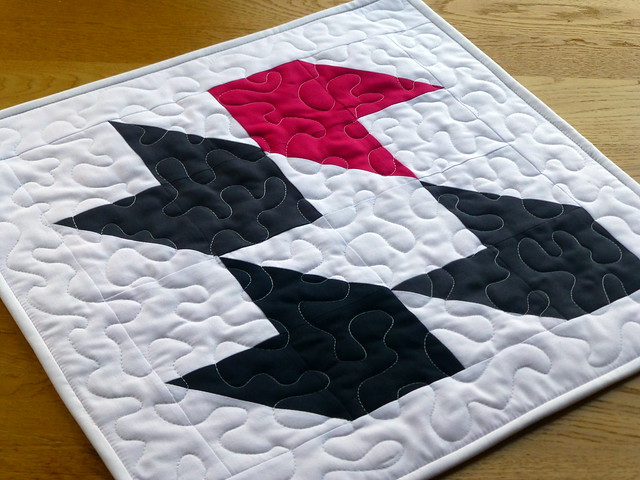
This week we are making Lucy’s Melody Mini Quilt/Cushion.
This is a foundation paper pieced pattern which makes either a 20″ cushion or wallhanging. I love foundation paper piecing for the accuracy and pointy points you can achieve!
I decided to make another pillow for my sofa and of course, I chose Tilda Fabrics!!
I wanted to create a secondary pattern that became the centre feature of the cushion so I vered slightly from Lucy’s original colour placement.
The cushion is actually made in 4 quadrants - you could keep the colourway in each quadrant the same colour/fabrics (like Lucy’s original pattern). Alternatively, by changing the fabric in one point in each quadrant you get a new secondary pattern when each of the those points face towards the centre.
When it came to the quilting, I decided to quilt in the ditches first, to bed down a few of those lumpier seams.
I knew the Kona Snow would look too stark by itself so a little running stitch brings interest to these plainer sections and a little more quilted texture.
My points were pretty well matched in the middle, despite the bulk of the intersecting seam, but it just didn’t feel right not to highlight the centre with a vintage button!
The back of the cushion has my ‘go to’ feature zip, and a stripey Tilda binding frames the finished cushion.
I’m really pleased with how this cushion has turned out and love how it looks with my other handmade cushions.
By Judith on July 1, 2026 2 Comments (Leave comment)
I’m so excited to annouce a new designer collaboration during the month of July, which will be running on Instagram!
I’m teaming up with 4 talented quilting designers to make 1 pattern from each designers shop or book. Each week we will showcase a designers pattern and let you see 4 different takes on it!
In addition to myself, the 4 other designers are:
Svetlana Sotak:
@Sotakhandmade
Svetlana is a contemporary quilter, bag maker & blogger based in The Netherlands. She has the most beautiful calming style and has an amazing range of pouch and bag patterns available in her shop.
Svetlana has recently authored a book entitled That Handmade Touch.
We will be kicking off our first week by making Svetlana’s Lola Pouch.
Lucy Brennan:
@CharmAboutYou
Lucy is a British quilter and blogger who designs & sells her own patterns and regularly teaches quilting classes. Lucy worked for two years as a designer and demonstrator on TV and often has projects featured in magazines.
Lucy describes her style as ‘miscellaneous’, enjoying mixing modern and traditional elements in her designs. She also co-hosts #saturdaynightcraftalong on Instagram, a weekly global crafting initiative.
In week 2 we will be making Lucy’s Melody Mini Quilt.
Kerry Foster:
@Pennydog
Kerry is a British blogger, quilter and dressmaker living in Canada. She designs most of what she makes and is mostly known for making animal portrait quilts with turned edge applique.
Kerry is a regular contributor to British quilting magazines and also teaches quilting classes. Her pointer ‘Hank’ is as famous as Kerry on Instagram!
Kerry sells her patterns online and has published a book entitled Paint by Number Quilts.
In week 4 we will be making Kerry’s Horseplay Cushion.
Stuart Hillard:
@StuartHillardSews
Stuart first appeared on our screens in the first episode of The Great British Sewing Bee! He is a self-confessed fabricaholic and designs his own fabrics.
In addition to presenting programmes on TV and his YouTube channel, Stuart is a regular contributor to quilting magazines and has authored 3 quilting and sewing books.
In the final week of our sew-along we will be making something from Stuart’s latest book Simple Shapes Stunning Quilts.
And week 3 will be yours truly! I can’t wait to see how the others interpret my Dotti Denim Pouch!!
You can tune into my instagram account @justjudebelfast to follow our sew-along or any of the designers instagram accounts.
But don’t worry if you’re not on Instagram, I’ll also be posting my collaborative makes here too!
Janet made 2 of the same cushion, so extra kudos to you Janet!!
Aren’t they gorgeous! And I know there are a few more still in the making!
Well done ladies for your amazing results and bearing with the imperfections in my first online class and being patient with our Zoom sessions!
I’m so looking forward to our next class starting tomorrow! Nothing beats actual ‘in person’ classes, but for lockdown, this is definitely the next best thing!
By Judith on December 12, 2025 2 Comments (Leave comment)
During our last week of classes we have adopted the tradition of ‘Secret Santa’.
I love this fun tradition, seeing the variety of handmade and bought gifts, all for under £5!
6 weekly classes means I have 6 Secret Santa presents to either make or buy. This year I’m trying not to buy as many presents, but making gifts where I can.
So here are my handmade Secret Santa classes gifts:
As you know I’ve been EPP-ing in the evenings, enjoying working with my Tilda scraps from past projects.
I saw some cute pincushions on Pinterest and thought my little Tilda Grandmother’s flowers would make pretty pinnies!
I appliqued the flowers onto some Essex Yarn Dyed Linen (Flax) and hand stitched with pale pink embroidery floss around the outside of the flowers.
I really like the recessed buttons on this design. I covered some buttons with more Tilda scraps and pulled the thread tightly through to the back of the pincushion to give it a more cushiony look!
I paired each pincushion up with a packet of pins and I’m pleased to report that the ‘secret’ gifts were very well received!
So my secret Santa pinnies are not so secret anymore!
And a big thank you to all my ‘Secret Santas’ for the lovely gifts that I received!
By Judith on December 6, 2025 0 Comments (Leave comment)
Well it’s hard to believe that we only have 1 more week of classes left for 2019! Where on earth did that year go!!
I can’t wait to show you the beautiful wreaths folks have been making as part of our (optional) class project this term. They’re stunning!
But before one term is out I always present to my classes what the next term’s (optional) class project will be.
Our technique focus next term will be Pleats & Tucks.
The main difference between pleats and tucks is that pleats are formed by folding the same length of fabric into folds which are only stitched down at the top and bottom ends, whereas tucks are constructed separately and then sewn into the project.
You will of course be more familiar with seeing pleats and tucks in clothing and apparel, but I love how different techniques in textiles can cross over into other disciplines, usually with a little creative tweaking!
So far I have 2 class samples made (both tucks!), but I hope to have one more pleated sample completed before the start of term!
Cushion with Tucks:
There are many different effects you can achieve by manipulating tucks.
I really like the ‘spread’ effect you get from this variation of the Wave Tuck. You can see each of the feature fabrics standing out nicely against the black Essex Yarn Dyed Linen.
Zippy Pouch with Tucks
This is an example of Twisted Tucks. Before sewing along the bottom edge of the pouch, the tucks are twisted back, revealing the secondary colour. This effect adds a lovely decorative touch to bags and pouches.
So that’s us (almost) ready for next term. If you would like to join us for some creative sewing fun, you can see all the available classes here.
In the meantime I have a few Christmas presents to make, and the small matter of workshops for February’s Retreat to make too!
By Judith on September 16, 2025 0 Comments (Leave comment)
It was a milestone weekend in the Hollies’ household!
I dropped my baby off at University of Liverpool to start her 3 year degree, and came back to an empty nest.
I’ve had children at home for the past 24 years, so not having ‘on hand’ mummy duties and living alone for the first time (ever) will be quite an adjustment. But I know that once the grieving ends I will learn how to grow a new set of wings and step into new rhythms and adventures.
In the meantime I have lots of exciting work ventures to focus on, one being our inaugural Quilting Retreat next month.
In addition to oodles of time to sew, chat and relax, there are also 2 optional workshops to choose from.
Saturday Afternoon: Sashiko Cushion
The Japanese sashiko stitching trend has swept through the quilting world in recent years.
This is my simplified take on what can be beautifully intricate hand stitched Japanese designs, often based on themes of nature and geometric patterns.
At this workshop you will learn how to trace patterns onto traditional indigo backgrounds and how to make the sashiko stitches and designs.
Sunday Morning: Selvedge Projects
Quilters are a frugal lot, and we don’t like throwing away even small pieces of fabric!
So when it comes to selvedges, the edges of fabric that prevent it from fraying, to me they aren’t the pieces you trim off and throw in the bin, but rather the unsung treasures of your yardage!
Selvedges not only display the colourful dye shades used in the print, but also the manufacturer and designer’s names and the name of the pattern.
It can take a while to save up enough selvedges to make something from them, but don’t worry, at this workshop I will have lots of selvedges available.
At the workshop you will learn how to cut and sew selvedges with finished edges and how to stabilise them into a new piece of fabric for project making.
And you can choose to make a small basket, pencil case or project pouch.
So start looking at those selvedges differently and hoard them like precious treasure!
Those are the workshops taking place at our Quilting Retreat in October. It’s going to be one fun and creative weekend!
By Judith on August 22, 2025 3 Comments (Leave comment)
The 2nd of my gifts being handed out this week is this English Paper Pieced (EPP) Hexie Pillow.
This gift is actually a ‘thank you’ from my daughter to a family who’ve been like a 2nd family to her for many years, and have faithfully supported her missionary training!
The family in question love the North Coast of Ireland, and holiday there every year (with my daughter included!).
They have a particular affection for The Giants Causeway, a geological phenomenon of mostly hexagonal shaped basalt stones, created from volcanic movement 50-60 million years ago.
But despite what Wikipedia and National Heritage say, we all know it was in fact built by the Irish Giant, Finn MacCool! Of course!
So this coastal coloured pillow with it’s columns of ombre hexies is my textile ode to The Giant’s Causeway and our legendary and affectionate giant, Finn MacCool!
This is my first time appliquing EPP hexies in this way. It’s important to draw your placement grid first onto the background (Essex Yarn Dyed Linen in this instance), before bondawebbing the starched hexies in place.
I’m delighted to say the pillow was very well received and the recipients immediately got the inferences to their favourite little corner of the world.
I love making cushions (well they’re just mini quilts really aren’t they!) and trying out new things. I’ll definitely chalk this one up as a success (especially as I would like to have one in my own home!)!
By Judith on May 24, 2026 0 Comments (Leave comment)
Welcome to part 3 of my series on Log Cabin blocks (part 1 available here; part 2 available here).
So far we’ve looked at the variations within Log Cabin and Courthouse Steps blocks.
This post is all about the Pineapple Block.
Like me, you may be surprised that the Pineapple block is included in the Log Cabin family of blocks.
But there are definite similarities. Fabric strips of equal width are added in rounds from the centre square outwards (just like Log Cabin or Courthouse Steps).
The main difference this time is each round is trimmed ‘on point’ to create a diamond shape, before the next round is added. By alternating the background and main fabrics each round, pineapple shapes start to emerge.
Photo Source: Pinterest
There are several ways to create the Pineapple Block:
1 Foundation Pieced:
For my block (above) I printed and enlarged a paper template and sewed directly onto the paper, only removing the paper on completion of the block.
While this is a time consuming method (especially for a full quilt!) it results in precision piecing and accurate points and edges.
(Tutorial and template available here)
2 No Foundation Papers:
Photo source: Crazy Mom Quilts
You don’t have to use foundation paper to make a Pineapple Block. Click here for a great tutorial on the ‘trim as you go’ method by Crazy Mom Quilts.
3 Creative Grids Ruler
The clever peeps at Creative Grids have made the lives of Pineapple Block makers much easier with this fab trimming tool!
It looks complicated to use, but Jenny Doan makes light work of it in her video tutorial here.
Photo source: Missouri Star Quilt Co.
I love how cavalier the piecing can be with this method, and still end up with a beautifully accurate block!
This will definitely be my ‘go to’ method when I get around to making a Pineapple Quilt!
Photo source: The Work Room
I particularly love this pillow example of the Pineapple Block by The Work Room.
And you can see lots more wonderful Pineapple blocks and quilts to drool over on my Pinterest board here.
Thank you for tuning in!
Come back soon for my final (Mystery) part of the Log Cabin Family of Blocks.
By Judith on May 10, 2026 0 Comments (Leave comment)
Hi there,
Welcome to part 3 of my Spring into Summer ’19 series, looking at the items on display in our classroom (part 1 available here; part 2 available here).
Part 3 continues the Lori Holt theme, this time looking at her book ‘Quilty Fun’.
7 Lori Holt’s Quilty Fun Book:
I adore ‘row by row’ quilts and Lori’s quilt design is full of cute and adaptable blocks. Here is my version of her quilt, hanging up in class.
I’ve used lots of scraps in this quilt, but for the bigger pieces I used Lori’s Bee Basics range of fabrics, which co-ordinate with all her other fabric collections.
There’s so much to look at in this quilt, and as always the book includes many more ideas on how to use the motifs in different ways for a whole range of projects.
All bar 1 of the books have now sold in class, which I’ll be listing soon in my shop (watch this space!).
8 Quilty Fun Mugs (Tea Cups) Cushion
One of the additional projects in the book is a Mugs (Tea Cups) Cushion (I omitted the border included in the pattern). Isn’t this fun! The piecing is really easy and I had a ball picking the colours I wanted all my mugs to be!
I went for my favourite zippered cushion back to finish off this 20″ cushion.
9 Quilty Fun Leaf Mat:
This is a smaller version of a table topper project in Quilty Fun. The leaves are the same size as those in the original quilt, and I thought this would make a pretty addition to my kitchen table.
And finally, a Lori Holt inspired cushion, which is on our display shelf:
Crossroads Cushion:
I made this cushion from Lori’s free ‘Scrappy Cross Roads Block’ tutorial, available here.
Using a small pack of ‘Something Blue’ by Makower, I followed Lori’s tutorial to make the block, and then brought it up to a 20″ cushion size with borders.
I had a lot of fun quilting this one!
The back was pieced with leftovers and my trademark ‘feature zipper’ closure.
And that brings part 3 of my Spring into Summer ’19 series to a close.
Just 3 more quilts and some holiday style pouches to show you in our final post.
By Judith on April 12, 2026 0 Comments (Leave comment)
This week saw the end of our current block of classes.
The optional class project was all about Triaxial and Basket Weaving.
I had made 3 class samples to showcase the different types of fabric weaving I would be teaching, but as you will see, a few creative minds didn’t stop there!
Aren’t they stunning! A few little notebook covers didn’t manage the photoshoot, but I’m sure you can guess how wonderful they are!
In the end, we were unable to source Wefty weaving needles here in the UK, and while we managed pretty well instead with large safety pins, the Wefty needles are certainly advantageous when it comes to the more complex triaxial weave. I would definitely recommend these genius little tools!
So a huge well done to my weaving ladies for stepping up to the challenge (especially when it came to triaxial weaving!) and producing beautiful work!
And of course, these weren’t the only projects being worked on! Well done to all my other ladies on your pre-Easter finishes.
I hope you all have a wonderfully creative and choccy-filled Easter break!
(Classes resume w/c 29th April - booking available here.)
By Judith on January 31, 2026 2 Comments (Leave comment)
Hi there, the ‘5 minute demo’ in my classes for this month was all about Portholes!
I first learned how to do this nifty technique from Lu Summers at the 2012 Fat Quarterly Retreat.
It was so much fun, and one of those techniques that is deceptively easy!
You can pretty much porthole any shape, and show off some patchwork, feature fabric or pretty vintage embroidery. But my advice is not to get too intricate with the shape otherwise the outline may not keep its definition.
At the Retreat I was sitting beside this talented lady, and inspired by her triple porthole cushions, I’ve made my own 18″ version and written up the tutorial for you here.
You Will need:
Fabric 1 (centre): 7″ square
Fabric 2: 12.5″ square
Fabric 3: 16.5″ square
Fabric 4: 18.5″ square
5.5″ diameter bowl or plate to draw around (alternatively use template plastic and compass)
9″ diameter bowl or plate to draw around
13″ diameter bowl or plate to draw around
Calico: Same 3 cuts as Fabrics 2-4 above
Method:
Use 1/4″ seam allowance
1 Press the 12.5″ calico square in half both ways to find the centre.
2 Centre the 5.5″ diameter bowl (or template plastic) onto the calico and draw round the circle.
3 Place the calico onto the RIGHT side of Fabric 2, with the circle facing up. Pin the layers together and stitch on the circle.
4 Carefully cut away the fabric in the middle of the circle leaving an 1/8″ seam allowance.
5 Push the calico through the hole and round to the back. Press well so there is no calico showing from the front side.
6 Position and centre Fabric 1 (feature fabric) behind the calico, before pinning and sewing around the hole, 1/8″ from the edge.
7 Peel back the top fabric from the calico and feature fabric laying behind. Carefully trim away all the excess calico and feature fabric leaving 1/8″ seam allowance. Do not cut through Fabric 2! Put to one side.
8 Repeat steps 1-5 for the 16.5″ piece of calico and 9″ diameter bowl/plate.
9 Pin the first porthole (with feature fabric) behind this porthole. Sew around the 2nd porthole 1/8″ from the edge, as before.
10 Peel back the top fabric from the calico and feature fabric laying behind. Carefully trim away all the excess calico and feature fabric leaving 1/8″ seam allowance. Do not cut through Fabric 3! Put to one side.
11 Repeat steps 8-10 for Fabric 4 and 13″ diameter bowl/plate.
Tip: If you want to turn your piece into a cushion, I recommend not trimming away the last layer of calico and excess feature fabric. This will add more stability to the outer edges.
Now you have your triple porthole piece, you can turn it into a pretty cushion!
I spray basted wadding and calico behind the cushion front, hand ‘echo’ quilted the portholes, before adding some mini pompoms and an envelope back!
I hope you enjoyed my tutorial and have lots of fun giving portholes a go!
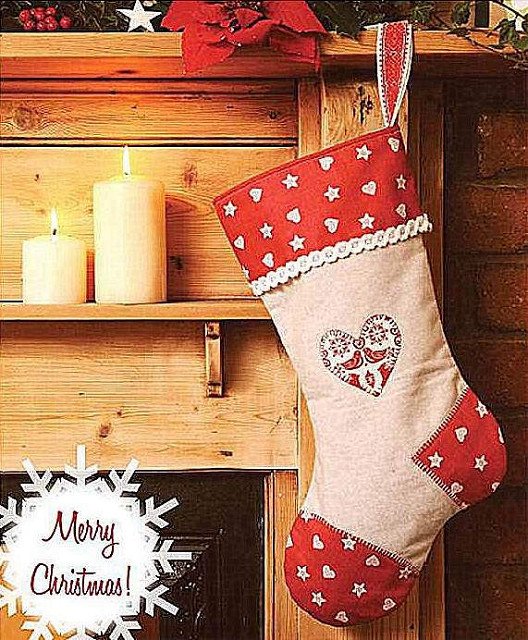
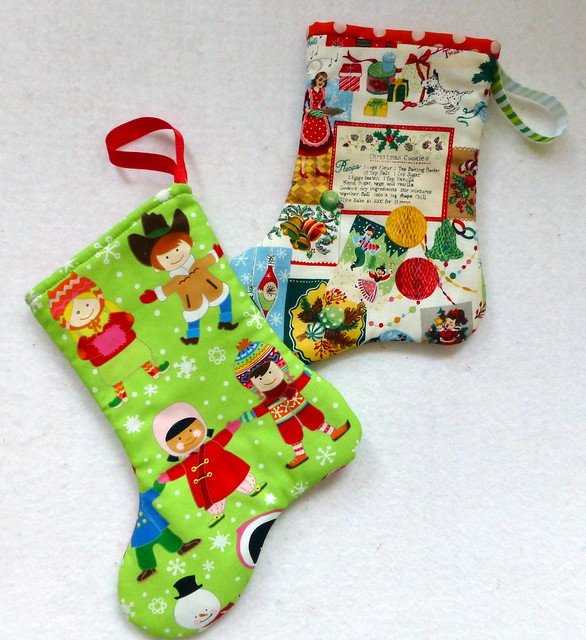
My Scandi Stocking pattern was first published in Sewing World magazine several years ago.
It combines one of my favourite fabrics, Essex Yarn Dyed Linen, with Makower’s gorgeous Scandi Christmas fabrics.
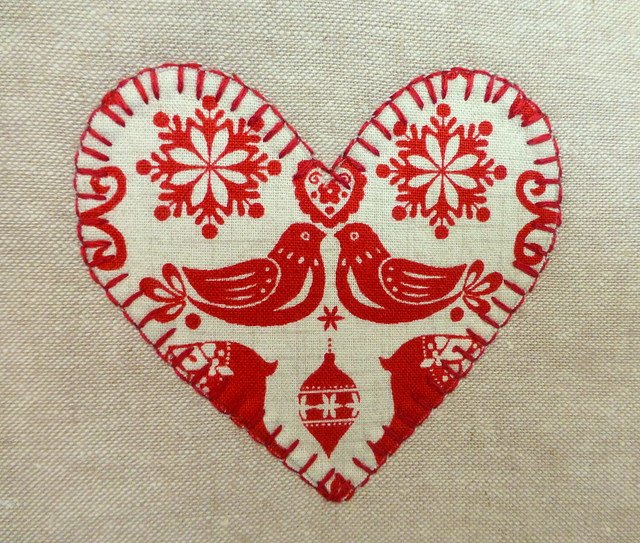
A little fussy cutting and simple applique add manageable and fun stages to this project.
Which is why I decided to run it as a Saturday workshop, on 17th November. (Full kits are available for those attending the workshop, but any leftover kits will be offered out!).
Only 1 place left on the workshop - get in touch if you would like to join us for some festive fun!
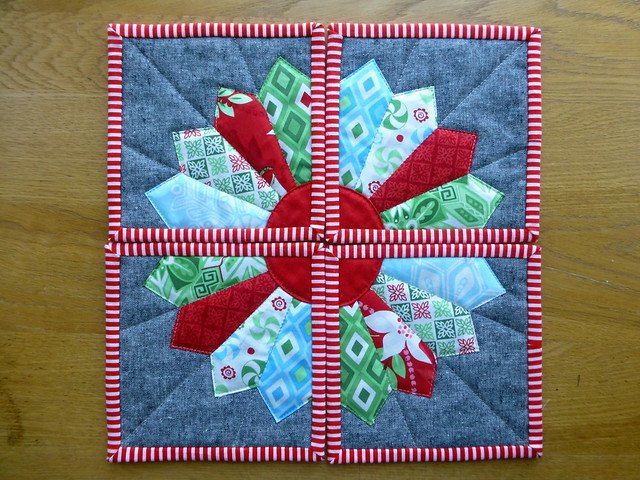
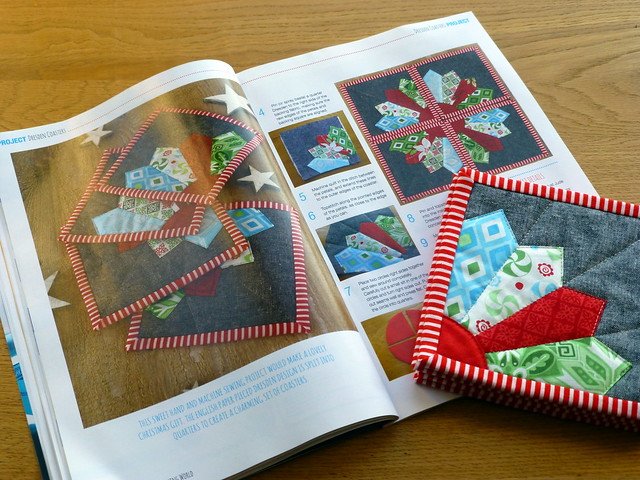
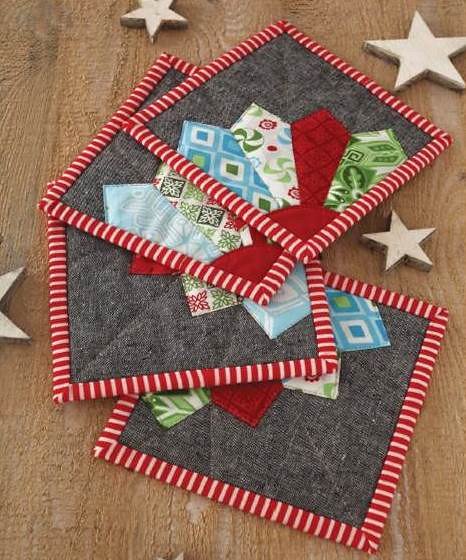
If you fancy a little hand sewing in your Christmas crafting, how about some Dresden coasters. The blades are English Paper Pieced for accuracy, and the rest is done on the machine.
Again, these made their debut in Sewing World magazine. I used more Essex Linen here, this time Black, with a few leftover Christmas 5″ charm squares.
Of course you could make these anytime of the year, making the dresden blades in non-Christmas fabrics.
This cute fellow first appeared in Pretty Patches magazine, and has been a big hit ever since!
He is a mixed textile cushion, making him super tactile and cuddly!
If you like mixing in a little tweed, wool or linen with your cottons, then you will love making this Rockin’ Robin!
I have used satin stitch applique here, but you could easily use raw edge applique or blanket stitch applique (more guidelines on machine applique here).
5 Christmas Baubles Cushions
(pattern to come)
I first made a Christmas Baubles cushion for a Brit Bee friend as part of a secret santa cushion swap several years ago!
These are great fun to make because there is no end to the ‘style’ of bauble you can have.
And you can let your creative ‘quilting’ juices flow too when it comes to the quilting.
One day I will get around to writing a pattern for these cushions - it’s on the long list!
So that’s the end of part 1!
Tune in again for part 2 and my 2nd surprise reveal!
I’m so proud of all my ladies, not just those who tackle the class project, but also those who work continuously on their generous gift making, charitable fund raisers, sharing inspiring new projects and continuing to fuel and feed their creativity.
And I get to call this my day job!! #lovemyjob
We are taking a one week break, and when we return it will be the last block of classes of 2018!
Tune in again soon to find out what our new class project will be.
By Judith on October 14, 2025 0 Comments (Leave comment)
Yesterday was my Chenille Workshop, and I’ve been beavering away this past week getting samples ready.
My ladies learned how to make a fluffy, tactile texture in their fabrics, and turn it into a snuggly cushion or a soft and useful bathmat.
We learned about how cutting across the bias can create a very different effect from cutting in line with the warp and weft (straight grain).
And how some fabrics will fray better than others, and where some will reveal little surprises after washing and drying (a frayed selvage will give a clue to secondary coloured threads).
The best way to chenille fabric is to cut across the bias, but that in no way limits the different effects you can achieve.
Check out some of these examples:
Grids:
Curves:
Pintucks:
Layered Shapes:
Applique Bias Strips:
You don’t need any special equipment for this technique. The clever peeps at Olfa have made the Chenille cutter, but you can get the same results from sharp scissors (recommended for smaller projects).
And if you don’t have a Chenille brush to help with the fluffing-up, just use a regular hairbrush (the washing and tumble drying are usually sufficient, but brushing the chenille can help with those fabrics that are a little more fray resistant!).
So huge well done to my ladies for a great day’s work sewing and chenilling (& chatting too!).
And if you haven’t tried chenilling yet, why not give it a whirl! You’ll be pleasantly surprised!
Unfortunately I don’t have a pattern written up yet for this project, but I’m currently working on a new Denim Pouch Bag, so stay tuned for new ways to upcycle your denim.
By Judith on September 6, 2025 0 Comments (Leave comment)
Hello there!
And hello September!
September sees the start of my Autumn term of classes, and an introduction to twin needling with fusible bias tape.
And in celebration of the start of meteorological Autumn, let me show you my new table display, full of ideas, patterns and tutorials to inspire you to get creative this season!
I designed this bag for my Scrap Buster Saturday, back in early August.
I organised my scraps into 3 colourways - lots of strips of varying widths, and at least 7″ long.
The French Braid technique is so easy and in no time at all you have the panels made. Quilting them onto Bosal Flex Foam gives the bag lovely structure.
2: Denim Messenger Bag
(pattern coming soon)
Messenger bags are great for all ages! Kids at school, professionals needing a laptop bag, or how about a ‘man bag’.
The pattern for this bag was originally published in Pretty Patches magazine a few years ago. I’m hoping to get the pattern reformatted for general sale soon.
You can see I’ve had a little fun with the flap section of the bag in other versions of this pattern!
This is a roomy bag which will put a dent in some of your scraps!
The ‘quilt as you go’ technique is great fun, and the condense quilting adds strength and structure too.
4: Rope Bowls
I’m teaching how to make these stylish and versatile bowls at my Saturday workshops.
The first workshop was a hit, and a very productive day!
The next Rope Bowls workshop is this Saturday. Again it is fully booked, but I will be running this one again in the new year (keep your eyes and ears open!).
On the table you can see a Chenille mat, and the Chenille Heart Cushion in the background.
Chenilling is such a fun quilting technique, and totally beginner friendly.
I’m hosting a Chenille workshop on Saturday 13th October, where you can make either a bath mat or my heart cushion (places still available at time of writing).
So that’s part 1 of my Autumn Table roundup.
Tune in later this week for more project inspiration!
By Judith on August 6, 2025 0 Comments (Leave comment)
Hello everyone,
It’s hard to believe that the summer is almost through, and attention is quickly turning to the new term of classes starting in September.
This term our (optional) class project will be Twin Needling with Fusible Bias (incorporating Stained Glass Windows).
As you can see above, there are a range of makes to choose from. Let’s look at them:
Mosaic Cushion (Beginner Friendly):
This 18″ cushion is a great starter project if you are new to fusible bias and twin needling.
Simple piecing creates the mosaic background, with the twin needled bias creating a dramatic (and quilted) finish!
I’ve made a feature of the zipper closure in the back of the cushion, but you could easily have an envelope or button closure here.
The digital pattern is available here (hard copies are available to purchase in class).
Mackintosh Flower Cushion (Intermediate):
This is another 18″ cushion, this time inspired by Charles Renee Mackintosh’s iconic design.
Shapes are bondawebbed onto background fabric, and the fusible bias then curved and twin needled down.
Again I’ve made a feature of the cushion back.
The digital Mackintosh Flower Cushion Pattern is available here (hard copies and full size templates are available to purchase in classs).
Applique Leaf Denim Bag (Advanced):
This project not only incorporates twin-needling (stems) and satin stitch applique (leaves), but also re-purposing textiles, zippered pocket and handbag construction.
The digital Applique Leaf Denim Bag Pattern is available here (hard copies and full size templates are available to purchase in class).
Mackintosh Rose Wallhanging (Advanced):
If you love wallhangings and aren’t afraid of something a little more challenging, you could try your hand at this Mackintosh inspired ‘Stained Glass Window’.
I’m in the progress of making up this wallhanging in a different colourway, and hope to show you the finished wallhanging soon! The finished size will be approx. 14″ x 21″ and full size templates will be available to purchase in class.
Materials:
Each pattern lists the materials you will need.
However, I will have the following available to purchase in class:
black 6mm fusible bias
4mm twin needles
pattern transfer pens
wadding
basting spray
thread
bondaweb
zips
hinged faux leather handbag handles
full size templates
So I hope you are inspired to perhaps try something different this term. You will have 7 weeks to make one of these projects, or a project of your own choosing!
And there are still a few spaces left across all the classes (more info here), so why not join us for some creative fun!
By Judith on June 7, 2026 0 Comments (Leave comment)
Hello there!
How is everyone doing? We are already half way through the last block of classes before summer recess!
I didn’t set a class project this block. I figured I’d thrown a lot at my poor unsuspecting victims students! So instead we’ve been focusing on getting UFOs ticked off the list.
You may remember that last term I introduced my ladies to the no-pin method of sewing drunkard’s path curves.
And just look at what my curvy ladies have produced!
Curves completely conquered! BOOM!
Aren’t they fabulous! Well done ladies, and also to those still finishing off their curvy cushions! You are all amazing!
And before the end of this block of classes, I will have more pics of my other group of curvy ladies who are making my Butterfly Garden Quilt. You won’t want to miss it!
How is your week going? We are (still) basking in the most gorgeous sunny weather here, leaving us with stunning, glorious sunsets!
This week in my classes I am presenting my summer Saturday Workshops. The 4 Saturdays in August will all be workshops, and I will be posting about them here, starting with ……
If you’ve been sewing for any length of time, you may have a huge healthy stock of scraps, leftovers from previous quilting projects. These pieces might just be too sizeable, pretty or meaningful to throw away, leftover binding or jelly roll strips, or perhaps frugality gets the better of you!
Either way, there are many, many ways to put those ever growing scraps to good use!
Here are just a few examples of what you can make on Scrap Buster Saturday.
This is another example of grouping scraps into colourways. The French Braid piecing technique is super easy, and you don’t even need the pieces to be of equal width.
I’ve quilted the bag exterior onto bosal (flex foam) which gives it lovely texture and structure without losing softness.
(Hinged Faux Leather Handles available at the workshop)
My technique for making strip pieced blocks doesn’t involve a foundation layer.
I added a little ‘organisation’ to lots of random strips by making the central strip in each block white. The white strips are of uniform width, but that’s were the uniformity ends! All other strips are random widths and lengths. I even used ‘ugly’ fabrics I still had, but I totally love the finished quilt! That’s the magic of using scraps.
Autumn Rail Fence Quilt(block tutorial available here)
The simple sewing together of strips means you can easily make up this quilt top in a day.
Once again, I dove into my scrap drawers for specific colours - golds, oranges, pinks and teals, all of different widths and lengths. Some donated yardage of a brown stripe gives flow and order to the scraps.
But equally, this quilt would look fabulous made in random coloured scraps with a uniform ‘fence’ fabric.
‘Quilt As You Go’ Handbag: (pattern available here)
Here’s another roomy handbag idea for all those colourful scraps!
This ‘quilt as you go’ method involves the quilting of each individual piece of fabric onto a larger piece of wadding. There are no raw edges, and the condense quilting gives the bag lots of structure.
The pattern also includes this secure recessed zipper closure.
‘Birch’ Quilt (in progress):
I took inspiration from this quilt and decided to make a grey and low volume version (given that I have an overflowing drawer of LV scraps!).
I plan on using up my stash of Kona Greys to make this into a bigger ‘man’ quilt. Somehow, I think it will take me a lot longer to use up my LV scraps!
So there you have it! A little inspiration on how to use your scraps, and a date for your diary on how to have a day of fun turning them into something wonderful!
And if you need even more inspiration, check out my Scrap Busting Pinterest Board!
All Saturday workshops are £30, including a non-refundable deposit of £15 to register. Just drop me an email to to book a place.
By Judith on May 20, 2026 0 Comments (Leave comment)
Yesterday was a big day here in the UK!
There was the small detail of a Royal Wedding (and an even smaller football final!!), but the main event was happening in my classroom at Conway Mill!
6 ladies rocked up for a day of sewing, making my Denim Sailboat Cushion.
And even though The Wedding was playing on my laptop in the background, these women were serious about learning hard and barely stopped for a lunch break!
For some, it was a first time venture into satin stitch applique and a little free motion sketching too (I think the celebratory tipple of Proseco might have helped, wink, wink!)
I’m sure you’ll agree, that these finishes (and almost finishes) look amazing!
Well done ladies on your focus, fun and fabulous creativity!
Full kits were available at the workshop, and I have a few left which I’ve listed in my shop.
The pattern is included in the kit, but if you would just like the pattern, you can find the digital download here.
By Judith on April 22, 2026 1 Comment (Leave comment)
I promised to post this week about the projects on my ‘Spring into Summer’ Table.
Never one to break a promise, I’m starting with my Denim Applique Sailboat Cushion.
I originally designed this cushion for a summer edition of Pretty Patches Magazine.
I loved re-purposing some denim and scraps for this nautical cushion. My recent discovery of Aurifil 12wt wool thread also made a significant contribution! You can read more about my designing process here.
The great news is that I’ll be teaching a workshop on this cushion on Saturday 19th May at my classroom in Conway Mill.
And not only that, kits will be available with everything you need to make the cushion, including lush Essex Yarn Dyed Linen, denim pieces, stripey binding and a bright red button for the back!
How cool is that!
So if you would like to spend a fun Saturday with other like minded creatives learning new skills like appli-quilting and free motion sketching, then just drop me an email to register:
Hello everyone! I hope you’ve been enjoying some glorious sunshine in your part of the world!
We have had several beautiful days here. Doesn’t a sunny day just lift one’s spirits!!
Time got away from me a bit this week, but don’t worry, I haven’t forgotten to bring you the posts on my Spring into Summer projects. I will get those posted this week.
In the meantime, I have a few pics to share with you from our Applique workshop yesterday!
8 courageous ladies decided to put their ‘big girl’ pants on and tackle satin stitch applique head on! And not just satin stitch applique, but ‘appli-quilting’ - combining the techniques of applique and quilting into one step.
By Judith on April 2, 2026 2 Comments (Leave comment)
Happy April to you all!
Well despite it being ‘Spring’ with sweet crocuses in full bloom in my garden, today I drove through snow showers with 2 degrees registered on my dashboard! Brrrrrrr!
So let’s leave the present for now, and think ahead 1 week instead, when hopefully the weather will be much better as my new term of classes start up again after the Easter break!
For a while now I’ve been threatening exhorting my ladies to confront their fears and give curved piecing a try!
So we’ve decided to get our ‘big girl’ pants on and jump in to this exciting new technique!
I will be teaching the ‘no pin’ method of curved piecing, as well as how to trim a drunkard’s path unit to achieve different effects.
Small Projects:
For those who want to make a smaller project, I have designed and written several patterns.
‘Ripples’ Cushion:
19.5″ x 19.5″
In this cushion you can use up lots of your colourful scraps, alternate with just a few colours, or use a different fabric in each ‘ripple’ as I have done here.
The cute ditsy fabrics I’ve used here are ‘Katie Jane’ by Makower, which were leftovers from this quilt project.
There are 5 ‘bauble’ shapes in this runner, but you could easily add more or less to suit your table. Wouldn’t this be lovely in Christmas fabrics for a festive table dressing!
The pattern includes instructions on how to make & attach bias binding, and 4 complimentary mats.
Wow! That was a long post! Thank you for sticking with all my ‘curves’!
If you would like to learn how to make drunkard’s path units (& all of these projects) & have a lot of fun along the way, then why not join in with our other crazy creatives and register for our class starting w/c 9th April. More details on classes available here.
By Judith on March 28, 2026 1 Comment (Leave comment)
Have you ever wanted to master satin stitch applique, but are too afraid to try on your own?
Why not surround yourself with like minded creatives and spend a Saturday learning this technique with all the help and support you need!
At the workshop you will not only learn how to set up your machine for satin stitch applique, you can also make one of two projects:
Family Tree Wallhanging:
27″ x 30″
This pretty wallhanging can be made with your favourite treasured scraps, seasonal fabrics, or how about embroidering the names of family members onto the leaves!
This type of applique is called ‘appli-quilting’. The leaves will be appliqued onto an already quilted background. The process of stitching the leaves down combines both techniques of applique and quilting (appli-quilting).
Applique Leaf Cushion:
20″ x 20″
The same leaf motif can have many applications. How about a pretty cushion in fabrics that co-ordinate with your home!
Once again, we are using the appli-quilting technique here, applique and quilting all in one go! Simples!
And how about making a pretty feature of your zipper closure!
So the choice is yours! Join us for lots of coffee, chat and craic in a fun and safe learning environment at Conway Mill.
By Judith on January 1, 2026 1 Comment (Leave comment)
HAPPY NEW YEAR!
I love new year, even more than Christmas. A fresh start, a clean page, renewed focus and motivation. And of course, a little stretch more light in the day!
I don’t set new year resolutions, but I do choose a word for the year, a kind of theme to keep me on track.
This year my word is RHYTHM.
After a momentous year of change in 2017, it’s time to start a new rhythm, in work, at home, in life. I love the organic nature of this word, and I think that’s how I’ll find my new rhythm, gradually, naturally, organically. I’m so looking forward to settling into all the new things that 2017 brought, like breaking in a fabulous new pair of shoes!
There may be more change, I may trip and wobble a little along the way, but each day that God grants me I will put on my new shoes and stride my best stride. I hope you’ll journey with me through 2018.
As is now tradition in blogland, I’ll leave you with my Year in Quilts and a selection of other projects.
I hope as you look back at all you’ve achieved in 2017, it fills you with hope, inspiration and dreams of even more creative pursuits in 2018!
By Judith on October 19, 2025 1 Comment (Leave comment)
Hi there! How’s your week going so far?
I hope you are managing to fit in some sewing time.
This week has had a few twists and turns for me. The Quilting shop where I teach announced they are closing down. Sad news for staff and customers alike.
A few weekends a go I taught my first ‘Rockin’ Robin’ workshop at the Northern Ireland Patchwork Guild.
The ladies were a joy to teach and totally embraced the ‘mixed textiles’ vibe. 12 cute Robins adorned the table at the end of the workshop!
I’ll also be teaching this project in my weekly classes, in the run up to Christmas.
I can’t wait to see many more versions of my Robin cushion appearing here, there and everywhere!
I’ve put together some Robin Cushion kits, using my wonderful collection of tweeds, flannel, linen and vintage cotton. The kits include everything you need to make the cushion front, including the pompom berries, pattern and already enlarged template.
Stuck for a gift idea or fancy having a go yourself? You can get your hands on one of my Robin kits here, but be quick - they are flying out the door fast!
By Judith on June 3, 2026 2 Comments (Leave comment)
Hello everyone, how is your weekend going?
We are slowly getting outnumbered by cardboard boxes here, as we prepare to move house later this month!
So as a little distraction from all the packing, I thought I would tell you about 2 pretty little cushions I made for Pretty Patches magazine.
Back in 2013 I made my daughter these cushions for her birthday. I thought I would have another go using my design, but this time with the summery fabrics from Lewis and Irene, called Flo’s Little Garden.
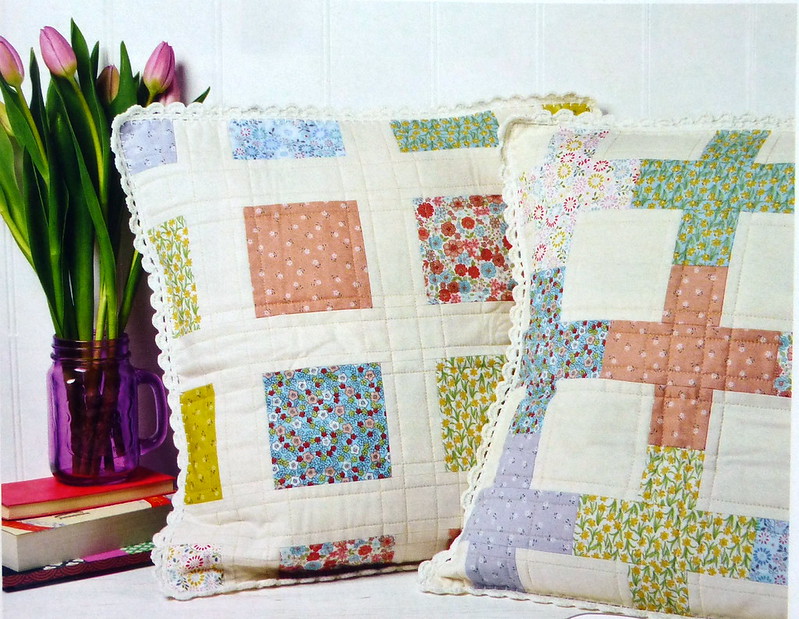
I’ve called them Garden Trellis. The Kona Snow trellis in one cushion provides little windows to view the pretty flowers, while in the other cushion, the ditsy florals are climbing up the trellis.
Simple ‘echo’ quilting make this a beginner friendly project, with an easy envelope closure at the back.
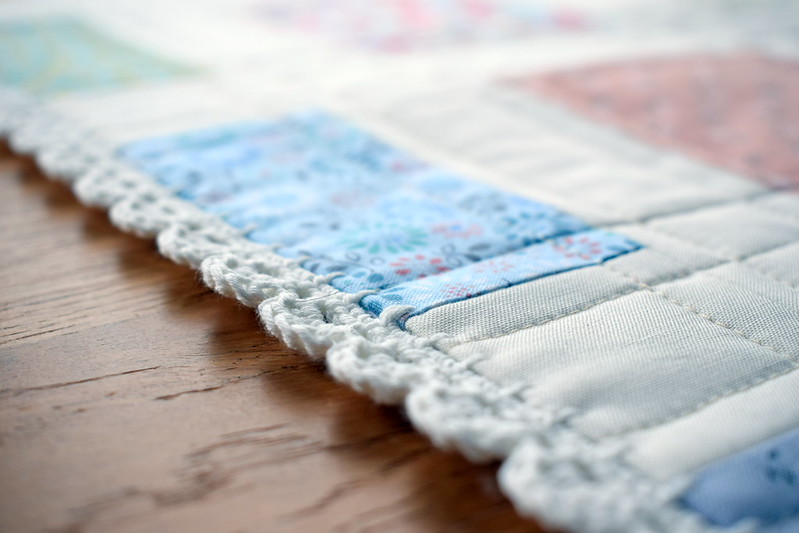
I finished the cushions with a crochet trim. To do this, hand sew a blanket stitch first with the crochet cotton (I used DMC Natura Just Cotton in Ivory). You will need a sharp darning needle with a big enough eye to take the crochet cotton.
The blanket stitches act like a foundation row to start crocheting into. Work 3 double crochet into each blanket stitch, then 3 chain loops into every 3rd double crochet. Finally, work 1 double crochet, 4 treble crochet, 1 double crochet into each chain loop.
Don’t worry if you aren’t a crocheter. The cushions are complete without adding a crochet trim. Alternatively, sew a ready-made crochet trim into the seams between the front and back of the cushion before the final assembly.
So there we have it! 2 pretty, summery cushions, sadly ready for the packing boxes!
By Judith on April 30, 2026 5 Comments (Leave comment)
Hi everyone, can you believe we are through April already!!
It’s been an eventful month for me, especially this past week (more on that another day). But as always, there has been lots of sewing!
I have two great friends that I regularly breakfast with. They have birthdays 2 months apart, and you may remember ‘Vi in Tweed’ made an appearance as one of these birthday gifts.
For my other friend, I made ‘Harriet in Tweed’! I recently inherited a lovely bag of tweed and wool, which set my heartbeat racing!! I couldn’t wait to use them and immediately new a Tweed Hare Cushion was on the cards.
I made the background in the same way as before, piecing strips of tweed and then quilting the seams onto wadding.
The main inspiration for this version of Harriet was a piece of vintage chintz linen. It went perfectly with a piece of green tweed I found in the bag.
Harriet is my favourite of my Woodland Friends. I used Irish linen for her face, ears, feet and tail. There’s just something about her sweet, friendly smile that gets me every time!
This time, I satin stitch appliqued the pieces to the background (bondawebbing them first of course)! I used Aurifil 12wt wool threads for the satin stitching, with a size 100 needle (just use your normal thread in the bobbin).
It’s soooooo satisfying when you have just the right coloured threads!
The back is an open weave tweed, trimmed with the chintz linen and a recycled duffle coat button to finish.
My breakfast friend is chuffed with Harriet. So that’s two happy breakfast friends, with new Woodland Friends of their own!
Wishing you all a wonderful start to the new month!
By Judith on March 17, 2026 1 Comment (Leave comment)
Happy Friday! Doesn’t the working week just fly by!
One of my favourite gifts to make friends are cushions. Don’t you think cushion fronts are just like mini quilts (another fun make!)? Creativity knows no bounds with mini quilts and cushions.
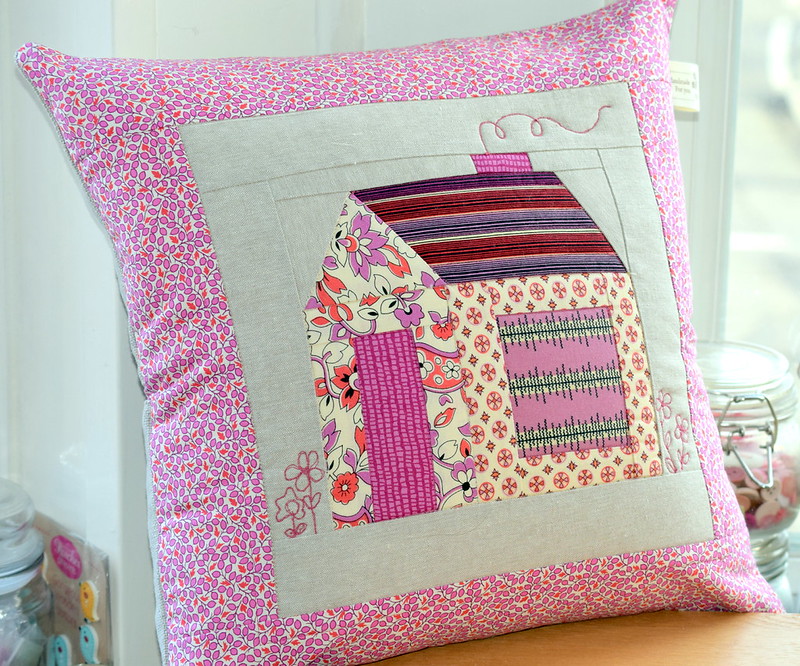
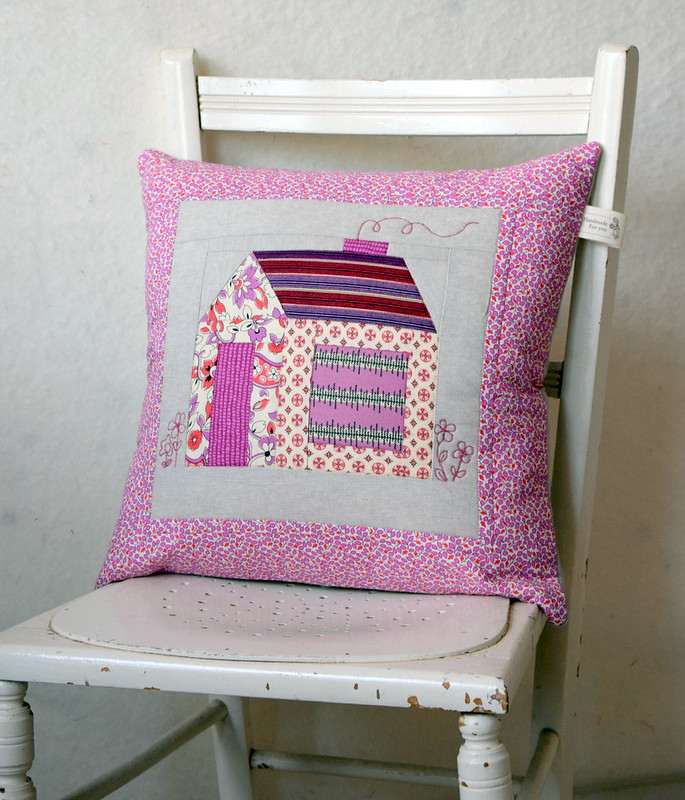
This is my schoolhouse cushion. I developed this pattern a few years back and have taught it several times in classes.
The technique for making the schoolhouse is called Foundation Paper Piecing. It’s a great technique for achieving precise lines and points. If you’ve never tried it before I’d highly recommend it. There are several different ways to foundation paper piece, but I prefer the ‘fold and cut as you go’ method. I feel it’s an easier technique for beginners to learn.
This particular cushion was made as a birthday gift for a friend. I know her interiors have the same lush purples that are found in Denyse Schmidt’s Chicopee range. I think they go perfectly with Irish Linen.
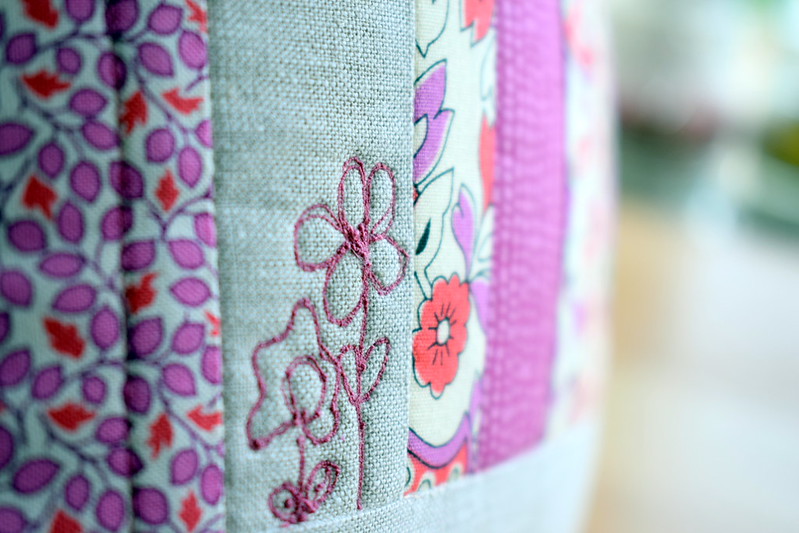
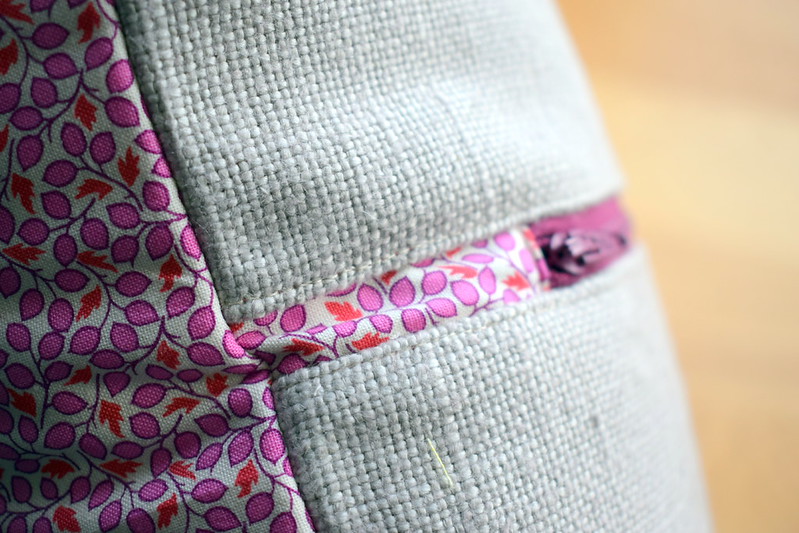
A few free motion sketched flowers and a feature zip closure to finish. (This is one of my favourite ways to close a cushion back, which helps the cushion keep its shape and avoid any gaping when the filler is inserted.)
I’m delighted to report that the cushion has been delivered and well received!
And I’m just as delighted to announce that I’m releasing the Schoolhouse cushion pattern for general sale as from today!
This step-by-step pattern has lots of photos to guide you through all the paper piecing and cushion construction.
But if you are still nervous about trying foundation paper piecing, you could give this beginner friendly, pieced schoolhouse cushion pattern a go instead.
So what technique have you been too nervous to try yet?
By Judith on March 13, 2026 1 Comment (Leave comment)
Do you love to recycle?
I try to do my bit for the environment, but one thing I love to recycle most are textiles.
A selection of my healthy hoard!
I’ve had to curtail my fabric hoarding over the years (!!) but tactile textiles like tweed, wool, linen and corduroy I’ll never be without! A donated coat here, outgrown trousers there, and before you know it, I’ve accumulated a healthy stash with more ideas than time!
Once upon a time we had a thriving linen and textile industry here.
It’s always a joy working with these materials, but especially when making a gift for a fellow ‘tweed’ loving friend.
I enlarged the template for Vi Vixen and bondawebbed the pieces onto a background of patchwork tweed. Then I free motion sketched all the shapes in place. I think the rustic and naive effect of raw edge applique suits this version of Vi perfectly!
In this cushion are offcuts from a pair of my daughter’s trousers (don’t worry, she outgrew them a long time ago!), pieces of Irish linen, a tweed coat, and many other off-cuts I’ve been donated or gathered up. Even the button is from an old duffle coat!
So my Tweed Fox cushion has been gifted and extremely well received. There is so much joy in the making and giving of something already loved. And I know this particular fox will continue to be greatly loved.
By Judith on December 31, 2025 0 Comments (Leave comment)
Another year has flown by!
But what a busy one it has been!
This is what my year in quilts looks like, 17 of which have been published in magazines.
And of course there were many more makes in 2016 - bags, pouches, cushions, bee blocks and more! This is just a sample - phew, I think I need a lie down!
One of my highlights this year has been getting my new website up and running!
And to celebrate a great creative year, I’m launching my New Year Sale today!
Get 20% off EVERYTHING in my web shop and Etsy shop using coupon code newyearsale17.
That’s 20% off patterns, fabric, pre-cuts, haberdashery, kits, including 20% off my new stock of Kaufman Indigo Denim.
This soft denim is 60″ wide, and perfect for dressmaking, bag making and soft furnishings.
So why not celebrate the new year with a bargain! The coupon is valid until Sunday 8th January.
By Judith on December 7, 2025 3 Comments (Leave comment)
In the December issue of Pretty Patches magazine, you might find this cheeky chappie making a song and dance of things!
Many of you will know that my first love in ‘all things fabric’ are recycled textiles. I have a particular obsession fondess for tweed, linen, wool and corduroy.
The only items officially ‘purchased’ in this cushion are the background (Tilda) and the berries!
I love mixing textures and textiles! Here we have sumptuous tweed, soft red wool, tactile cord, a vintage curtain remnant and a few scraps of good old fashioned quilting cotton. Oh what fun I had playing putting these together.
I also love satin stitch applique, but I knew with these thicker fabrics standard thread would disappear into the nap.
So out come the 12wt Aurifil wool threads! These are thick enough to use for hand embroidery, but not too thick to put through the eye of a size 90 machine needle. Win, win! (You can find a great selection here.)
As the design came together, I knew I wanted ‘berries’ in the corners. I scratched my head for a few minutes, and then came up with a plan!
I un-threaded some jumbo pompom trim I had leftover from another project. Then I ‘couched’ or satin stitched 3 thread stems together to create a little cluster of berries. This made it super easy to sew them into the corners of the cushion.
A simple envelope backing and you have the perfect gift for all bird and nature lovers everywhere (not forgetting all the tweed & corduroy lovers too!).
My recycled, chirping Robin may be in the Christmas issue, but like the loyal and territorial real birds, I think he’ll stick around all year long!
So what type of fabrics make your heart skip a beat?
By Judith on November 18, 2025 12 Comments (Leave comment)
The design process can be an interesting one!
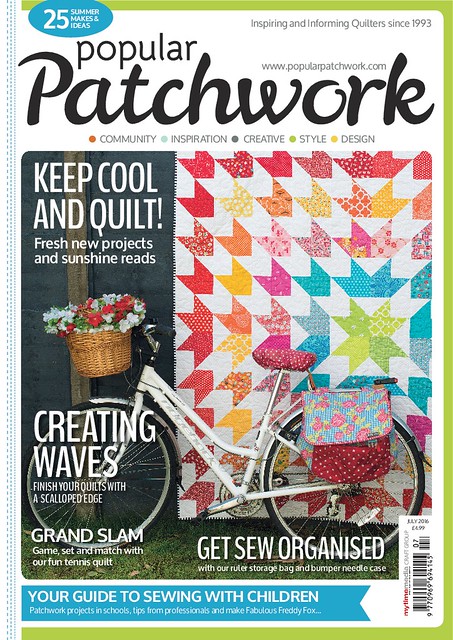
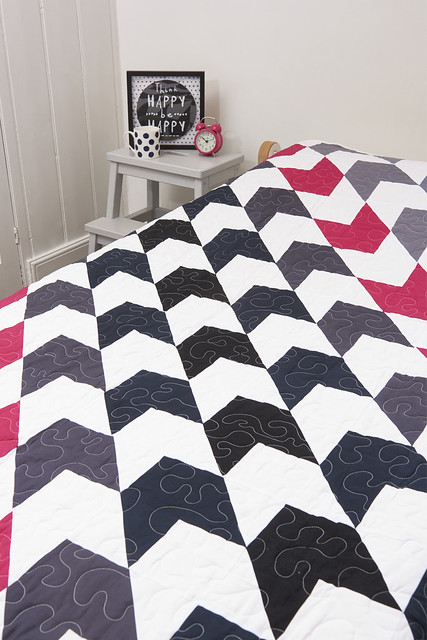
I remember one time in Bee Blessed we decided to make arrowhead blocks. For some reason, when I looked at that block I saw different patterns, and filed those ideas away! Earlier this year I made this Starburst quilt, for a summer issue of Popular Patchwork, and realised one of those arrowhead ideas!
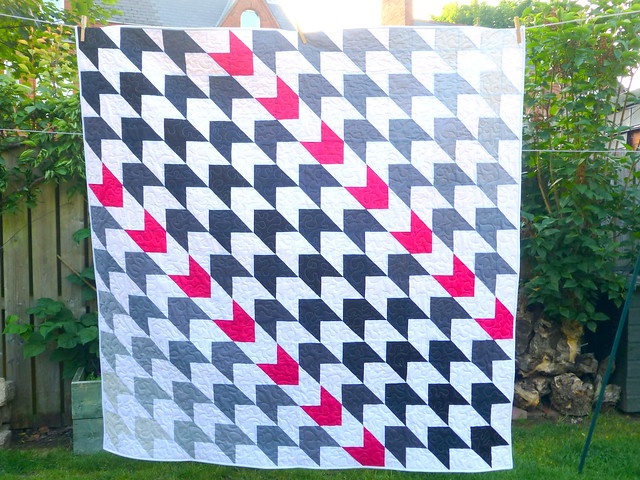
But I needed to ‘scratch the itch’ a little more, and so my modern Houndstooth Quilt came into being (in fact there were 4 other variations of this one!).
Love Patchwork & Quilting magazine fell in love with it and commissioned it for their November issue, which is in the shops now!
Photo courtesy of LPQ
They also asked for a matching cushion:
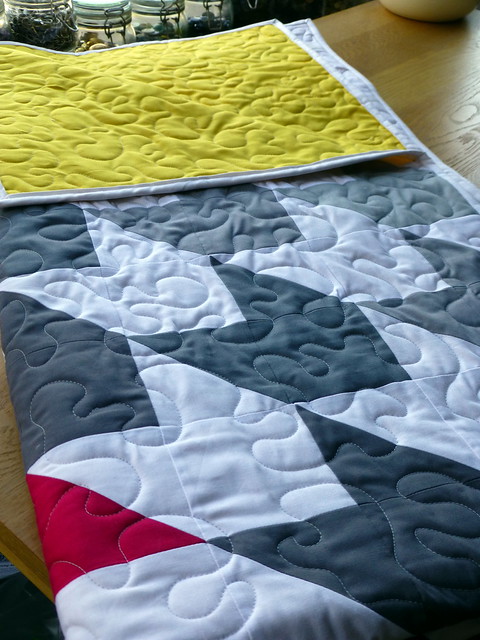
I’ll admit that this quilt is a little more modern than my usual style, but I love the 9 steps of gradation in the Kona solids from Black to Silver. Kona Pomegranate has been one of my favourite colours since I discovered Kona solids - I love how it completely interrupts all that grey!
And just look at that bright canary yellow on the back!
It’s a bad habit of mine not to look at blocks at face value! You never know what you might discover!
By Judith on June 19, 2026 1 Comment (Leave comment)
Hello everyone! My that’s another week gone!
How has your week been?
My June is always a little crazy, but exams are over, Uni daughter comes home for a visit on Thursday, so all is right with the world!
Did I ever tell you that I love recycling denim (only once or twice right! Wink! Wink!).
Sometimes an idea just comes on me and I have to run with it.
This started out as a little denim ‘play therapy’! I had a clutch of Aurifil 12wt wool threads which I knew would marry the denim perfectly!
And so a little fun applique project turned into a cushion commission for Pretty Patches Magazine.
This was my first time using Aurifil 12wt threads in my machine. I used them for some of the details, but not the main satin stitch applique.
I had used Coats Creative thread before in this way, and really liked the effect. But it’s difficult getting a wide range of shades in Coats Creative thread. Aurifil however have a lovely range of 12wt colours, and with a size 100 needle, it ran through my machine like a dream (I used normal cotton thread in the bobbin).
My favourite bit is the uniquely worn part of the ‘sea’ - can you guess which part of the jeans this came from!!
You could easily substitute the denim for quilting cotton if you don’t have spare jeans lying around!!
So if you fancy dreaming of sailing away on the summer seas, then pick up a copy of Pretty Patches (July) today!
By Judith on April 20, 2026 0 Comments (Leave comment)
We had the most gloriously sunny day today!
I tried to capture the light on the limited features in my small garden.
Isn’t light so inspiring, and seems to make everyone feel much more positive! One of my daughter’s names means ‘bringer of light’ and she does just that, every day!
And here are a few more leaves to tell you about!
Photo courtesy of Sewing World Magazine
This is my Applique Leaves Cushion in the current (May) issue of Sewing World, out now!
Applique can be a little intimidating for novices, especially when thinking of satin or blanket stitching the edges.
‘Raw edge applique’ is a great way to introduce new shapes and pictures to your quilting.
This pattern uses bondaweb to fix the stem and leaves in place, and simple top stitching close to the raw edges completes the picture. No special foot needed, no changing the stitch settings on your machine. Simple, fun and quick!
So if you’ve never tried applique yet, why not have a go at raw edge applique! The possibilities are endless!
By Judith on March 23, 2026 0 Comments (Leave comment)
Are you a ditch quilter?
Ditch quilting is when you quilt in the seams of your patchwork, so that it won’t be seen! This secures all 3 layers (top, wadding, backing).
Traditionally, quilts and other quilted projects were always ditch quilted first, before any decorative quilting was added.
However, as with most things, attitudes and trends have changed. No longer do we have to try to ‘stay in the ditch’ and hold our breath as we try to get from one end of a seam to the other! (Imagine how nerve wracking that is for a beginner!).
As long as you quilt sufficiently (manufacturers state the minimum intervals on wadding packaging) so that there is no bagging between layers, then ditch quilting isn’t always required.
However, that doesn’t mean it can’t still be used as a quilting technique in its own right. Sometimes when you have pretty fabrics and an effective design, decorative quilting isn’t required.
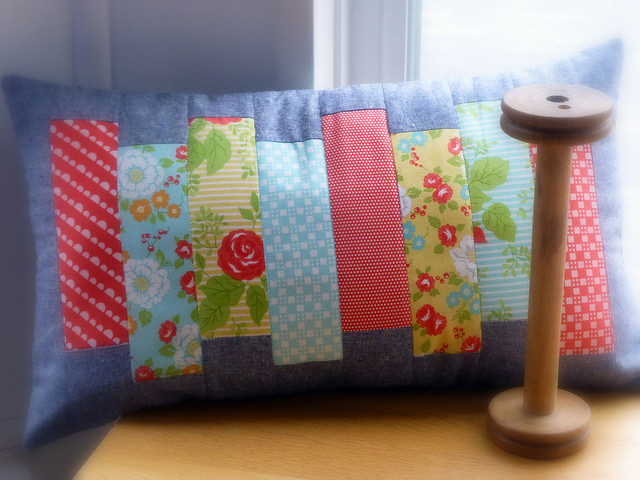
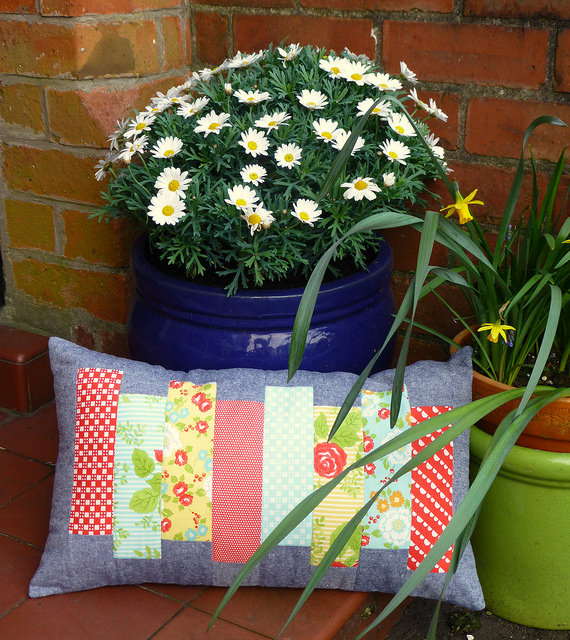
This is my Staggered Strips Cushion. Hopefully you can tell that it is quilted without seeing the quilting!
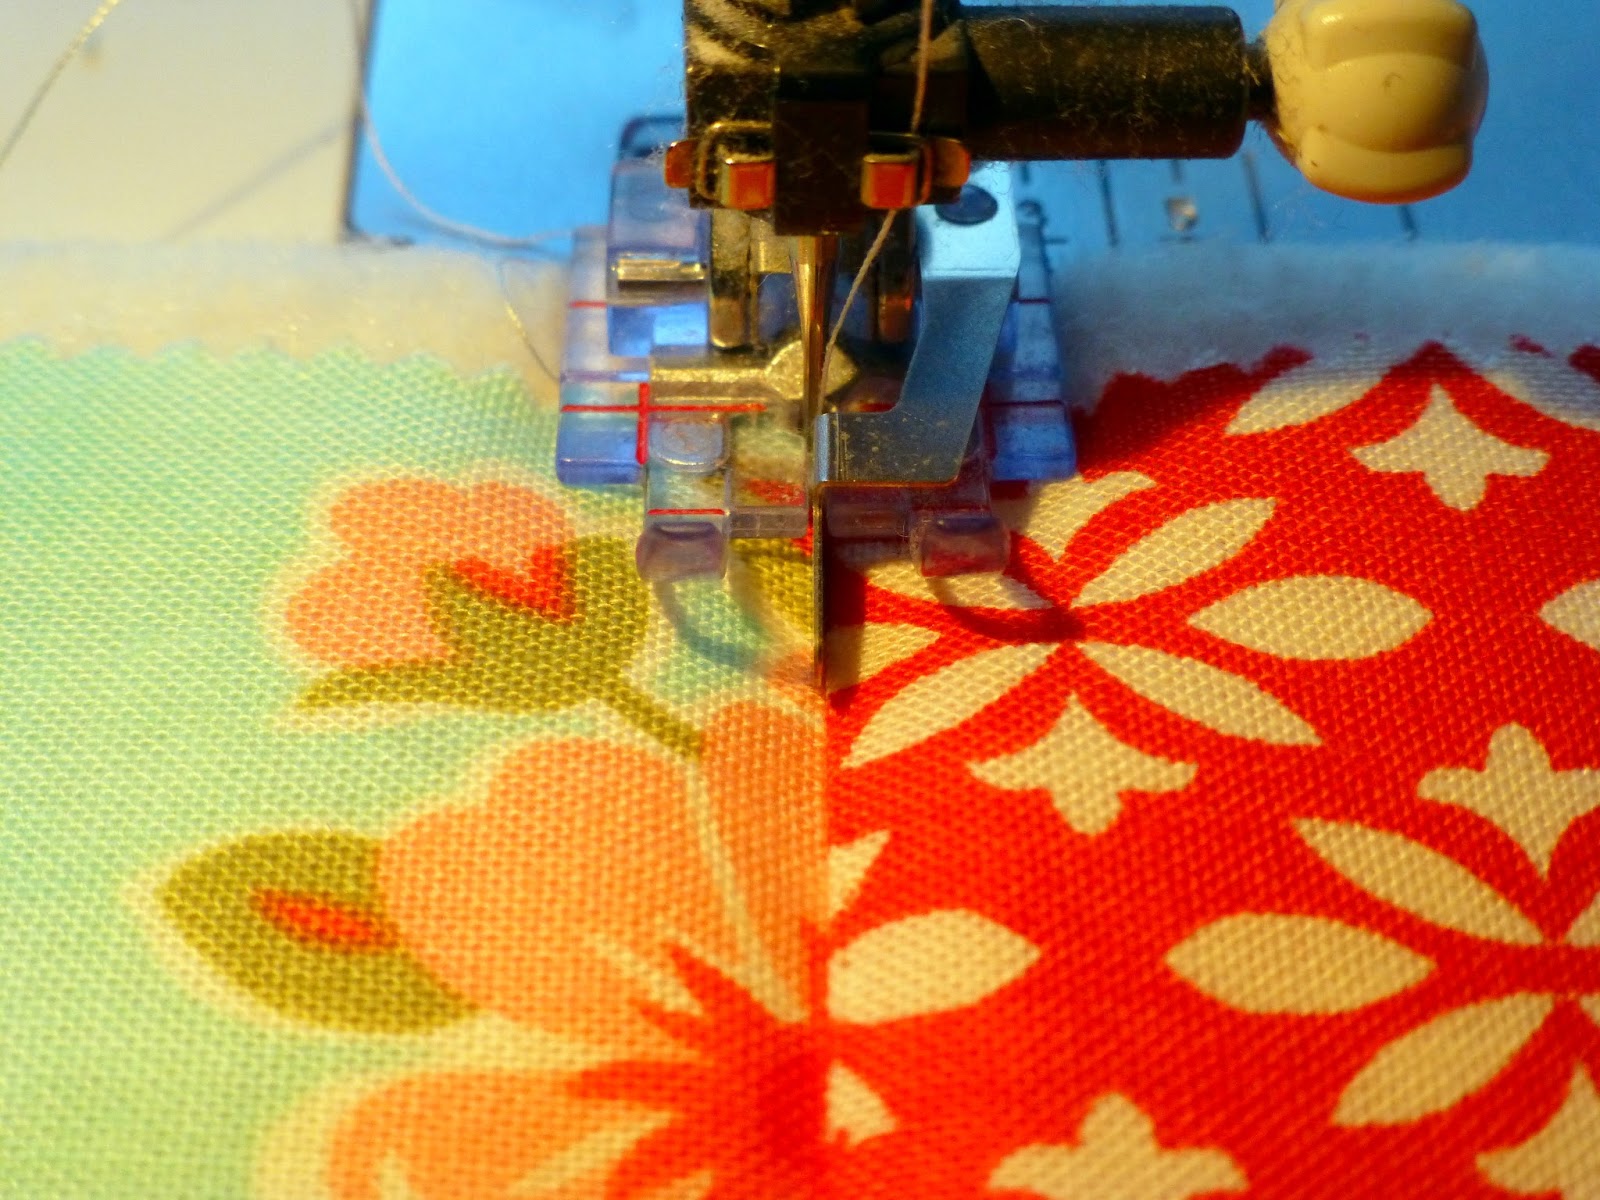
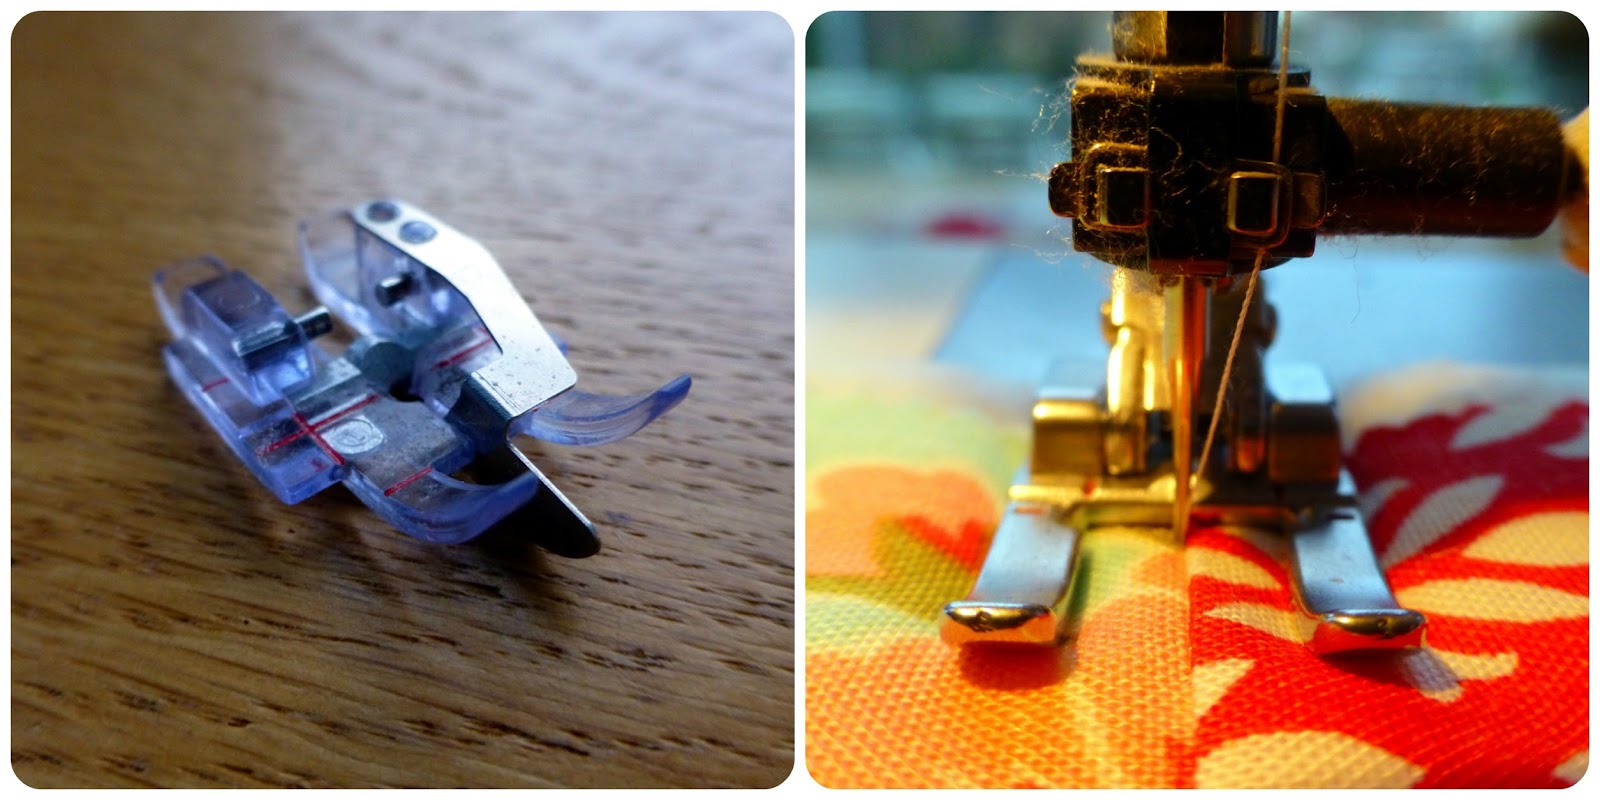
I have quilted in all the vertical seams using my ditch quilting foot. If you don’t have a ditch foot, use an applique or open foot to maximise your view of the seams and ditches!
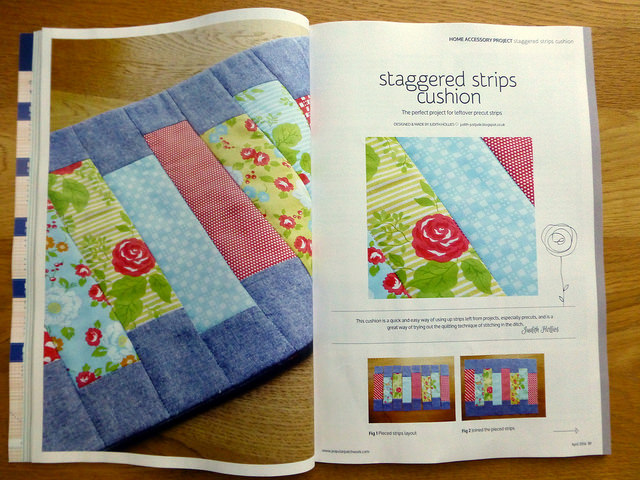
If you would like to learn more about ditch quilting, get my step by step guide in the current issue of Popular Patchwork (pg 34). You can also get the pattern for my Staggered Strips Cushion.