By Judith on September 7, 2025 0 Comments (Leave comment)
I love seeing the same pattern being made in a wide range of fabrics and styles!
My Betty Bag is growing in popularity and I want to show you some stunning finishes!
Aren’t they fabulous!
I just love how stylishly practical they are, ready for some serious use about town!
And 3 more to show you.
These are Betty Bags made by my #threadsacrossthesea buddies, Trudi, Sarah and Di.
Because we weren’t able to have our annual meet up this year, we had ourselves a secret swap, making Betty, and had an exciting reveal over zoom at the weekend. I received the first one pictured, which was from the super talented Trudi (@Trudi_wood), made in stunning Art Gallery Fabrics, received together with this package of cuteness!
This is a free motion sketched picture by Stitched Up by Samantha! Isn’t it gorgeous! Totally my kind of art!
Thank you everyone for taking part in my Betty Bag class, and to Trudi for my very own Betty!
The Betty Bag pre-recorded YouTube course is available here.
By Judith on September 3, 2025 0 Comments (Leave comment)
I’m super excited to let you know about my latest teaching project:
Kindred Spirits Quilt (Coastal) 64″ x 76″
This is the Kindred Spirits Sampler Quilt and I will be teaching this as a weekly quilt-along, starting 14th September through to end January ’21.
Each week there will be a new block to make and a new technique focus (some blocks have 2 weeks allocated).
This was a project I already had in mind for my actual classes at Conway Mill. But as I’m not back to running my classes yet (thanks to Coronavirus!) I thought I would go ahead and teach it online! And that means anyone can join in!
This quilt-along is all about building skills, building confidence and building community. Here are a few more thoughts on what this quilt-along represents:
So what do you get?
All the teaching will come in the form of
pre-recorded videos emailed each week into your inbox. These videos will include accurately cuttin fabric and using templates. The videos mean you have complete control -press pause, replay and sew at your own pace
PDF documents (colouring sheets & cutting instructions)
Professionally art-worked templates (as needed)
and you will be supported every step of the way through our interactive social media groups where you can ask questions, share tips and ideas, access bonus features, make new friends and create community!
And here are a few other colourways you could consider:
The full list of materials and equipment needed is available here, as well as the schedule of our block making throughout the 4 months.
And finally, by taking part in this Quilt-Along, you will also be supporting a charity close to my heart.
£5 from every registration will be donated to Shared Threads, who make reuseable sanitary pads and hygiene packs for women and girls who are struggling with period poverty at home and abroad.
Here’s Kirsty to tell you more:
If you’d like more information about the work of Shared Threads or how you can get involved, check out their website here.
And so the countdown begins!
I do hope you will consider joining us for an Autumn term of fun, learning and connecting!
(Booking will be available from 14th September here)
By Judith on August 2, 2025 3 Comments (Leave comment)
We are delighted to announce our next online class:
The Betty Bag is a slimline purse designed for holding your essentials without creating a bulky bag!
Whether you are travelling, out for the evening or just want a hands free shopping experience, the Betty Bag will perfectly meet your needs.
The zippered compartments are great for coins and notes (maybe even a second currency!). In behind those there is space for a passport and phone, and in behind that is a credit card slot.
The strap can be made in 2 lengths, a shoulder strap or a crossbody strap.
And it is removeable too, so you can easily convert your bag into a stylish clutch purse!
The class will take the form of videos via YouTube, so you can stop or pause the steps to suit your pace and replay sections if you need to watch steps again.
Initially the class will be released on Monday 10th August in 3 weekly parts to my existing class ladies before being released for general sale as 1 complete video on Monday 31st August.
25 of my regular ladies have had lots of fun making the bag the past 4 weeks, and the results are amazing!! Here are a few of their photos.
Aren’t they beautiful!
I love seeing all the different fabrics used, which totally change the personality of the bag!
Well done ladies! I hope you (& your recipients) get lots of enjoyment out of your fabulous bags!
Here’s another little resume of what the YouTube class covers:
*hand applique (Needleturn)
*machine applique (Satin and blanket stitch)
*suitable materials for the bag
*quilting
*reinforced divider pocket
*snap fasteners for divider pocket & alternatives
*making handles
*handbag construction
The class consists of 1 YouTube video and 2 PDF files. You can purchase the class here.
In your order confirmation email you will receive links to 2 PDFs – one is the full list of materials needed. The other is the heart template which also includes the link to the YouTube video. Copy and paste this link into your internet browser to access the video.
When printing the heart template, either select ‘Actual Size’ or deselect ‘Fit To Page’ printer settings.
I hope you’ve enjoyed seeing some of our class finishes (always my favourite part!).
Janet made 2 of the same cushion, so extra kudos to you Janet!!
Aren’t they gorgeous! And I know there are a few more still in the making!
Well done ladies for your amazing results and bearing with the imperfections in my first online class and being patient with our Zoom sessions!
I’m so looking forward to our next class starting tomorrow! Nothing beats actual ‘in person’ classes, but for lockdown, this is definitely the next best thing!
By Judith on May 31, 2026 0 Comments (Leave comment)
We are still very much in lockdown here, so ‘teaching’ has had to look very different for me.
Aside from my free video tutorials on YouTube, I trialled an online class last month with my ladies - the Causeway Hexie Cushion.
Feedback from the ladies was really positive and I’m looking forward to showing you their results!
Spurred on by their brilliant results and encouragement, I’m making another class available - the Applique Hearts Boxy Bag.
This class will be available first to my ladies from 8th June, and then to the general public from 6th July.
As before, the class will consist of 4 weekly YouTube videos, with an optional zoom session at the end of each session (existing class members only). This is when we check in with each other, talk about any issues, swoon over our progress and fabric choices etc. and generally stay connected (as best we can!).
This boxy bag design is a variation on my original Boxy Bag class I designed and taught way back in 2011!
I often call it my book bag, because the short handles and sturdy body really lend themselves to carrying heavy books and files, to work, college, church or the library!
However, I also think it would be a great project bag. There is a handy divider pocket which could keep a pattern book with lots of room in the main bag for a knitting or crafting project.
I chose to needleturn my hearts onto the bag, but as you will see in the ‘what we cover’ section below, I also show you how to machine applique too!
So here’s what we will cover in this class:
*hand applique (Needleturn)
*machine applique (Satin and blanket stitch)
*suitable materials for the bag
*quilting
*reinforced divider pocket
*snap fasteners for divider pocket
*making handles
*handbag construction
Many of the materials I have used in this bag are available in my shop.
So if you need another practical and sturdy bag in your life, or can think of someone who would love one, why not join us on either 8th June or 6th July for some step by step handbag making fun!
By Judith on April 29, 2026 0 Comments (Leave comment)
It seems like an age since we were last in class creating a holy mess with strips of fabric, wool fibres, thread and hospital bandages (don’t ask!!)!
We were well in the throws of making Textile Art Pictures, using a water soluble fabric technique for the background, and then building up a picture on top.
I’ve had a few finished photos sent to me of completed pictures, and they are pretty amazing!
Aren’t they fab! I love how each one is uniquely different, expressing favourite thoughts, colours, flowers and words.
I know this particular project was a real hit with some of my ladies, who had ideas and plans for several more pictures!
If you’d like to have a go at a similar technique, check out my free tutorial here on how to turn little scraps into applique shapes using water soluble fabric (available to purchase here).
And it’s soo lovely to see your scrappy pouches, made using my first YouTube tutorial.
Thank you everyone for sending me your pics! They bring a smile to my face!
By Judith on February 16, 2026 1 Comment (Leave comment)
At the end of February we will be having a half term break from classes.
Which means, a new block of classes kicks off in March up until Easter.
And a new block of classes means a new (optional) class project.
We’re going to dip our creative toes into some textile art this term, having unadulterated play-time with mixed textiles and medium.
I’ve 2 class samples to showcase several fun techniques.
Picture 1:
This is a 12″ picture in a box frame.
The background can be made with strips of torn linens, cottons, lace, voile, broderie anglaise and anything else light weight which is textured or can fray well. I even included fine strands of felting wool!
We then use a water-soluble fabric to matchstick quilt the background before adding our composition on top.
I’ve chosen some flowers and seed heads, but you could quite easily go with a bird, meadow or beach theme. Let your creativity run wild!
In the making of my picture I used the following techniques:
couching
free motion embroidery
paper aging
embellishing
I also included some cut out some embroidered yellow flowers from an old duvet cover!!
What a lot of fun! You’ll never look at textured fabrics, bedding and apparel in the same way again!
Picture 2:
I love word art! There’s nothing quite like the perfectly spoken word at exactly the right time to create profound impact and legacy.
If you enjoy poetry and literature you can have so much fun with your composition here. Or how about the name and meaning of a loved one? What a special gift.
The background is made in the same way as picture 1. I’ve also included free motion sketching and printed text here. This time though, I’ve embellished my picture with text printed onto fabric. You need an inket jet printer and freezer paper do to this.
I’m so looking forward to seeing what artistic impressions are released when this class starts in March!
If you would like to join us for some textile creativity, check out all the classes and vacancies here.
By Judith on February 2, 2026 0 Comments (Leave comment)
In our current block of classes we are looking at tucks and pleats.
You may remember I had made 2 examples of tucks for our classes, but at the time was still working on a pleats sample.
And here it is:
The pattern for this pleated bag is by Lisa Lam (U-handbag.com) and is called ‘For Pleats Sake!’. You can find the free tutorial here.
The tutorial doesn’t include quantities for the exterior and interior fabrics.
If you are using non-directional fabric you will need 0.5 metre of both. However, if you have a direction to your pattern which follows the width of the bolt, you will need 0.75 metres.
And a further note on the fabrics. I used ‘deco’ (decorating) weight fabric (or lightweight curtaining) from Ikea. This fabric gives body to the bag, pleats beautifully and negates the need for interfacing or fusible fleece.
I used the same weight for the lining (a vintage curtain) which also gets pleated. However if you wanted to use quilting weight cotton I recommend using a heavy weight sew-in stabiliser (rather than fusible fleece) on both the exterior and lining. Spray baste the sew-in stabiliser rather than using a fusible heavy weight stabiliser as this could resist the light weight cotton and cause it to bubble.
Sewing the faux leather handles through the exterior layers only can be tricky (the handles can’t be held in place with pins and the needle comes out awkwardly between the exterior and lining!). So try sewing through both layers and covering the visible back stitching with glued on fabric or leather scraps.
P.s. you want to use really strong thread to sew on your handles, like linen, perle cotton or 6 strand embroidery floss.
The bags currently being made in class are gorgeous! I can’t wait to show you them at half term, with the equally beautiful pleated pouches and cushions! It’s a hive of wondrous activity!
(Want to know the difference between pleats and tucks? See here)
By Judith on December 6, 2025 0 Comments (Leave comment)
Well it’s hard to believe that we only have 1 more week of classes left for 2019! Where on earth did that year go!!
I can’t wait to show you the beautiful wreaths folks have been making as part of our (optional) class project this term. They’re stunning!
But before one term is out I always present to my classes what the next term’s (optional) class project will be.
Our technique focus next term will be Pleats & Tucks.
The main difference between pleats and tucks is that pleats are formed by folding the same length of fabric into folds which are only stitched down at the top and bottom ends, whereas tucks are constructed separately and then sewn into the project.
You will of course be more familiar with seeing pleats and tucks in clothing and apparel, but I love how different techniques in textiles can cross over into other disciplines, usually with a little creative tweaking!
So far I have 2 class samples made (both tucks!), but I hope to have one more pleated sample completed before the start of term!
Cushion with Tucks:
There are many different effects you can achieve by manipulating tucks.
I really like the ‘spread’ effect you get from this variation of the Wave Tuck. You can see each of the feature fabrics standing out nicely against the black Essex Yarn Dyed Linen.
Zippy Pouch with Tucks
This is an example of Twisted Tucks. Before sewing along the bottom edge of the pouch, the tucks are twisted back, revealing the secondary colour. This effect adds a lovely decorative touch to bags and pouches.
So that’s us (almost) ready for next term. If you would like to join us for some creative sewing fun, you can see all the available classes here.
In the meantime I have a few Christmas presents to make, and the small matter of workshops for February’s Retreat to make too!
By Judith on October 18, 2025 2 Comments (Leave comment)
We have one week left of our current block of classes before the half term break.
Folks have been beavering away on their Soft Toys and Sock Monkeys - can’t wait to show you our amazing menagerie!
But looking ahead to our final block of classes of 2019, our optional class project will help to sharpen our focus on Christmas preparations!!
The original pattern for the Fold ‘n Stitch Wreath is by Poorhouse Quilt Designs, available here.
But then I saw this amazing triple version of the wreath and thought I’d have a go at making my own interpretation of it.
I have used 3 fabrics in my double wreath. I like the versions which have a 3rd fabric peeping out at the edges of the folds. I’m a bit fussy when it comes to Christmas fabrics so I chose 2 Tilda fabrics (a Christmas red and a non-Christmas pink) and a non-Christmas cream by Lewis & Irene.
While the construction of this wreath may look complicated, let me assure you that it isn’t (I love it when patchwork deceptively portrays complexity!).
Each row is made the same way. The repetitve nature of making square ‘coasters’ and cleverly joining them into a circle means you can stop at a single wreath (as a candle mat or door-hanging) or keep going and make additional rounds.
I stopped at 2 rounds and decorated the centre with a Scandi birdhouse. But at the class you will have the option of making a single, double or triple wreath.
And if you like your bling, you’ll love decorating your wreath! Metallic threads, beads, bells and baubles are all up for grabs! Let your Christmas creativity go wild!
And of course, if you’re not a Christmas fan, why not make a beautiful autumnal or winter wreath!
Lots of options and variations are open to you with this optional class project.
The new block kicks of w/c 5th November and runs for 6 weeks. Booking available here.
By Judith on September 19, 2025 0 Comments (Leave comment)
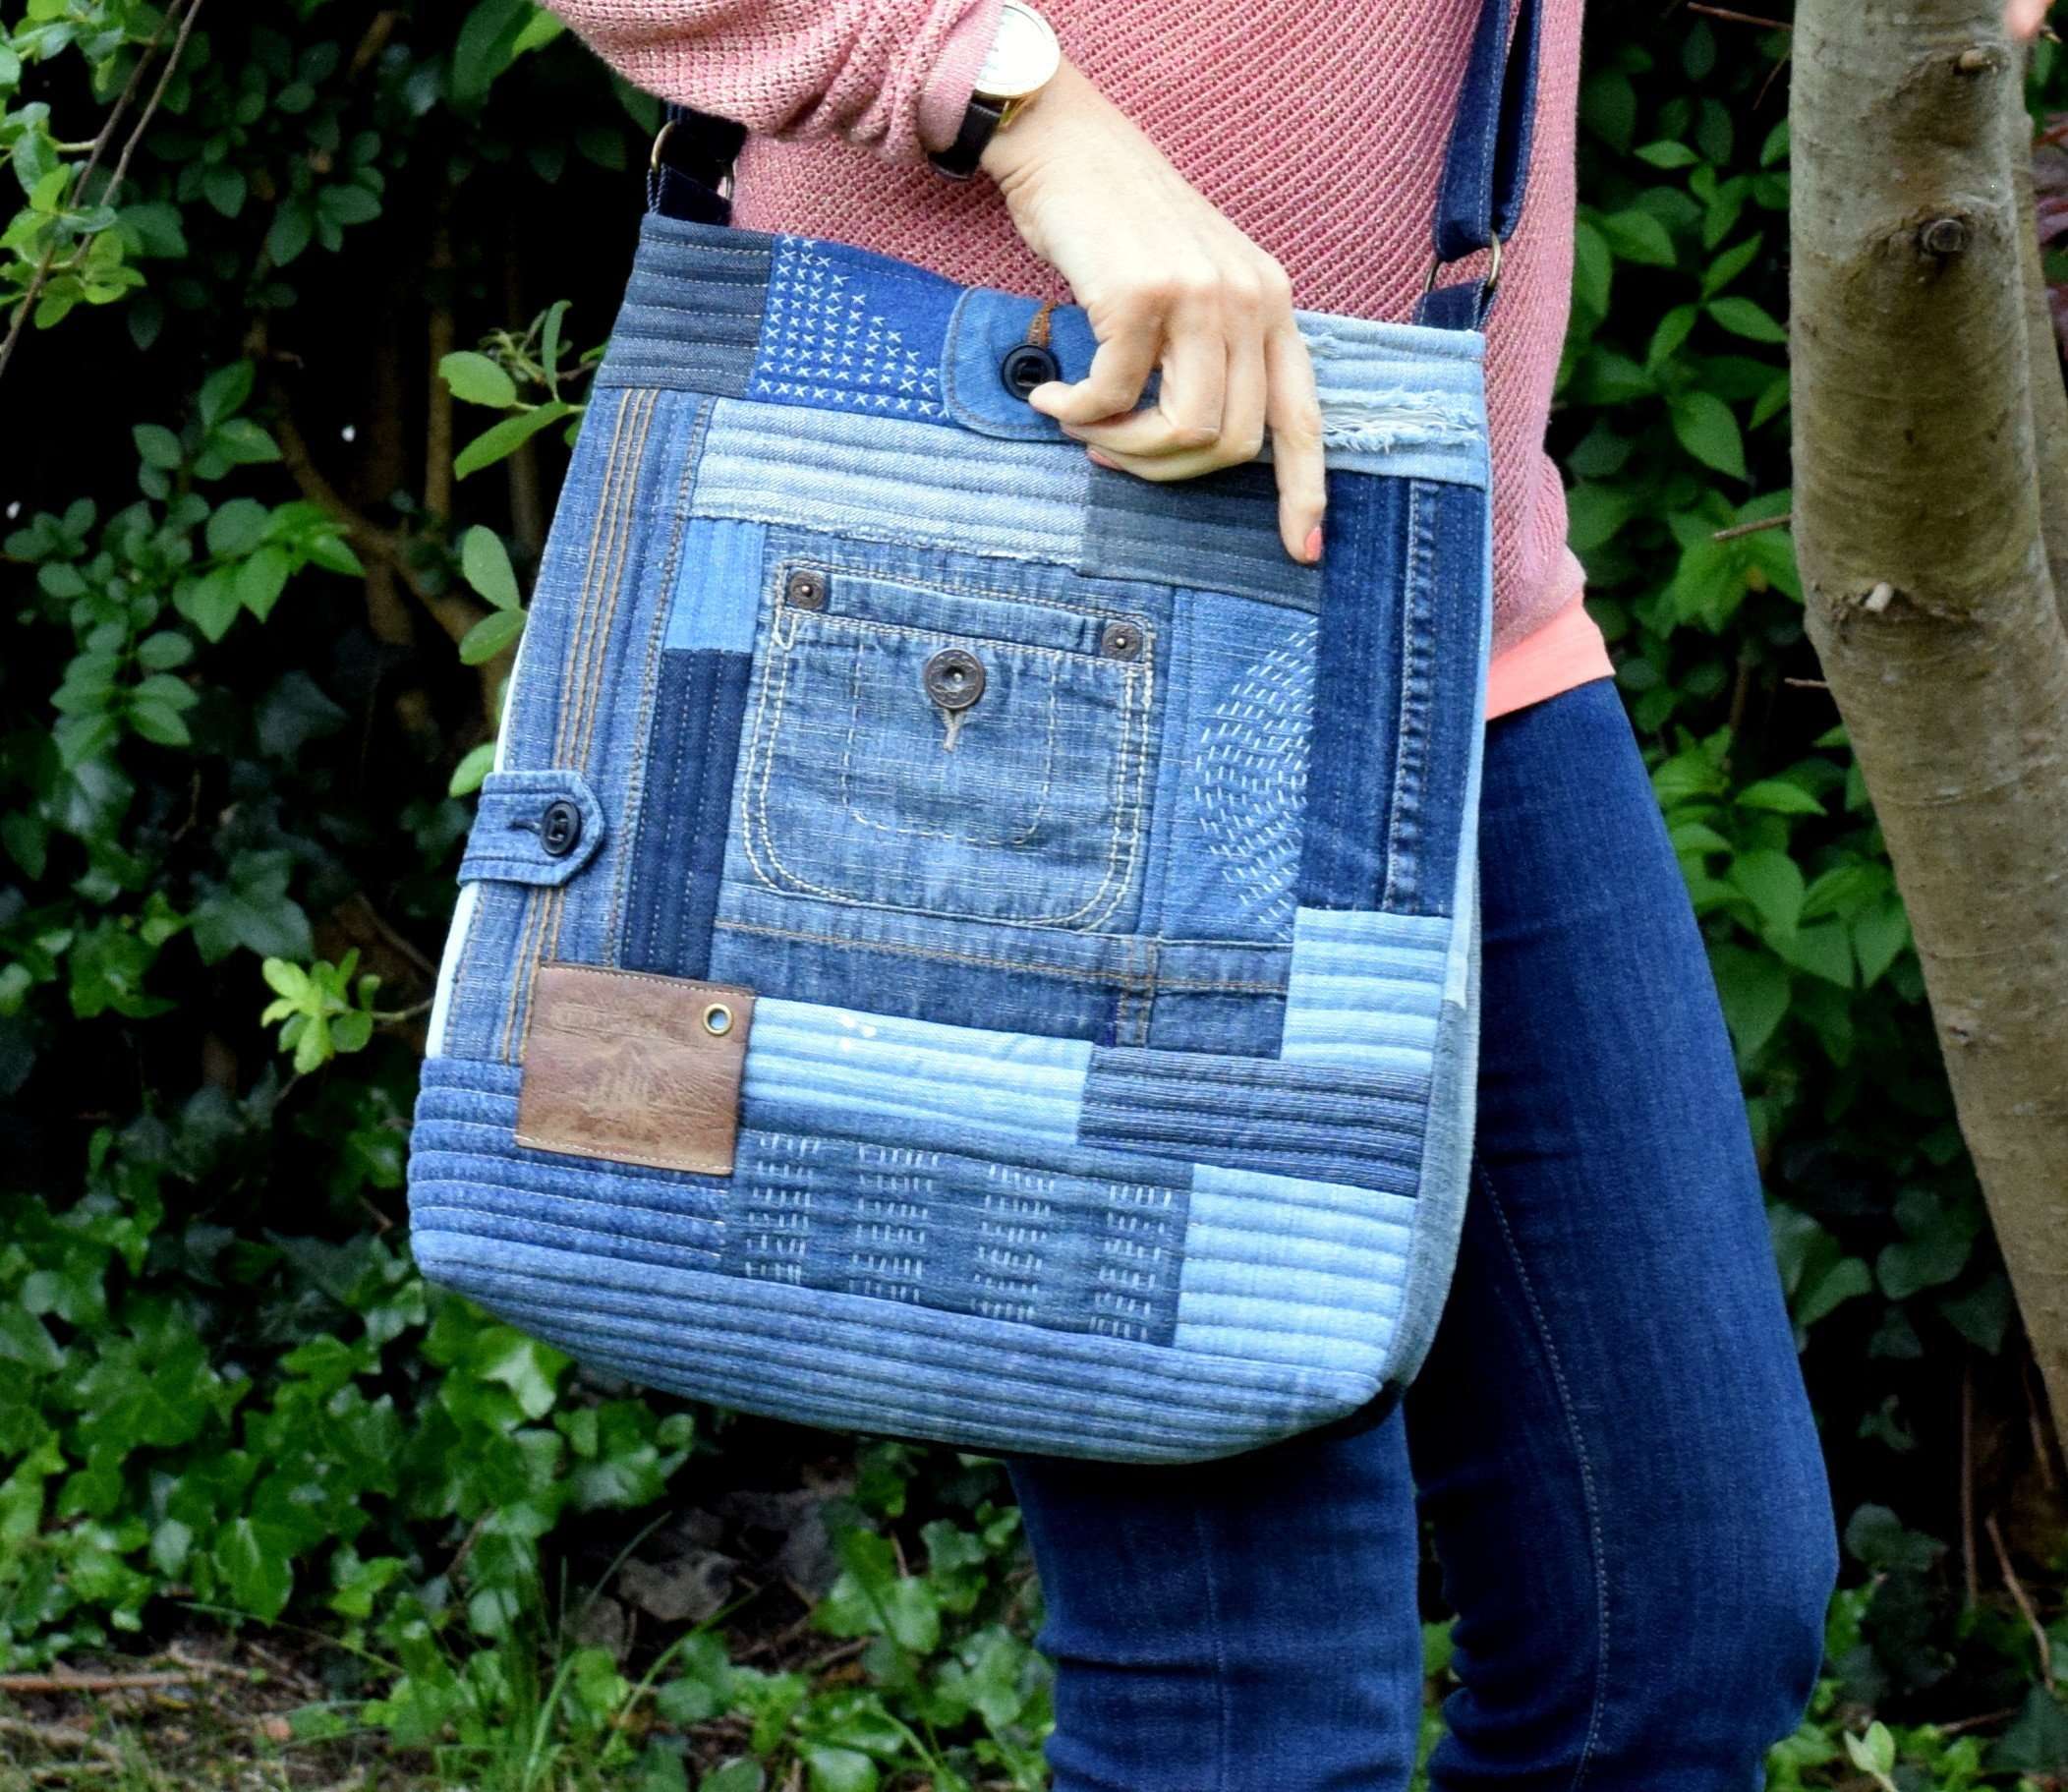
Our studio in August looked a little bit like a jeans factory, as many pairs of jeans were massacred in the honourable pursuit of making my Boro Denim Bag pattern.
Repurposing projects are among my favourites, and it was exciting to see the ladies’ bags grow in a very organic, non-prescriptive way.
While some of the techniques are the same e.g. ‘quilt as you go’ and measured bag construction, each bag looks uniquely different because of the different denim placements and features used.
Like an archeological dig, there was much excavating through the pile of jeans for pockets, loops, leather labels and interesting design features which were rescued and treasured for embellishing the bags!
Doesn’t Glenda looked pleased with her finished bag!
There are a few more bags that are still in the making, but to all my ‘bag ladies’ I’d like to say a big well done on your repurposing and bag making skills! The variety and creativity you showed in the hand and machine quilting of your bags was inspiring!
If you would like to have a go at your own Denim Boro bag, you can find the pattern here.
(Newsletter subscribers will have received a 50% off coupon code for this pattern in the Autumn ’19 edition - expires 25th Sept.)
By Judith on August 14, 2025 1 Comment (Leave comment)
Last Saturday was sultry and wet, the perfect day for sewing!
We had our ‘Quilt Top In A Day’ Workshop at the studio, with 7 ladies making either my Mama Boho or Baby Boho Quilt pattern (see if you can spot my Mama Boho Quilt in the picture below!).
Mama Boho is a great quilt design for using large and bold prints, and the simple half square triangle construction means blocks are made in double quick time!
Look at these dramatic Mama Boho Quilts …..
70″ x 88″ finished
And while there is a little waste generated from the triangle corners that are cut away, even these can be repurposed into a co-ordinating cushion cover!
The Baby Boho quilt is ‘layer cake friendly’ - just look at these cuties!!!
38″ x 48″ finished
Aren’t they adorable!
Well done ladies on a productive day sewing your flimsies!
So if you need a quilt made up quickly why not try Mama or Baby Boho Quilt pattern, available here.
By Judith on August 4, 2025 0 Comments (Leave comment)
It’s only 4 weeks until my Autumn term of classes starts back!
Our classes are ‘open’, which means they are mixed ability and you can work on any Patchwork and Quilting project you like, getting all the help and support you need.
But I also provide an optional class project each term. These might focus on a new technique, one of my new patterns or a new challenge to keep growing those brain cells!
In our new term we will be tackling soft toys!
I know these will be a hit with Grannies, Mummies and big kids alike!
I’ve curated 3 toy patterns from around the creative web to tempt my lovely ladies to try these cute 3d shapes!
Francie Fox:
Pattern available here (by Angela Lea Designs)
This cute girl was a dream to make, following Angela Lea Designs’ fab pattern.
She finishes at 11.5″ tall and has moveable ‘arms’ and tail.
I went a little less scrappy than the original pattern, but still had fun choosing from my Art Gallery scraps! Yum!
Ric Rac Trunk Show
Pattern available here (by Jodie Carleton)
This little darling stands proud at 10″ and the pattern includes 3 trunk variations.
It also includes an adorable ‘Elmer-esk’ patchwork version!
The Purl Bee Penguin
Free pattern available here (by Purl Soho)
This cute little fella (I’m calling him Percy!) is the smallest of our curated toys, at only 9″ tall.
The free pattern and templates are really clear, and could be easily enlarged if you’re after a bigger penguin.
So there you have it!
3 gorgeous soft toys to make, and 8 weeks in which to make them!
If you would like to enrol for a class, to make these soft toys or to work on your own project, you can get registered here (places are limited).
By Judith on July 31, 2025 4 Comments (Leave comment)
I’m excited to share with you my latest bag pattern!
This is my Denim Boro Bag, created from some ‘denim playtime’ in my sewing room, and crafted into a 5 week class starting today.
I always love playing with denim on my sewing machine, but I was surprised at how much I also enjoyed the boro/sashiko style hand stitching! (You can read more about my joyful process here.)
And my pattern testers told me they also enjoyed making their bags! Just check these out….
by Jennifer aka Patchwork Mummy
by Wendy aka Bothybird
by Nicola aka Nicola Foreman Quilts
by Mary aka Handmade by Mary Emmens
(no picture yet from Di aka Willowbeck Designs)
Aren’t they amazing!! And it’s great to hear that the bags are being used and loved!
A big thank you to my 5 pattern testers for your constructive feedback, comments and support!
And if you would like to have a go at your own Denim Boro Bag, the pattern is available here.
By Judith on July 1, 2026 0 Comments (Leave comment)
Each term we have an optional project or technique focus, where ladies can try their hand at something new!
Monsoon Quilt
In our Easter to Summer term some of my ladies decided to try their hand at my recent Monsoon/Frost Quilt Pattern.
This project was all about accuracy, both in cutting and piecing lots of triangles (with pesky bias edges). Everyone found it a little tricky at one stage or another, learning how to create pointy points, correct fabric placement or bringing the blocks in on size.
But I’m so proud of my ladies for rising to the challenge and pushing through their comfort zones to accomplish a more advanced pattern.
Here are a few finishes and progress shots, but there are quite a few more still in the ‘Work In Progress’ category!
I’m hoping with the summer recess I’ll see a few more Monsoon and Frost finishes by September!
If you would like to make your own version of Monsoon or Frost, the pattern is available here.
By Judith on June 9, 2026 4 Comments (Leave comment)
Following the immense fun I had making the patchwork denim pouch for my daughter’s friend, I just had to make a bag in the same boro style!
Oh I had a ball mixing one of my favourite textiles (denim) with one of my favourite pastimes (patchwork & quilting) while fulfilling one of my favourite values (recyling!).
This is a great project for using up all those torn and unwanted jeans, denim scraps and interesting bits!
If, like me, you love recycling and not adding to landfill, why not join us for some repurposing and patchwork fun at our Studio at Conway Mill, Belfast.
Over 5 Wednesday evenings I’ll show you how to reuse your old jeans to make a patchwork and quilted cross-body denim bag, with feature ‘boro’ stitching.
There’ll be lots of advice on the best threads and needles to use, how to quilt the denim, putting a zippered pocket into the lining, and how to make an adjustable shoulder strap.
If you too would like to have a ridiculous grin like mine (!!) come and join the repurposing fun! Booking available here.
By Judith on May 20, 2026 2 Comments (Leave comment)
Last week in classes I taught a short lesson on the Log Cabin Family of blocks!
I’m going to take you through the 3 main categories in a series of posts, with a mystery post to finish the series!
Part 1: Log Cabin
Part 2: Courthouse Steps
Part 3: Pineapple
Part 4: Watch this space!
I demonstrated a few variations within each category, but there are many more than what I can show you here (follow the Pinterest links for lots more inspiration!).
(All the sample blocks have been made using Handmade by Makower)
Part 1: Log Cabin
1 Traditional:
The standard log cabin block starts with a square centre (traditionally this would have been red) adding ‘logs’ around the centre square (either clockwise or anti-clockwise) in rounds. All the logs are the same width.
The traditional log cabin block was the first block I learned, and made a little quilt for my young daughter using chopped up clothes and linens!
You can find a tutorial on how to make a 12″ traditional block here.
2 Colour Rounds:
This variation of Log Cabin follows exactly the same construction as the traditional version, but keeping the fabric choice of each round the same.
Just a change of fabric placement dramatically changes the look of this block. Here’s another similar example, the back of quilt I made several years ago.
3 Wonky:
If you enjoy a little ‘improv’ piecing then how about a Wonky Log Cabin!
Again the logs are added in rounds, but this time, the sides are sliced at irregular angles before adding the next log.
While strips are useful to start with here, the width of the finished logs will be varied. No two blocks will be the same!
This can be a really fun block to make if you like a little more ‘freedom’ in your piecing. Just keep adding rounds until your block is a little bigger than you need, then square it off to the required size.
Here’s an example of a Wonky Log Cabin Quilt I made for Quilt Now Magazine several years ago.
4 Curved:
To achieve a curved effect in a Log Cabin block, the background logs must be thinner than the coloured logs.
The curved effect becomes more obvious when you put 4 blocks together to create a ‘circle’:
The bigger the difference between the widths of the background and coloured logs, the greater the curve!
There are lots more variations of Log Cabin, like the Quarter Log Cabin (adding logs to the same two adjacent sides each round, rather than to all four sides) ….
(Quarter Log Cabin Cushion tutorial available here.)
….. or how about starting your Log Cabin block with a different shape!!
These are definitely on my Quilts Bucket List!
And as if that’s not enough, check out my Log Cabin Pinterest board for lots more inspiration from around the Quilty Web!
Come back soon for part 2 of The Log Cabin Family of Blocks!
By Judith on April 14, 2026 2 Comments (Leave comment)
Yesterday we got all folksy at our Tea Cosy Workshop!
We were few in number, but the chatter and vibe was as warm and inviting as the cosies!
The raw edge applique was new to some, but with the easier option of top stitching also available, nothing held back these creative endeavours.
Aren’t they adorable!
Well done ladies on your cute cosies (I just know your tea will taste even better now!).
My Folksy Tea Cosy Pattern is available here, and includes a 2nd applique design and instructions on how to measure your teapot for a perfectly fitting cosy.
By Judith on April 12, 2026 0 Comments (Leave comment)
This week saw the end of our current block of classes.
The optional class project was all about Triaxial and Basket Weaving.
I had made 3 class samples to showcase the different types of fabric weaving I would be teaching, but as you will see, a few creative minds didn’t stop there!
Aren’t they stunning! A few little notebook covers didn’t manage the photoshoot, but I’m sure you can guess how wonderful they are!
In the end, we were unable to source Wefty weaving needles here in the UK, and while we managed pretty well instead with large safety pins, the Wefty needles are certainly advantageous when it comes to the more complex triaxial weave. I would definitely recommend these genius little tools!
So a huge well done to my weaving ladies for stepping up to the challenge (especially when it came to triaxial weaving!) and producing beautiful work!
And of course, these weren’t the only projects being worked on! Well done to all my other ladies on your pre-Easter finishes.
I hope you all have a wonderfully creative and choccy-filled Easter break!
(Classes resume w/c 29th April - booking available here.)
By Judith on February 17, 2026 0 Comments (Leave comment)
It’s half term here this incoming week, and I’m looking forward to getting a few (overdue) jobs done around the house!
We finished another round of classes last week. There was a flurry of makes including wallhangings, cushions, zippy pouches, hot water bottle covers, baby quilts, baby baskets, and many more.
And of course, there were lots of Necessary Clutch Wallets! Check out this amazing clutch of clutches!
Aren’t they brilliant! And some of them have already been used in travels abroad.
(you can purchase the Necessary Clutch Wallet here)
Well done to all my talented ladies! Enjoy your well deserved break!
And if you’d like to join us for some creative fun, our new block kicks off w/c 25th February. There are 6 weekly classes to choose from - check out the vacancies here.
By Judith on February 9, 2026 1 Comment (Leave comment)
Already we are coming to the end of our first block of 2019 classes. This week we will wrap up our Necessary Clutch wallets and New Year projects.
I can’t wait to show you all the finished clutches!
And I’m a little bit excited to show you our (optional) class project for the Feb-April block.
In our next block of classes I will be showing 3 different weaving techniques, 2 of which use the Wefty Weaving Needle.
A Wefty Needle comes in 2 sizes, 1″ and 0.5″ and enables weaving both simple and complex designs with little/no fabric waste.
Once you have a deliciously woven panel you can turn it into a pretty basket, a tactile cushion, a useful notebook cover, anything you like!
I’ll have notes available on how to make my 3 examples, but you don’t have to stick to these projects. Just check out my Weaving Pinterest Board for lots more mind blowing inspiration!
Linen Basket Weave Cushion
This is a beginner friendly project, keeping the strips wider and easy to weave into a traditional basket weave pattern.
We don’t use the Wefty Needle on this project, a large safety pin will suffice, though there will be a little fabric waste at the end of each woven strip.
And if you haven’t already them sussed, how about trying some buttonholes and self covered buttons as your cushion closure?
Houndstooth Journal Cover
These 0.5″ strips are woven with the Wefty Needle into a houndstooth pattern.
Again we are using a traditional basket weave here, but clever placement of strips produces the secondary pattern.
I turned my woven panel into a journal cover (my notebook cover pattern is available here), but you could easily use this as a decorative panel in a bag or add some borders for a textured placemat or cushion.
Triaxial Woven Basket
Triaxial means 3 angles. Unlike a basket weave (with only vertically and horizontally woven strips) triaxial weaving involves strips woven at vertical and 2 thirty degree angles.
For my cute basket I’ve used the 1″ Wefty Needle. Triaxial weaving is more complex than basket weaving designs, but once you get your head around it, there are many more amazing designs which can be produced from the 3 angles.
So if you fancy a spot of weaving over the next 7 weeks, or just want to carve out some therapeutic sewing time to work on other projects, why not come join the fun and book into one of our 6 weekly classes.
By Judith on January 1, 2026 0 Comments (Leave comment)
My classes start back next week, and our class project this term is The Necessary Clutch Wallet by Emmaline Bags.
This is a great pattern, and with a little bag making experience, one can start to experiment a little with the design (you can read all about my first 2 wallets here).
For my 3rd Necessary Clutch, I went for a stiffer interfacing in the flap, keeping the design simple to show off the Japanese fabrics ( Kimono by Makower).
2 other additions to this clutch were the shoulder strap (instructions available here) making this more of a stylish evening bag,
… and rivets instead of sewing the thicker sides (big thanks to Svetlana for this inspired idea!).
I think is my new favourite Necessary Clutch!
Now all I need is a little black dress and a handsome man to go with it (actually, forget the last part!!).
There are still a few spaces available if you’d like to have a go at making this clutch, in a friendly and supported environment. Just drop me an email at .
What an amazing year it has been, both inside the classroom and outside it!
One of my professional highlights in 2018 was attending Patchwork in the Peaks Quilters Retreat, Morzine, France, as guest tutor.
And on a personal level, hosting a memory quilt party for my special friend’s 50th birthday in February was a wonderful day!
Helping 2 charities, Shared Threads and Flourish, launch their new sewing initiatives, both aimed at improving the lives of women, locally and internationally was (and continues to be) a pleasure and a privilege.
Among the many highs and lows that come in a year, I’m reminded of my ‘word for the year’ back in January ’18 - RHYTHM.
I set a word at the start of each year to give me a focus to my professional and life goals.
After a massive year of change in 2017, I feel I definitely achieved some rhythm, allowing life to settle some, and to get into my stride with the new classroom and home.
Of course there were still changes in 2018, some happy, some sad, some expected, some unexecpted; the normalcy of life demands it.
But amidst it all, I have much to be thankful for and am content to leave 2018 with a smile, and embrace the exciting new chapter that is 2019.
Come back soon to find out all about my word for 2019!
By Judith on December 16, 2025 0 Comments (Leave comment)
My last class of 2018 finished last Thursday!
What a wonderful term (& year!) it was! And I think, one of our most productive!
Here’s a little snapshot of some of the amazing makes my ladies have been beavering away at!
There are many more amazing projects and gifts that will be bringing smiles to lots of faces this Christmas.
Let’s just say there will some truly blessed recipients out there! My ladies are some of the most talented and generous people I know, and they have continued to inspire me all year!
For me, I plan to continue working on patterns, plans and projects for next year. But I will be taking a break over Christmas, to spend time with 2 of my girls, a little EPP, some reading and much needed rest!
Whatever you are planning over the next few weeks, I pray you will be happy and healthy!
By Judith on December 7, 2025 0 Comments (Leave comment)
In classes this week I presented my 2019 (January-April) Saturday workshops.
They got a wonderful response, and I’m happy to share them with you here.
So let me tell you a little more about what you can expect in each workshop:
I’ve scheduled again my most popular workshop - Free Motion Quilting and Sketching.
In this workshop you get lots of practice time to learn at least 6 ‘beginner friendly’ free motion designs, fillers and how to quilt a cot size quilt.
The 2nd half of the day is all about Free Motion Sketching, where you can relax a little and have fun with this raw edge applique and writing technique.
My cute friend ‘Harriet Hare’ (from my Woodland Friends quilt) makes her appearance in tweed!
Tweed is a favourite textile among many sewers, and mixed with pretty cottons and satin stitch applique, you have one gorgeous cushion!
(The pattern for Harriet Hare Cushion will be released after the workshop.)
At our Apron workshop in March there will be 2 styles to choose from - the Japanese style ‘Cross-over’ apron and my ‘Apron in Jar’, a practical and stylish apron which folds into a decorated mason jar for gifting.
The pattern for the Apron in a Jar includes a child’s size template and will be released after the workshop.
We wrap up our first term of ‘Sewing Saturdays’ with some folksy tea cosies.
Bring your teapot along to this workshop, and we will have fun appliqueing a ‘made to measure’ cosy for your pot.
I will be posting more information about each workshop nearer the time.
Places are limited, so book early (waiting lists available if fully booked). Just drop me an email at
By Judith on December 1, 2025 0 Comments (Leave comment)
Happy December to you all!
We are on the final countdown to Christmas, and with only 2 more weeks of classes left, my attention has turned to the new class project for next term!
This is the Necessary Clutch Wallet, by Emmaline Bags.
This is a well designed and written pattern, and I can think of many occasions when a stylish and compact little clutch would be perfect.
During this class project you will learn:
how to insert hardware (twist/turn locks, D-rings, swivel fobs)
how to make a zippered pocket
to use different interfacings for different parts of the clutch
how to vary the flap design
how to sew cork fabric
how to insert rivets
You will have the option of adding a wristlet or shoulder strap (not shown here) and also how to insert rivets into the bulky sides (still waiting on my rivets to arrive to show you my 3rd example!)
Rivets will replace the step where you sew down the thicker sides. If not using rivets here, I recommend a heavier thread and needle in your machine for this.
The many pockets and compartments in the wallet allow plenty of space for your essentials (phone, cards, money, passport, makeup etc.) while still folding up into a compact and easy to carry clutch.
The design of the flap is easily altered. You can have fun with different fabric placement, or why not try on-trend cork fabric.
Cork fabric is vegan and harvested from the Cork Oak Tree. It is scratch resistant, stain resistant and water resistant, much more durable than leather (and easier to sew with too!).
There are 6 weeks in the next block of classes, plenty of time to get at least one Necessary Clutch Wallet made!
Further information about the requirements for this project (& what is available to purchase in class) will be emailed to all registrants, but you can purchase the actual pattern here.
By Judith on November 1, 2025 0 Comments (Leave comment)
(Subscriber newsletters dispatched today - please check your inbox and junk folders!)
Exactly 1 year ago today I signed the contract and got the keys to my classroom in this stunning converted Victorian Linen Mill in Belfast!
After teaching in various places for more than 10 years, it was lovely to step into a bright a spacious room, which I knew would meet all our classroom needs.
The room takes 12 students per class, and we also have 5 separate cutting tables and 4 ironing stations.
The ‘Basting Bay’ gives the ladies room to spray baste their quilts, and the design wall facilitates the laying out of blocks and quilt design.
The ‘Tea/coffee’ making station is an essential feature (no mini-bar yet!) and I even have room for a themed display table and a small haberdashery and pattern shop.
I teach 6 weekly classes and monthly Saturday workshops from September to June, with a slightly different programme over the summer months.
Since I started the classes in January ’18, we have had a total of 203 weekly classes, 11 Saturday workshops, 1 50th birthday party and several charity sewing days!
Phew! What a brilliant year!
And to celebrate my first birthday in Conway Mill, we not only have chocolates in class, I’m also discounting all my online patterns by 50%. Just use the coupon code BIRTHDAY1 at the checkout (one use only).
Thank you to everyone for making this new venture an exciting and fulfilling one! I can’t wait to see what 2019 brings!
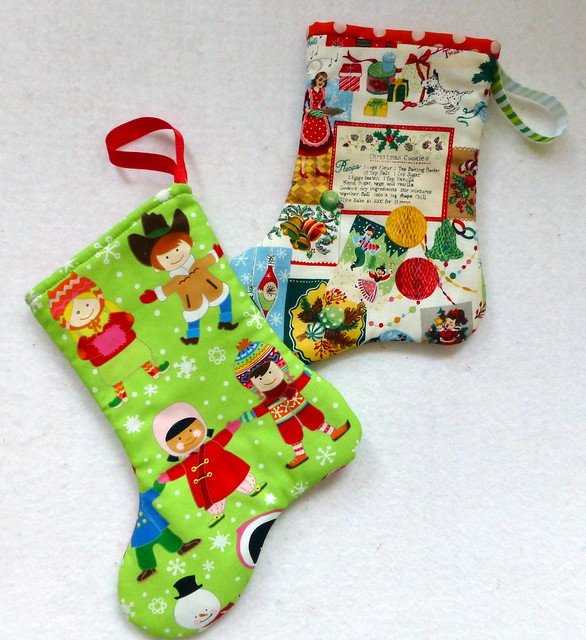
My Scandi Stocking pattern was first published in Sewing World magazine several years ago.
It combines one of my favourite fabrics, Essex Yarn Dyed Linen, with Makower’s gorgeous Scandi Christmas fabrics.
A little fussy cutting and simple applique add manageable and fun stages to this project.
Which is why I decided to run it as a Saturday workshop, on 17th November. (Full kits are available for those attending the workshop, but any leftover kits will be offered out!).
Only 1 place left on the workshop - get in touch if you would like to join us for some festive fun!
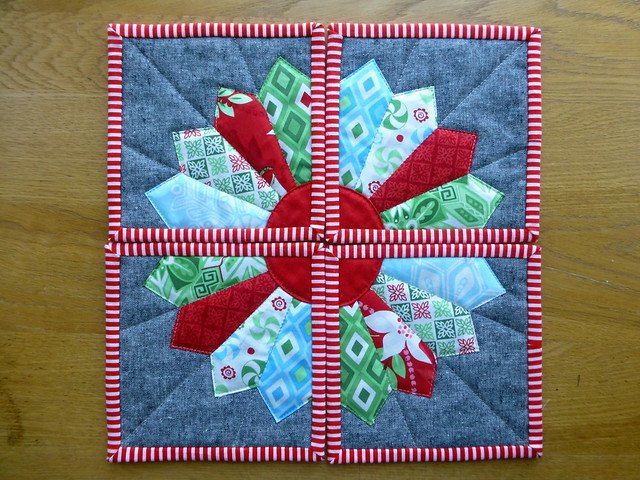
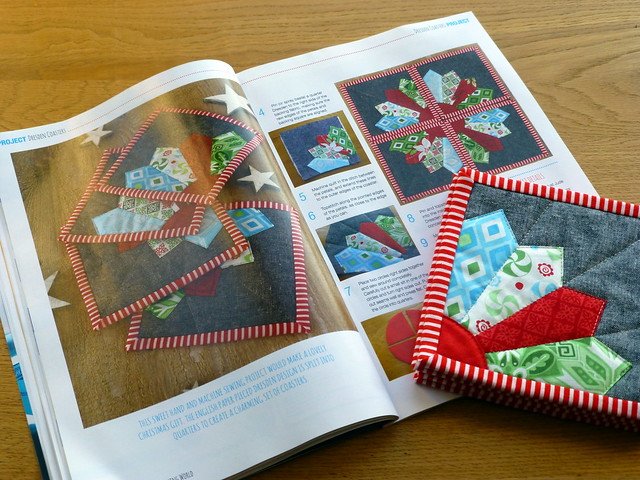
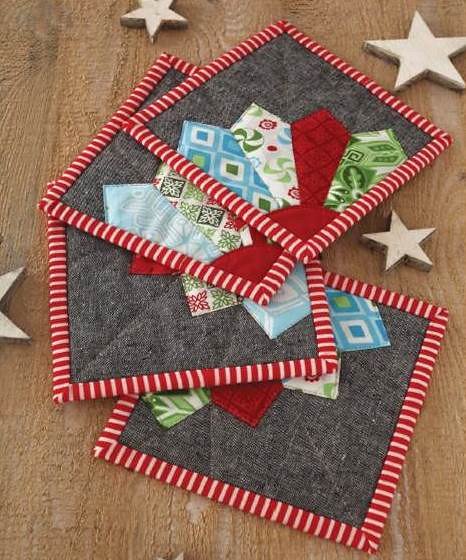
If you fancy a little hand sewing in your Christmas crafting, how about some Dresden coasters. The blades are English Paper Pieced for accuracy, and the rest is done on the machine.
Again, these made their debut in Sewing World magazine. I used more Essex Linen here, this time Black, with a few leftover Christmas 5″ charm squares.
Of course you could make these anytime of the year, making the dresden blades in non-Christmas fabrics.
This cute fellow first appeared in Pretty Patches magazine, and has been a big hit ever since!
He is a mixed textile cushion, making him super tactile and cuddly!
If you like mixing in a little tweed, wool or linen with your cottons, then you will love making this Rockin’ Robin!
I have used satin stitch applique here, but you could easily use raw edge applique or blanket stitch applique (more guidelines on machine applique here).
5 Christmas Baubles Cushions
(pattern to come)
I first made a Christmas Baubles cushion for a Brit Bee friend as part of a secret santa cushion swap several years ago!
These are great fun to make because there is no end to the ‘style’ of bauble you can have.
And you can let your creative ‘quilting’ juices flow too when it comes to the quilting.
One day I will get around to writing a pattern for these cushions - it’s on the long list!
So that’s the end of part 1!
Tune in again for part 2 and my 2nd surprise reveal!
By Judith on October 23, 2025 0 Comments (Leave comment)
Next week starts a new block of classes, the last block of 2018!!
In this final term, our attention will turn towards preparations for Christmas!
Following several requests for a Christmas Tree Skirt, I’ve curated a selection of patterns which my ladies can choose from.
I don’t have time to make all of these wonderful examples, but I did make this one!
This cracker themed tree skirt was originally designed by my lovely quilty friend Reene of Nellies Niceties.
I have never used a tree skirt around my Christmas tree before, but as soon as Reene released her free pattern, I pinned it and knew one day I would make it!
While Reene’s instructions are on how to make the top only, they are really clear and the easy piecing means it works up really quickly!
This tree skirt is a good size, but if you needed a smaller one, simply omit one or two crackers until you have your desired size.
I had fun quilting this ‘skirt’ using my quilting bar, and decided to finish the opening with buttons and hair bobbles!
This was a fun venture into my first Christmas Tree Skirt! And I’m looking forward to seeing many more tree skirts over the next few weeks!
And we’ll also have lots more tutorials and inspiration for your Christmas gift and decorating ideas!
So if you would like to join in the Christmas fun, spaces are still available across all 6 classes. Give me a shout if you would like to book a spot!
I’m so proud of all my ladies, not just those who tackle the class project, but also those who work continuously on their generous gift making, charitable fund raisers, sharing inspiring new projects and continuing to fuel and feed their creativity.
And I get to call this my day job!! #lovemyjob
We are taking a one week break, and when we return it will be the last block of classes of 2018!
Tune in again soon to find out what our new class project will be.
By Judith on September 10, 2025 0 Comments (Leave comment)
Last Saturday was my 2nd Rope Bowl Workshop.
And I’m pleased to say this lot were just as productive as my first group of ladies!!
Once again the feedback from this workshop was a resounding success!
It gives me so much pleasure seeing proudly smiling faces going home with beautiful creations tucked under arms and invigorated inspiration for many future gifts!
Well done ladies!
Interest and enquiries for this workshop continue to grow, so I will be sure to schedule more in next year!
By Judith on September 6, 2025 0 Comments (Leave comment)
Hello there!
And hello September!
September sees the start of my Autumn term of classes, and an introduction to twin needling with fusible bias tape.
And in celebration of the start of meteorological Autumn, let me show you my new table display, full of ideas, patterns and tutorials to inspire you to get creative this season!
I designed this bag for my Scrap Buster Saturday, back in early August.
I organised my scraps into 3 colourways - lots of strips of varying widths, and at least 7″ long.
The French Braid technique is so easy and in no time at all you have the panels made. Quilting them onto Bosal Flex Foam gives the bag lovely structure.
2: Denim Messenger Bag
(pattern coming soon)
Messenger bags are great for all ages! Kids at school, professionals needing a laptop bag, or how about a ‘man bag’.
The pattern for this bag was originally published in Pretty Patches magazine a few years ago. I’m hoping to get the pattern reformatted for general sale soon.
You can see I’ve had a little fun with the flap section of the bag in other versions of this pattern!
This is a roomy bag which will put a dent in some of your scraps!
The ‘quilt as you go’ technique is great fun, and the condense quilting adds strength and structure too.
4: Rope Bowls
I’m teaching how to make these stylish and versatile bowls at my Saturday workshops.
The first workshop was a hit, and a very productive day!
The next Rope Bowls workshop is this Saturday. Again it is fully booked, but I will be running this one again in the new year (keep your eyes and ears open!).
On the table you can see a Chenille mat, and the Chenille Heart Cushion in the background.
Chenilling is such a fun quilting technique, and totally beginner friendly.
I’m hosting a Chenille workshop on Saturday 13th October, where you can make either a bath mat or my heart cushion (places still available at time of writing).
So that’s part 1 of my Autumn Table roundup.
Tune in later this week for more project inspiration!
By Judith on August 26, 2025 0 Comments (Leave comment)
Hello everyone!
Just checking in to tell you about some exciting new workshops coming up this term.
Saturday 8th September: Rope Bowls II
(fully booked - waiting list available)
My first Rope Bowls workshop booked up in double quick time, so I set a 2nd date! (you can read all about the first workshop here.)
15th September: Free Motion Quilting/Sketching
(fully booked - waiting list available)
Yesterday was the first of 2 FMQ workshops.
My ladies worked hard at 6 different FMQ designs, fillers, small and large samples, and tried their hand at a little sketching too! (I bet they all slept well last night!).
This is my most requested workshop, and as it booked up in 2 days(!!) it was only fair I put on a 2nd date!
Don’t worry if you haven’t managed to get onto one of these workshops. I’ll be running this one again next year.
13th October: Chenille (Bath Mat or Cushion)
(places available)
In quilting, the term ‘Chenille’ refers to a texture achieved through sewing and cutting through several layers of fabric. When washed and dried, the raw edges of the cuts ‘fluff up’ creating a wonderfully tactile texture. This new ‘fabric’ can then be turned into a wide range of items.
In this workshop you can choose to make a fluffy bath mat, or a snuggly cushion.
17th November: Scandi Christmas Stocking
(places available)
Getting ready for Christmas and Christmas gift-making is always popular among quilters.
My Scandi Christmas Stocking incorporates a little fun applique and it is fully lined, so it will stand the test of time year after year!
I’m now stocking the latest collection of Makower Red Scandi Christmas prints in my classroom, as well as my usual stocks of Essex Yarn Dyed Linen, and I’m hoping to have kits available for the workshop.
8th December: Gingerbread Men Garland
(places available)
How cute would these decorated felt Gingerbread Men look adorning your Christmas themed fireplace!
This workshop will combined some relaxing hand sewing and embellishing with a little machine work.
A great gift for gingerbread men lovers everywhere!
So there you have it! A round-up of fun ways to spend a Saturday!
If you see anything here you fancy, just drop me an email at
By Judith on August 19, 2025 1 Comment (Leave comment)
Hi there!
Yesterday was my first of 2 Rope Bowl Workshops.
This was my first time teaching rope bowls and not having a previous experience to draw on, I didn’t know how well the ladies would take to it, or how well their machines would behave!
But first time nerves quickly dissolved as my ladies jumped right in like pros and took to this new technique like ducks to water! (The machines were pretty well behaved too!)
By lunchtime the first few bowls had been made, fuelling confidence to keep up the productivity right until the end of the workshop!
And just look at our ‘end of day’ Rope Bowl haul!
Aren’t they fabulous!
I love the variety and creativity on display here!
Getting the bowls started is the trickiest part, but a little patience and a steady resolve soon gets you to the satisfying rhythm of rounds and rounds of zigzagging!
My next Rope Bowls Workshop is Saturday 8th September. It is fully booked, but if you would like your name put down on the waiting list (in case of a cancellation) just let me know.
And if you would like to purchase your own 8mm cotton rope, I get mine here.
By Judith on August 12, 2025 1 Comment (Leave comment)
Yesterday was my Zippy Pouches workshop, a day to conquer the ‘Fear of the Zip’!
My courageous ladies could choose from a simple but perfectly formed ‘Easy Peasy Pouch’ or the ‘Gracie Pouch’ which included a template and a flange feature.
And just look at what they achieved!
Easy Peasy Pouches (2 sizes)
Gracie Pouches (2 sizes)
Aren’t they beautiful!
Well done ladies! Your hard work totally paid off!
If you would like to have a go at making a zippy pouch, you can get the Easy Peasy Pouch pattern here and the Gracie Pouch pattern here.
By Judith on August 6, 2025 0 Comments (Leave comment)
Hello everyone,
It’s hard to believe that the summer is almost through, and attention is quickly turning to the new term of classes starting in September.
This term our (optional) class project will be Twin Needling with Fusible Bias (incorporating Stained Glass Windows).
As you can see above, there are a range of makes to choose from. Let’s look at them:
Mosaic Cushion (Beginner Friendly):
This 18″ cushion is a great starter project if you are new to fusible bias and twin needling.
Simple piecing creates the mosaic background, with the twin needled bias creating a dramatic (and quilted) finish!
I’ve made a feature of the zipper closure in the back of the cushion, but you could easily have an envelope or button closure here.
The digital pattern is available here (hard copies are available to purchase in class).
Mackintosh Flower Cushion (Intermediate):
This is another 18″ cushion, this time inspired by Charles Renee Mackintosh’s iconic design.
Shapes are bondawebbed onto background fabric, and the fusible bias then curved and twin needled down.
Again I’ve made a feature of the cushion back.
The digital Mackintosh Flower Cushion Pattern is available here (hard copies and full size templates are available to purchase in classs).
Applique Leaf Denim Bag (Advanced):
This project not only incorporates twin-needling (stems) and satin stitch applique (leaves), but also re-purposing textiles, zippered pocket and handbag construction.
The digital Applique Leaf Denim Bag Pattern is available here (hard copies and full size templates are available to purchase in class).
Mackintosh Rose Wallhanging (Advanced):
If you love wallhangings and aren’t afraid of something a little more challenging, you could try your hand at this Mackintosh inspired ‘Stained Glass Window’.
I’m in the progress of making up this wallhanging in a different colourway, and hope to show you the finished wallhanging soon! The finished size will be approx. 14″ x 21″ and full size templates will be available to purchase in class.
Materials:
Each pattern lists the materials you will need.
However, I will have the following available to purchase in class:
black 6mm fusible bias
4mm twin needles
pattern transfer pens
wadding
basting spray
thread
bondaweb
zips
hinged faux leather handbag handles
full size templates
So I hope you are inspired to perhaps try something different this term. You will have 7 weeks to make one of these projects, or a project of your own choosing!
And there are still a few spaces left across all the classes (more info here), so why not join us for some creative fun!
By Judith on August 5, 2025 0 Comments (Leave comment)
Hi there!
Yesterday we had a fun Scrap Busting Saturday up at the Mill.
The classroom was alive with scraps getting turned into beautiful bags, cushions and quilts! (You can read more about the projects being made here.)
Oh how satisfying it is to breath new life into unwanted or left-over fabrics!
And speaking of fabric rejuvenating!
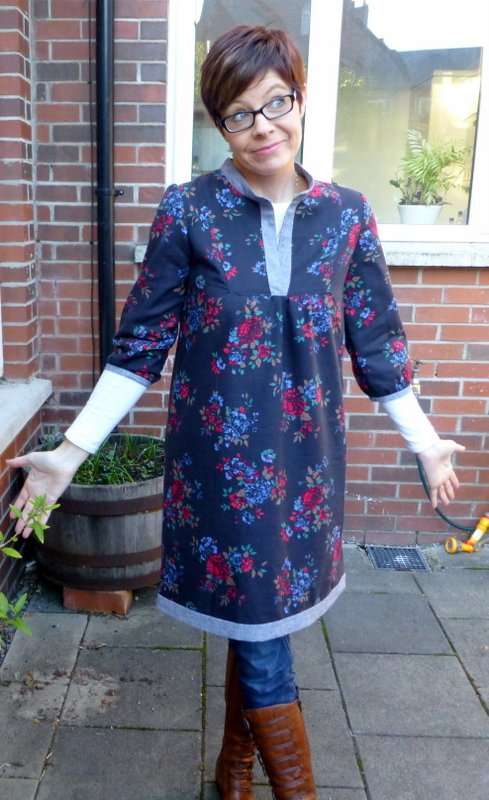
No 2 The ’60’s Revival’ Tunic!
This is my hippy tunic (made using New Look pattern 6068), not hippy perhaps in style, but hippy because it is made from 100% unadulterated C.R.I.M.P.L.E.N.E!
Yes you heard right!
I LOVE CRIMPLENE!
I don’t even know where a love for this nasty nylon came from! I love it so much I’m thinking of starting a ‘bring back the housecoat’ revolution!
And I feel it’s only right that I tell you now, I HAVE MORE CRIMPLENE! What joy!
That’ll be a few more hippy tunics to add to collection then!
And see that mug there? That’s my new folksy mug! Isn’t it fab!
By Judith on June 30, 2026 0 Comments (Leave comment)
It’s the end of June and classes are now finished for the summer recess. What a wonderful first 6 months in my new classroom!
Our ongoing heatwave here meant the classroom was quite warm on occasion, but the ladies were smokin’ their creativity even more so!
You may remember Part 1 of our ‘Real Women Have Curves’ roundup, where I showed you the fabulous drunkard’s path cushions my ladies had made.
Well just take a look at these!
These beautiful ‘Butterfly Garden’ quilts are stunning on every level (my poor photos not doing them justice at all!).
I love how different fabrics or placement of colour value can completely change the look of the same quilt. In this pattern, drunkard’s path units are combined with squares to make up these curvy blocks.
Aren’t they wonderful! A huge well done to my ladies for ‘going large’ with their curvy project (especially as temperatures soared inside and out!).
If you like what you see here and want to have a go at your own ‘layer cake friendly’ Butterfly Garden quilt, you can get the pattern here.
I won’t have any classes in July, but you can find out all about my summer programme of classes and workshops here.
By Judith on June 18, 2026 0 Comments (Leave comment)
During the 5 Wednesday evenings in August I will be running my ‘Machine Sewing for Beginners’ Course.
I have run this course many times in the past, and it has always proven popular. The course is designed for folks who want to learn how to use a sewing machine, or refresh their machine sewing skills from long ago!
Here’s a run down of the topics we cover:
Week 1:
threading the machine
filling a bobbin
understanding the various buttons, dials & stitches
practising the different stitches
Week 2:
understanding tension & troubleshooting
how to change needles and feet
understanding uses of different feet
sewing control skills
Week 3:
understanding fabric (warp, weft, bias)
measuring & cutting fabric
seams (1/4”; 3/8”; 5/8”, overlocking; french)
Weeks 4-5:
Project: Single skein cushion cover with a zippered back
Extra Info:
Cost: £45 (includes a non-refundable deposit of £20)
Course in Conway Mill (2nd Floor), Conway Street, Belfast, 6.30pm-8.30pm
Disabled Parking and Access available
Places are limited so book early
Limited number of machines available to hire (pre-booking required)
Full list of materials/requirements emailed in July
So if you fancy learning a new skill, or brushing up on an old one, just drop me an email to . Classes are fun and relaxed!
By Judith on June 7, 2026 0 Comments (Leave comment)
Hello there!
How is everyone doing? We are already half way through the last block of classes before summer recess!
I didn’t set a class project this block. I figured I’d thrown a lot at my poor unsuspecting victims students! So instead we’ve been focusing on getting UFOs ticked off the list.
You may remember that last term I introduced my ladies to the no-pin method of sewing drunkard’s path curves.
And just look at what my curvy ladies have produced!
Curves completely conquered! BOOM!
Aren’t they fabulous! Well done ladies, and also to those still finishing off their curvy cushions! You are all amazing!
And before the end of this block of classes, I will have more pics of my other group of curvy ladies who are making my Butterfly Garden Quilt. You won’t want to miss it!
By Judith on May 30, 2026 0 Comments (Leave comment)
Next up on my series of Summer Workshop posts are my Easy Peasy Pouches!
It’s funny how often I come across folks with an inherent fear of zippers!
I remember my own fear of them once upon a time. But oh, the wonderful freedom I experienced once I faced my fear, able to make and enjoy many zippered projects and gifts.
I want to enable others to experience this freedom and fun, and to embrace their zipper foot once and for all!
For the complete ‘Zipper Novice’ I have designed the Easy Peasy Pouch, simple construction without compromising on the little details that matter, like pretty zipper tabs and a boxed corner base.
And for those feeling a little more adventurous, you could try The Gracie Pouch.
These have the same simple construction as the Easy Peasy Pouch, just with a few added features and a little more quilting.
When I need a handmade gift idea, zippy pouches are my go to project!
Bookings for this workshop are now open! All workshops are £30 (includes a non-refundable £15 deposit). Just drop me an email to .
How is your week going? We are (still) basking in the most gorgeous sunny weather here, leaving us with stunning, glorious sunsets!
This week in my classes I am presenting my summer Saturday Workshops. The 4 Saturdays in August will all be workshops, and I will be posting about them here, starting with ……
If you’ve been sewing for any length of time, you may have a huge healthy stock of scraps, leftovers from previous quilting projects. These pieces might just be too sizeable, pretty or meaningful to throw away, leftover binding or jelly roll strips, or perhaps frugality gets the better of you!
Either way, there are many, many ways to put those ever growing scraps to good use!
Here are just a few examples of what you can make on Scrap Buster Saturday.
This is another example of grouping scraps into colourways. The French Braid piecing technique is super easy, and you don’t even need the pieces to be of equal width.
I’ve quilted the bag exterior onto bosal (flex foam) which gives it lovely texture and structure without losing softness.
(Hinged Faux Leather Handles available at the workshop)
My technique for making strip pieced blocks doesn’t involve a foundation layer.
I added a little ‘organisation’ to lots of random strips by making the central strip in each block white. The white strips are of uniform width, but that’s were the uniformity ends! All other strips are random widths and lengths. I even used ‘ugly’ fabrics I still had, but I totally love the finished quilt! That’s the magic of using scraps.
Autumn Rail Fence Quilt(block tutorial available here)
The simple sewing together of strips means you can easily make up this quilt top in a day.
Once again, I dove into my scrap drawers for specific colours - golds, oranges, pinks and teals, all of different widths and lengths. Some donated yardage of a brown stripe gives flow and order to the scraps.
But equally, this quilt would look fabulous made in random coloured scraps with a uniform ‘fence’ fabric.
‘Quilt As You Go’ Handbag: (pattern available here)
Here’s another roomy handbag idea for all those colourful scraps!
This ‘quilt as you go’ method involves the quilting of each individual piece of fabric onto a larger piece of wadding. There are no raw edges, and the condense quilting gives the bag lots of structure.
The pattern also includes this secure recessed zipper closure.
‘Birch’ Quilt (in progress):
I took inspiration from this quilt and decided to make a grey and low volume version (given that I have an overflowing drawer of LV scraps!).
I plan on using up my stash of Kona Greys to make this into a bigger ‘man’ quilt. Somehow, I think it will take me a lot longer to use up my LV scraps!
So there you have it! A little inspiration on how to use your scraps, and a date for your diary on how to have a day of fun turning them into something wonderful!
And if you need even more inspiration, check out my Scrap Busting Pinterest Board!
All Saturday workshops are £30, including a non-refundable deposit of £15 to register. Just drop me an email to to book a place.
By Judith on May 20, 2026 0 Comments (Leave comment)
Yesterday was a big day here in the UK!
There was the small detail of a Royal Wedding (and an even smaller football final!!), but the main event was happening in my classroom at Conway Mill!
6 ladies rocked up for a day of sewing, making my Denim Sailboat Cushion.
And even though The Wedding was playing on my laptop in the background, these women were serious about learning hard and barely stopped for a lunch break!
For some, it was a first time venture into satin stitch applique and a little free motion sketching too (I think the celebratory tipple of Proseco might have helped, wink, wink!)
I’m sure you’ll agree, that these finishes (and almost finishes) look amazing!
Well done ladies on your focus, fun and fabulous creativity!
Full kits were available at the workshop, and I have a few left which I’ve listed in my shop.
The pattern is included in the kit, but if you would just like the pattern, you can find the digital download here.
By Judith on May 18, 2026 0 Comments (Leave comment)
Mental Health Awareness Week is 14th - 20th May here in the UK (photos explained at the end of the post!).
Did you know that 1 in 4 people in the UK will experience a mental health issue and 5% of the world’s population currently suffer from depression? That’s 350 million people!
I’m sure, like me, you have either experienced some form of mental illness in your life, or know someone you care about who has.
During a particularly low point in my life, I started seeing a counsellor, who recognised that after seeing to my husband, my children, my home etc. I did nothing for myself. She introduced me to the notion of ‘play’ and asked me to name one thing that I used to enjoy doing when I was younger. I said sewing!
She encouraged me to reclaim this activity that gave me so much fulfillment and joy, and so I enrolled in my local college to study in City & Guilds Textile & Design.
I can honestly say that getting back into a creative environment and learning how to ‘play’ again, was instrumental in my recovery from depression.
That was 12 years ago, and little did I know then, that I would be teaching others how to release their creativity and learn how to ‘play’ and enjoy life again.
My first experience of teaching patchwork and quilting was to a group of women with various mental health needs (depression, self-harm, addiction, domestic violence, grief, bi-polar disorder, cancer survivors, eating disorders to name but a few). For 2 years I saw first-hand the therapeutic benefits they experienced after only a few short weeks of sewing. One lady in particular, old before her time, stooped with low self worth and heavily reliant on a walking stick, made her first patchwork cushion and within 6 weeks was coming to class without her stick and walking tall!! Like many others, learning a new skill within a caring community, and having something to show and be proud of, elevated her self-esteem and ignited hope and positivity in many areas of her life.
Seeing the wonderful benefits sewing was having on these ladies’ lives ignited a passion in me to encourage others to let go of negativity, worry, anxiety & perfectionism, even if only for a few hours a week, and discover the healing and therapeutic powers of sewing.
It’s encouraging now to see emerging evidence from neuroscientists and doctors that support what we sewists already know - that sewing (& crafting) is good for our brains and mental health!
The authors of the ‘Sew Your Blues Away’ blog have written an informative article about this here. They say:
“In short, mentally engaging movement (sewing) helps to break the cycle of negative thoughts, as well as allowing the brain to recover and improve by generating newer, healthier brain cells. Specialists state that an engaging hobby is often more effective than just taking an antidepressant, which typically targets only one neurotransmitter. While sewing not only heals, it also improves the brain’s resistance to future bouts of depression by reminding our brains that we have an impact on the world around us.”
So not only is sewing mentally good for us, it is helping our brains physically too! How cool is that!
This article from 2014 explains not only why crafting like knitting and sewing are good for our brains, but why crafting with others is so important too. Check it out!
And I’m sure the ladies who come to my classes will testify to many of these benefits (& more!) too! We certainly have a lot of fun together!
Now my work as a sewing tutor is my passion, my calling and it has gotten me through some of the toughest periods of my life. I’m so privileged to get to ‘play’ everyday as my day job. But of course, turning a hobby into a business means I needed to find a new hobby!
At the moment I’m learning about photography, and I enjoy getting out into nature and noticing details that I would otherwise miss had I not brought my camera along. In the busyness of this modern world I’m trying to literally ‘stop and smell the roses’! (I hope you have enjoyed the pics I’ve shared here.)
So as we focus on Mental Health this week and bring this once taboo subject into the open, let me encourage you to find something that returns to you the same enjoyment, fulfillment and escapism that playtime once did. Let yourself be absorbed by creativity and fun, and released from the stresses and demands of life!
By Judith on April 22, 2026 1 Comment (Leave comment)
I promised to post this week about the projects on my ‘Spring into Summer’ Table.
Never one to break a promise, I’m starting with my Denim Applique Sailboat Cushion.
I originally designed this cushion for a summer edition of Pretty Patches Magazine.
I loved re-purposing some denim and scraps for this nautical cushion. My recent discovery of Aurifil 12wt wool thread also made a significant contribution! You can read more about my designing process here.
The great news is that I’ll be teaching a workshop on this cushion on Saturday 19th May at my classroom in Conway Mill.
And not only that, kits will be available with everything you need to make the cushion, including lush Essex Yarn Dyed Linen, denim pieces, stripey binding and a bright red button for the back!
How cool is that!
So if you would like to spend a fun Saturday with other like minded creatives learning new skills like appli-quilting and free motion sketching, then just drop me an email to register:
Hello everyone! I hope you’ve been enjoying some glorious sunshine in your part of the world!
We have had several beautiful days here. Doesn’t a sunny day just lift one’s spirits!!
Time got away from me a bit this week, but don’t worry, I haven’t forgotten to bring you the posts on my Spring into Summer projects. I will get those posted this week.
In the meantime, I have a few pics to share with you from our Applique workshop yesterday!
8 courageous ladies decided to put their ‘big girl’ pants on and tackle satin stitch applique head on! And not just satin stitch applique, but ‘appli-quilting’ - combining the techniques of applique and quilting into one step.
By Judith on April 13, 2026 3 Comments (Leave comment)
If you are a regular subscriber to Quilt Now magazine, you may recognise someone in the ‘Designer Spotlight’ this month.
It was a privilege to be asked by Quilt Now to feature my new classroom and classes in the latest copy of their magazine (issue 48).
I have very much enjoyed working with Katy and designing for Quilt Now in recent years, but now I’m giving almost all of my design attention to my classes.
I’m nearly 4 months into running Patchwork & Quilting classes here at Conway Mill, and I’m delighted with the response and feedback so far.
My ladies are loving the wonderful light and space in the room, and I try to keep them inspired with themed quilts and project displays.
One of the things I love about working here is being surrounded by the wonderful story of what it used to be, a 19th Century Flax Mill.
Some of the original features of the Mill have survived, even through the Belfast blitz of 1941 and being set on fire during our political troubles here in the 1970’s.
How serendipitous to be bringing the art and love of textiles back into this beautiful Victorian Mill!
If you would like to know more about my classes, click here, or pop in to see us on the 2nd floor, grab a coffee (or lunch) in the Little Mill Bistro, or come see the many other businesses, trades, creatives and artists who work here!
Our focus in class this term is ‘Curves’ in particular the Drunkard’s Path, and the ‘no pin’ method of sewing this wonderfully versatile block (read all about the projects here).
I can’t wait to see my ladies conquer a new challenge!
To celebrate our new term, I have changed the quilts on display in my classroom, and also my little display table has been given a new theme!
Spring into Summer!
Gone are all the Easter projects, and we are now focusing on lighter evenings, temperatures on the rise (finally) and a building excitement of Spring into Summer!
As before, I’ll be doing a series of posts on the items displayed, pointing you in the direction of patterns and tutorials.
And to kick us off, I’ll be giving you a free tutorial tomorrow on how to make these cute pot plant holders!
By Judith on April 2, 2026 2 Comments (Leave comment)
Happy April to you all!
Well despite it being ‘Spring’ with sweet crocuses in full bloom in my garden, today I drove through snow showers with 2 degrees registered on my dashboard! Brrrrrrr!
So let’s leave the present for now, and think ahead 1 week instead, when hopefully the weather will be much better as my new term of classes start up again after the Easter break!
For a while now I’ve been threatening exhorting my ladies to confront their fears and give curved piecing a try!
So we’ve decided to get our ‘big girl’ pants on and jump in to this exciting new technique!
I will be teaching the ‘no pin’ method of curved piecing, as well as how to trim a drunkard’s path unit to achieve different effects.
Small Projects:
For those who want to make a smaller project, I have designed and written several patterns.
‘Ripples’ Cushion:
19.5″ x 19.5″
In this cushion you can use up lots of your colourful scraps, alternate with just a few colours, or use a different fabric in each ‘ripple’ as I have done here.
The cute ditsy fabrics I’ve used here are ‘Katie Jane’ by Makower, which were leftovers from this quilt project.
There are 5 ‘bauble’ shapes in this runner, but you could easily add more or less to suit your table. Wouldn’t this be lovely in Christmas fabrics for a festive table dressing!
The pattern includes instructions on how to make & attach bias binding, and 4 complimentary mats.
Wow! That was a long post! Thank you for sticking with all my ‘curves’!
If you would like to learn how to make drunkard’s path units (& all of these projects) & have a lot of fun along the way, then why not join in with our other crazy creatives and register for our class starting w/c 9th April. More details on classes available here.
By Judith on March 30, 2026 0 Comments (Leave comment)
For the past 6 weeks some very talented ladies in my classes have been beavering away on my Denim Hexie Bag Pattern.
This pattern combines techniques such as English Paper Piecing (EPP Hexies), eyelet holes, zippered pocket, handbag construction as well as some serious denim upcycling!
At times it looked like a missile had gone off in a jeans factory in my classroom, as scissors and blades feverishly amputated legs, pockets and loops! While denim is one of my favourite textiles to work with, it doesn’t half shed!
But oh boy, the results of this serious crafting were so worth it!
Not all the bags being made are represented here, a few are still being finished off.
But aren’t they brilliant! Sturdy, stylish practical bags that I know will get lots of use!
And I also know that the bags still being finished are equally as fabulous!
I haven’t been able to capture all the individual details in the bags here, but trust me when I tell you that each bag has it’s own unique characteristics.
Details like repurposed loops, tabs and pockets from the jeans, as well as complimentary fabrics like cotton and tweed, buttons, badges and even embroidery and printing.
A huge ‘well done’ to all my wonderful ‘Bag Ladies’!
I also have 3 part-kits available in my shop, which include the pattern, pre-cut hexie papers, various coloured denim squares (for the hexie panels) , 1 metre of heavy weight sew-in vilene and 4 eyelet rings.
By Judith on March 28, 2026 1 Comment (Leave comment)
Have you ever wanted to master satin stitch applique, but are too afraid to try on your own?
Why not surround yourself with like minded creatives and spend a Saturday learning this technique with all the help and support you need!
At the workshop you will not only learn how to set up your machine for satin stitch applique, you can also make one of two projects:
Family Tree Wallhanging:
27″ x 30″
This pretty wallhanging can be made with your favourite treasured scraps, seasonal fabrics, or how about embroidering the names of family members onto the leaves!
This type of applique is called ‘appli-quilting’. The leaves will be appliqued onto an already quilted background. The process of stitching the leaves down combines both techniques of applique and quilting (appli-quilting).
Applique Leaf Cushion:
20″ x 20″
The same leaf motif can have many applications. How about a pretty cushion in fabrics that co-ordinate with your home!
Once again, we are using the appli-quilting technique here, applique and quilting all in one go! Simples!
And how about making a pretty feature of your zipper closure!
So the choice is yours! Join us for lots of coffee, chat and craic in a fun and safe learning environment at Conway Mill.
By Judith on March 21, 2026 2 Comments (Leave comment)
Last Saturday we had my first all day workshop at the Mill.
Myself and 9 adventurous ladies settled in a for a St.Paddy’s Day knees-up with a difference!
Flex and Framed Purses were the order of the day, with lots of tea, coffee and craic thrown in!
By lunchtime the ladies had reached the half-way mark by conquering the tricky glue stage on one side of their purse frames!
Then it was onto the flex frame glasses cases. Sadly I forgot to take some pictures, so trust me when I say they turned out brilliantly!
I think it’s safe to say that everyone had a lot of fun, and now have 2 more handmade gift ideas for next Christmas!
And if you enjoy a little EPP (English Paper Piecing) but hate all the cutting out, my newly listed Hexie Framed Purse Kits are available again in my Etsy shop.
By Judith on March 11, 2026 2 Comments (Leave comment)
In my classes last week, I gave another ‘5 minute demo’. This month the demo was all about Disappearing Blocks!
No, not magic tricks or a trick of the eye. But how to turn a well known quilt block into something rather special (without lots of intricate piecing)!
The following are pictorial instructions on how to make the disappearing blocks. A few notes to consider before we get started:
please work on the basis of colour placement being the same in each series, even if the fabrics are slightly different! (A big thank you to my daughter for making all the blocks)
I haven’t included sizes here. You need to start with the finished block size and work backwards allowing for extra seam allowances per cut.
The position of the ‘cut’ lines can vary to give different effects, as long as they are equidistant from each seam.
check out my pinterest board for tutorials, sizes and variations.
1. Disappearing 9 Patch:
Here’s what to do:
2. Disappearing 9 Patch Variation:
Here’s what to do:
3. Double Disappearing 9 Patch:
Here’s what to do:
4. Disappearing Hourglass:
Here’s what to do:
5. Disappearing Pinwheel:
Here’s what to do:
6. Disappearing Pinwheel Variation:
Here’s what to do:
7. Disappearing Four Patch:
(assume finished block is in same fabrics!)
Here’s what to do:
8. Disappearing 4 Patch Variation:
Start with another 4 patch block.
These are just a sample of the many disappearing blocks you can make! Aren’t they cool!
photo courtesy of British Patchwork & Quilting magazine
And if you make a quilt with one of these disappearing blocks, you can get some lovely secondary patterns emerging too, like my Disappearing 9 Patch quillow (pattern available here.)
I hope you have been inspired and have fun making some impressive (yet easy) quilt blocks!
By Judith on February 17, 2026 1 Comment (Leave comment)
This was the last week of our ‘Take Wing’ Butterfly wallhanging series.
31 brave ladies have been diving into the exacting and at times demanding technique of foundation paper piecing using Lillyella’s ‘Take Wing’ butterfly pattern.
And just look at some of the results!
Aren’t they majestic!
Each one a unique metamorphosis of creative energy and courage into raw talent and beauty!
Some will be transformed into wallhangings and some into cushion covers.
I’m so proud of all my ladies for undertaking this project, especially for those who found themselves well and truly out of their comfort zone!
By Judith on February 9, 2026 0 Comments (Leave comment)
Hi there,
It’s been a beautifully cold and sunny day here! And I can already notice a little stretch of more light in the evenings! Hooray!
I have had a fantastic start to my new classes at The Mill, with great feedback from my inaugural classes. And I can now release the next 6 week block of classes.
If you would like to learn a new skill, get some long standing projects completed, or join in with our optional class project (Denim Hexie Bag) then drop me an email to book a place.
All abilities are welcome, and you will find a hot cuppa, friendly faces, and a light and spacious classroom to work in.
Saturday Workshops:
I’m also announcing my first term of one-day Saturday workshops.
What better way to spend a Saturday than sewing fun projects alongside enthusiastic sewers in a relaxed and fun environment! Here’s a little more information on each of the workshops.
Flex and Framed Purses:
Not only do these make for great gifts, but they are so practical too! Keep your glasses and sunglasses safe and protected in these cute flex frame cases.
And learn how to make these stylish metal framed purses for your make-up or essentials (perhaps even a little English Paper Piecing!).
And speaking of EPP, I will have kits available of my Hexie Framed Purses, as well as the hardware for both pouches.
Family Tree Wallhanging:
27″ x 30″
This wallhanging covers quilting and applique techniques. You can make it seasonal e.g. an Autumn tree, a Spring tree or perhaps a ‘Christmas Tree’! Or turn it into your Family Tree and embroidery names on the leaves!
Denim Sailboat Cushion:
18″ x 18″
If you like a spot of up-cycling, then why not turn some of your unwanted denim into this nautical themed cushion!
Have fun with ‘appli-quilting’, feature quilting and a little free motion sketching!
Kits will be available to purchase at the workshop.
Large Toiletry Bag:
This is a sizeable pouch, with room for all your bottles and toiletries!
There’s even a handy toothbrush and toothpaste bag, with wipeable rip-stop lining.
And don’t worry about that zipper! It’s easy peasy to put in!
So those are the fun workshops up for grabs! Places are limited, and a few of the workshops are already half booked, so please don’t leave it too long to sign up! Again, just drop me an email to .
By Judith on February 4, 2026 1 Comment (Leave comment)
Hello everyone!
I hope you’ve had a healthy and creative week!
My first (half) term of classes are almost through (this is week 5 of 6) so it’s time to announce next (half) term’s class project!
This is a project for those who not only enjoy a spot of ‘re-purposing’ but also bag construction. The exterior and lining are reinforced with heavy weight vilene, and the exterior is quilted.
What’s involved?
Upcycling your unwanted denim jeans, skirts and shirts (I have a large stash you can avail of!)
English Paper Piecing (EPP) - hand sewing the hexies into 2 panels
Eyelet Ring handle opening
Zippered pocket in the lining
Reinforced base
And to make it even easier to make this great shopper, I will have part-kits made up of the following:
37 hexie papers Sizzix cut and hole punched
37 varied pieces of denim for the hexies
4 sets of eyelet rings
1 metre heavy sew-in vilene
comprehensive Just Jude Designs pattern with step by step photos
The part-kits are discounted at £13 for those attending the classes.
So the only materials you need to bring with you are:
0.5 metre cotton for the bag lining
1 fat quarter cotton for zippered pocket lining
8″ plastic zipper
Easy peasy!
As always, the class project is optional, and I will be announcing class vacancies at the end of this week! So stay tuned!
By Judith on December 12, 2025 2 Comments (Leave comment)
Hello everyone!
Well despite the snow, I had a wonderful day celebrating the opening of my new classroom on Saturday.
Thank you to everyone who braved the weather to come and join in the fun! It was lovely catching up with friends old and new, and getting lots of positive feedback about the new space.
Of course I couldn’t have pulled any of this off without lots of wonderful support from friends and family!
Don’t worry if you weren’t able to make it to the Mill on Saturday. I’ve included a little video here of the ‘quiet before the storm’!
New Classroom Video
I’m so looking forward to getting started with my new classes in January. There aren’t many places left, so if you would like to join us for some creative craic, then please drop me an email to .
By Judith on November 29, 2025 1 Comment (Leave comment)
It’s getting much colder here! Brrrrr! Winter has most definitely arrived!
And it’s getting harder to photograph my projects outside - icy showers are never too far away!
24″ x 15″
For a while now I have been wanting to make Lillyella’s Take Wing Butterfly pattern.
Butterflies hold symbolic meaning for me, and when I first saw Nicole’s Take Wing Butterfly, it took my breath away!
The butterfly is foundation paper pieced in 5 sections. I LOVE foundation piecing because of the crisp, sharp points and lines you get from this technique.
And Nicole includes a really helpful colouring sheet, so you can colour in the sections of your butterfly first to get an idea of colour and fabric placement.
The fabrics I used were mostly Sunprints by Alison Glass, leftovers from a rainbow quilt I made in the summer.
Most of the pieced sections are small, so this would also be a great scrap-buster project. And if you don’t fancy a wallhanging, it can easily be transformed into a beautiful cushion.
I will be teaching this next term as part of my new program of classes. I do hope you can join us for some foundation piecing fun!
By Judith on November 14, 2025 8 Comments (Leave comment)
Hello everyone!
Thank you for your patience in waiting until today for my BIG ANNOUNCEMENT!
Well I can finally reveal that I will be starting up again my own programme of patchwork and quilting classes! Woohoo!
For the past 3 years I have been teaching in Quilter’s Quest, Belfast. But their announcement at the end of October to close gave me the push opportunity I needed to look elsewhere for premises.
Before I joined Quilter’s Quest, I had taught my own programme of classes for 5 years. A sudden change in personal circumstances meant I had to stop, but it was always my dream to one day return to inspiring and motivating others into Quilting through my own programme.
And now that dream is coming true!
Conway Mill is a beautifully converted Linen and Flax Mill (you can read more about their history and ethos here). It is jammed packed with lots of other creative enterprises, from artists, to architects, hairdressers, dressmakers, media tech, charities and much more! It also has the most gorgeous coffee shop & bistro too (that’s lunchtimes sorted then!). I’m on the 2nd floor, but don’t worry there are lifts and lots of convenient parking.
I acquired the last available unit, all 525 square feet of it! No pictures just yet as it needs painted and fitted out. But don’t worry, I’ll give you the obligatory before and after shots!
I will finish out the current term at Quilter’s Quest in December, and start my new programme w/c 8th January (get more details here).
But before that, I will be having an open day on Saturday 9th December, 10am -4pm. This is your opportunity to come and see the newly fitted out premises, get more info on the classes, have a cuppa, chat and a traybake (or two!) and smooch around the room and the Mill.
I hope you can come and share this exciting new adventure with me!
By Judith on June 18, 2026 15 Comments (Leave comment)
Hi everyone!
It’s getting pretty hot around here!
As I enjoy the wide open windows and the washing on the line, I’m also progressing well with packing up ready for moving house at the end of this month. A small challenge when there’s 15 years worth of ‘stuff’ to thin out ready for our down-size!
I have also packed up my sewing room, but not before I got a class sample finished for classes in the new term.
I’m a great admirer of Anna’s fabulous bag designs and patterns, and her Maker’s Tote is a particular favourite of mine. I’ve had it bookmarked for a while, but am only now getting around to making it!
I thought this would be a good bag pattern to teach in class because of the variety of bag construction elements and skills involved.
But of course I couldn’t just stick to the pattern, could I!
I love using denim for bags, it makes them more durable and useable in my view. And besides, I already had 2 ‘uneven brick’ panels sewn together for another project long forgotten! They were the perfect size, so I got to *quilting them, first in the ditches, and then some feature quilting using Aurifil 12wt wool thread.
*the original pattern uses a foam interfacing like Bosal to give structure and reinforcement to the bag. I wasn’t able to get any in time, so substituted with a layer of wadding and heavy weight sew-in vilene spray basted together.
I used a size 100 Jeans needle for the quilting and construction
The front and back of my bag are slightly different. I didn’t think the prescribed front pocket would work on my version of this bag, but I did include the zippered back pocket.
One of the joys of working with recycled denim is thinking of ways to use the loops, tabs and unusual features attached to a pair of jeans.
Self-covered button with vintage chintz
I decided my Maker’s Tote could be used as my everyday bag, not just a class sample, so I incorporated another one of my favourite textiles, vintage chintz linen.
A few vintage style Lecien prints coordinated beautifully for the internal pockets and facings.
The handles are made from a re-purposed denim belt, reinforced with webbing and lined with more of the chintz linen.
The belt was a little on the wide side, so by cinching in the edges along the top section, they are now the perfect fit for my hands and have lovely structure too!
The bag is finished off with self-made bias binding, another great skill to have under your belt. If you follow me on Instagram, you will know that the first lot of bias binding I made is different to the one on the finished bag!
I decided I didn’t like choice no.1 (after I had attached it!). In my opinion the chintz linen binding works much better, even though it was a little trickier to attach.
So there we have my version of Noodlehead’s Maker’s Tote! A fabulously roomy bag, gorgeous shape, and versatile elements.
And I’ll leave you with an ‘out take’ of the ‘helper’ on my photo-shoot!
Linking up to Nicky & Leanne’s Scraptastic Tuesday!
By Judith on June 29, 2026 0 Comments (Leave comment)
Today saw the end of another year of teaching my Patchwork and Quilting classes!
I teach 4 (sometimes 5) classes a week and the topics of conversation that take place are varied and entertaining!
To give you an idea, here are a few of my favourites:
English football (the less said the better!) The Great British Sewing Bee (and the ‘unique’ dress code of one of the judges!) How hot and wrinkled Egyptian cotton sheets can get (don’t ask!) How to treat achne! How to get rid of garden snails! How to disable your hockey opponent! Birthing calves and lambs (& babies!) 50 ways to deal with an unhelpful doctor (un-printable!)
Of course there are many serious and thought-provoking conversations too!
Today one lady said ‘getting old isn’t for wimps’, which was swiftly followed by murmurs of agreement from around the room.
I’ve just had another birthday, and while ‘half way to 90’ isn’t old, neither am I young.
My daughter and nephew also celebrating birthdays this month!
In truth this statement could apply to life - ‘doing life isn’t for wimps’. Among the 48 ladies I have the privilege of teaching each week, some are battling cancer or illness, divorce and loss, children with special needs, caring for elderly parents, teenagers, anxiety, worry and fear and many more life challenges.
One of our recent chats in class was about how to get through life with a positive attitude, seeing good and bad times as an opportunity to grow and learn, and how to have courage to live life with intention and purpose. How inspiring!
Doing life, and doing it well, isn’t for whimps! But each week my ladies turn up to class with a smile; they laugh, chatter, encourage, cajole, drink tea, eat biscuits and even sew a little!
They are choosing to do life, and do it well. There are certainly no wimps in my classes!!
Thank you ladies for sharing your thoughts, talents, hearts and authenticity each week.